English - 89
5. REPAIR INSTRUCTIONS
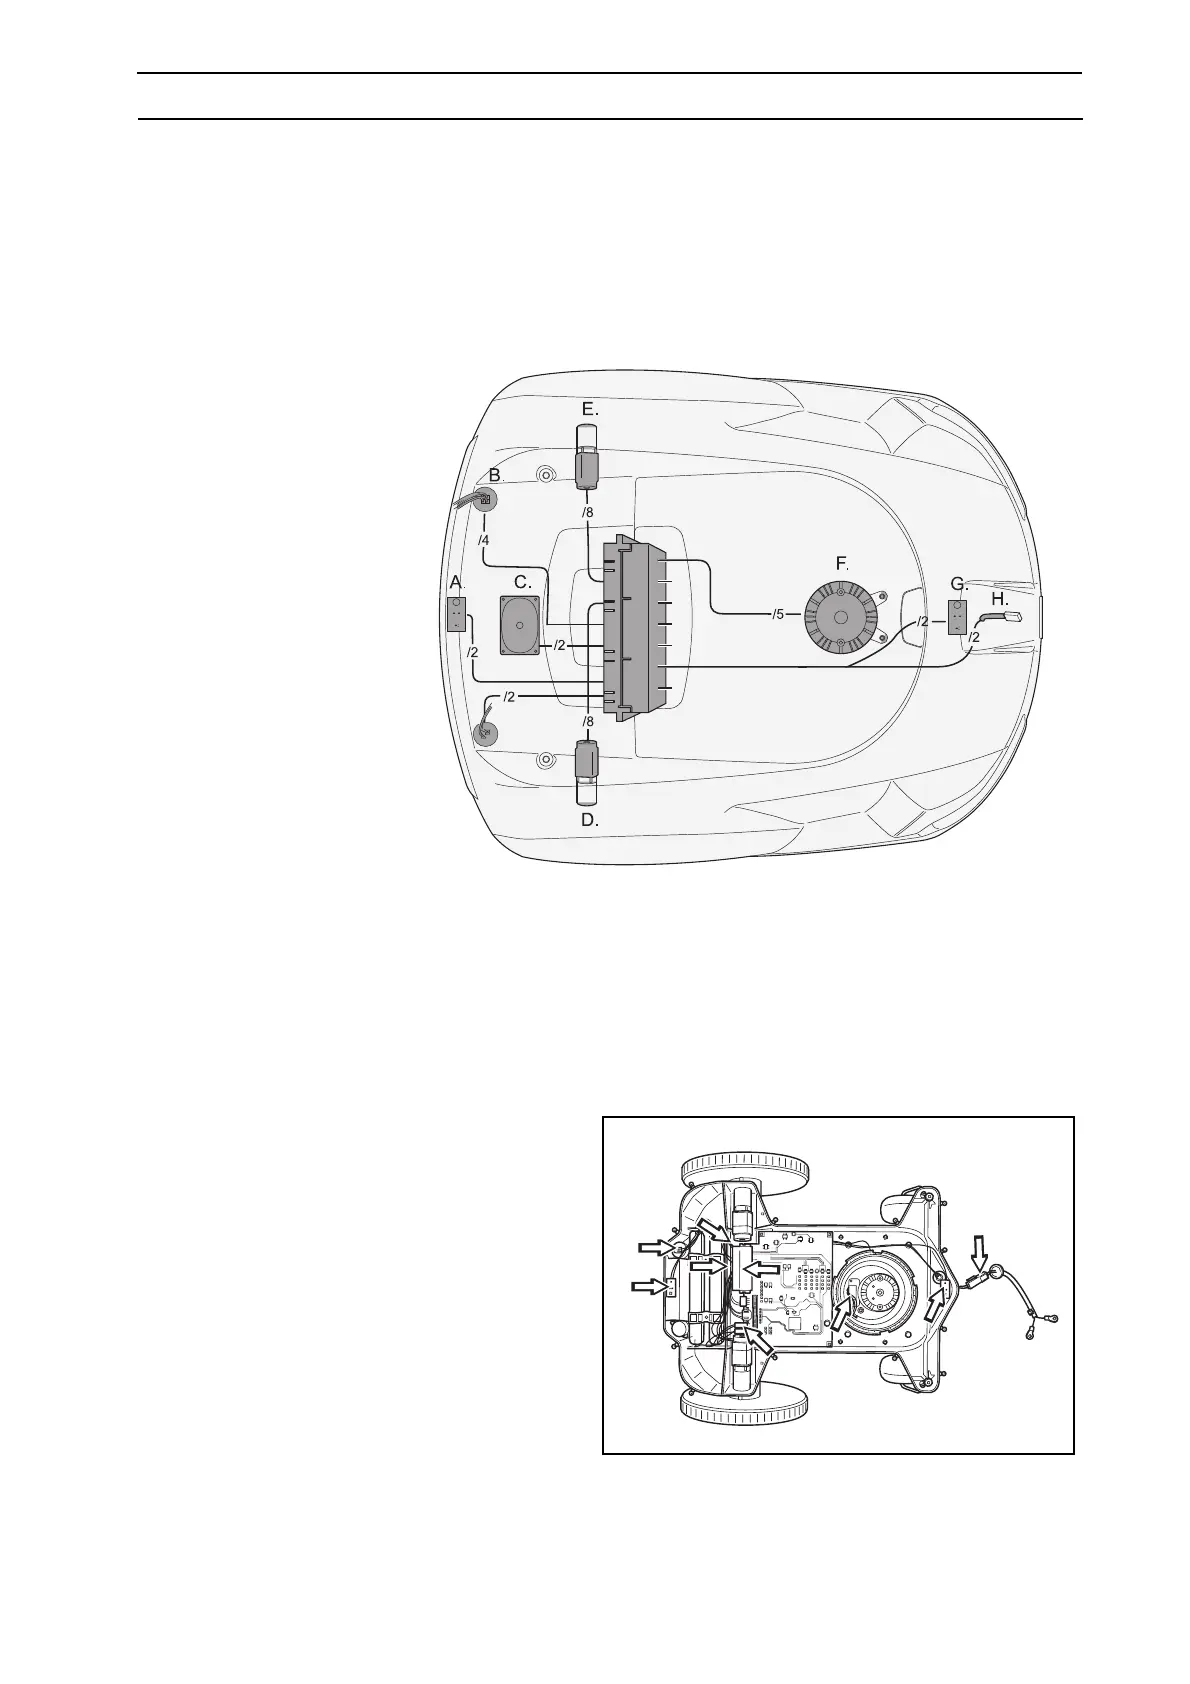
5.6 Replacing the lower section
cable harness
The lower section cable harness on the Automower
runs from the control box connection to the
components:
A. Rear loop sensor.
(white)
B. Service connector.
(white)
C. Speaker (only 220 AC).
(white)
D. Right wheel
motor.(yellow)
E. Left wheel
motor.(green)
F. Blade motor.
(blue)
G. Front loop sensor.
(black)
H. Connector for charging
strip (not 210 C).
(black)
I. Connector to the
charger contact (only
210 C).
(black)
J. Buzzer (only 230 ACX).
(white)
To change the cabling:
1. Dismantle the body and chassis.
2. Remove all cables from their connections:
control box, speaker, rear loop sensor,
service connector (press together, from below
the chassis, the catches using e.g.
a screwdriver), wheel motors (may be
necessary to remove the wheel motors),
blade motor and front loop sensor.
NOTE! Remove the cables by loosening
respective catches and pull the connector.
3. Dismantle the control box.
4. Remove the old cabling and replace with new
cabling. Ensure that all connections are made
properly.
5. Assemble the control box.
6. Check that the mower works.
7. Fit the chassis and body.
I/J.

 Loading...