EasyManuals Logo
Home>Hypertherm>Welding System>Powermax 125

Hypertherm Powermax 125 Service Manual

Hypertherm Powermax 125
317 pages
To Next Page IconTo Next Page
To Previous Page IconTo Previous Page
Page #232 background imageLoading...
Page #232 background image
232 Powermax125 Service Manual 808070
9 Power Supply Component Replacement
8. Remove the plastic washer.
9. Remove the silver-plated fitting by pushing it out through the front of the quick disconnect receptacle housing.
10. Remove the quick disconnect receptacle by removing the 4 mounting screws that secure the quick disconnect
receptacle to the front panel.
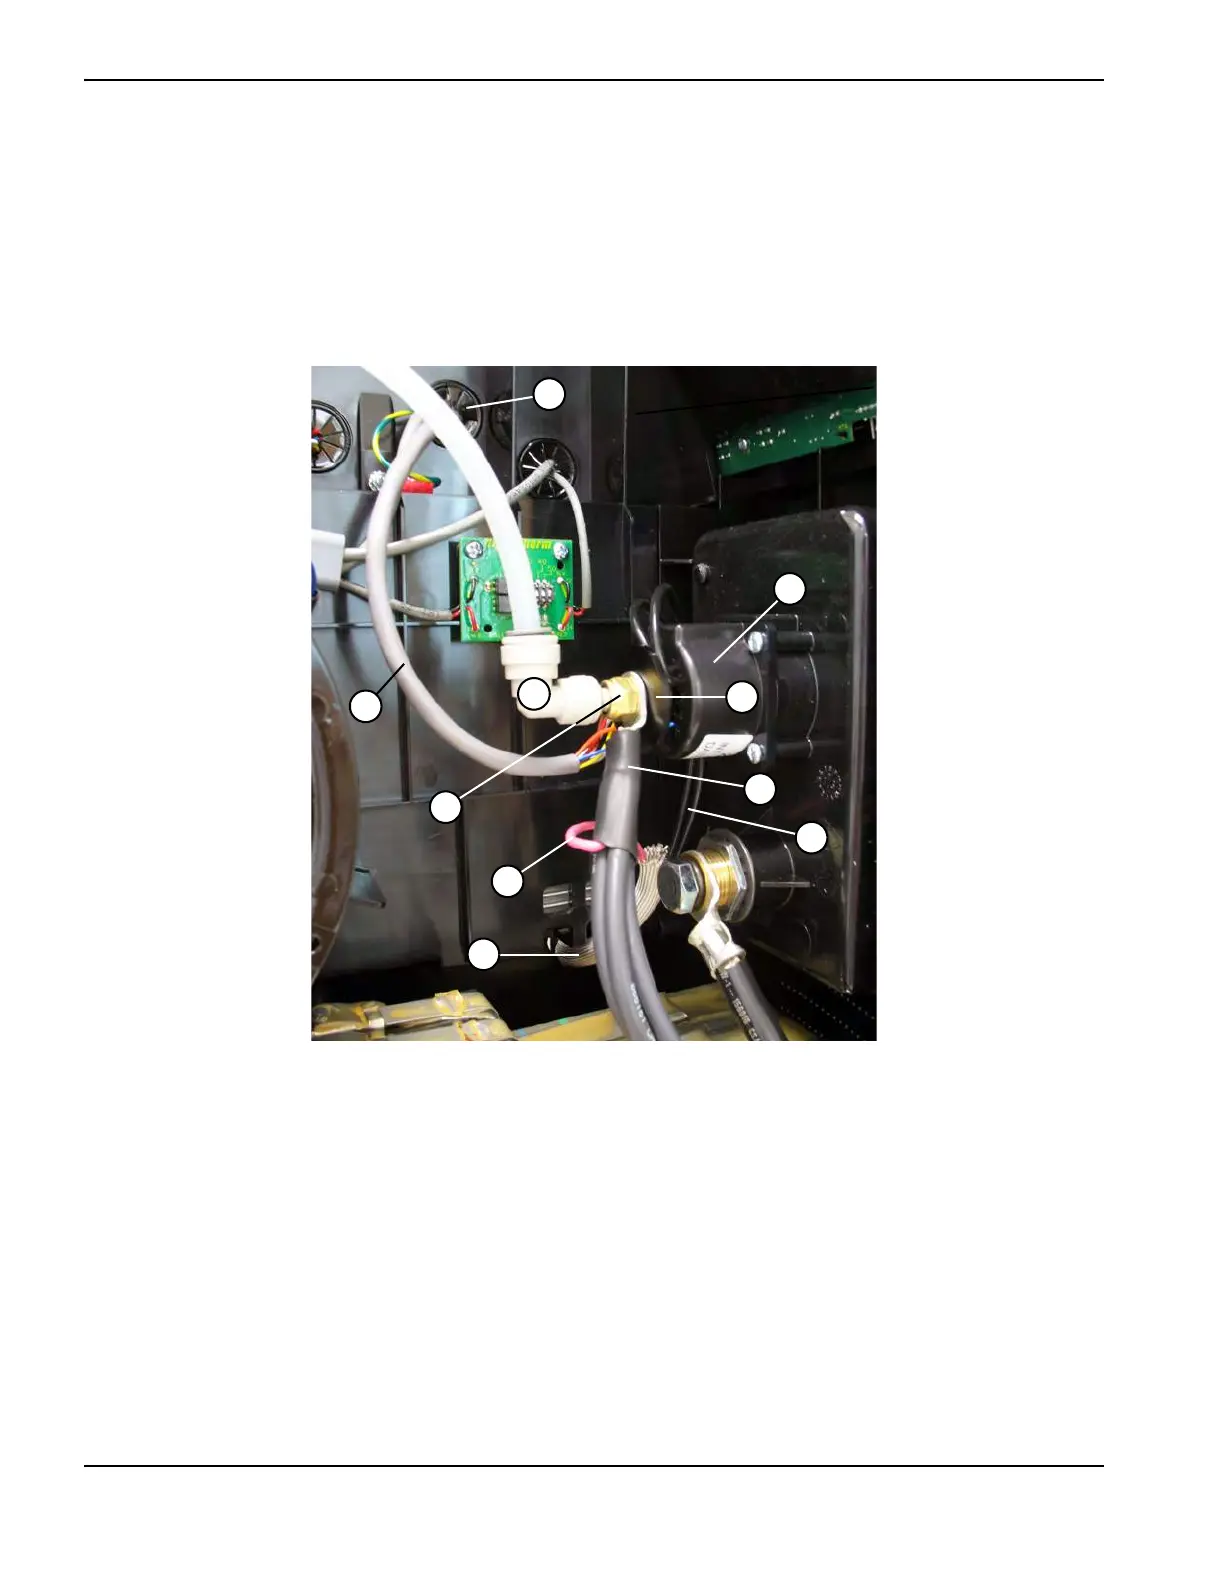
Figure 90
1
2
4
5
6
7
8
9
10
3
1 Torch interface cable
2 90° push-to-connect fitting
3 Brass nut
4 Electrode wire (red)
5 Protective sheathing
6 Nozzle wires (2)
7 Output inductor wires (3)
8 Plastic washer
9 Quick disconnect receptacle
10 Center grommet

Table of Contents

Other manuals for Hypertherm Powermax 125

Questions and Answers:

Question and Answer IconNeed help?

Do you have a question about the Hypertherm Powermax 125 and is the answer not in the manual?

Hypertherm Powermax 125 Specifications

General IconGeneral
BrandHypertherm
ModelPowermax 125
CategoryWelding System
LanguageEnglish

Related product manuals