244 Powermax125 Service Manual 808070
9 – Power Supply Component Replacement
Replacing the transformer
Remove the transformer
1. Complete the following procedures:
a. See Disconnect the power and gas supply on page 166.
b. See Remove the power supply cover on page 172.
c. See Remove the component barrier on page 173.
d. See Remove the fan shroud on page 216.
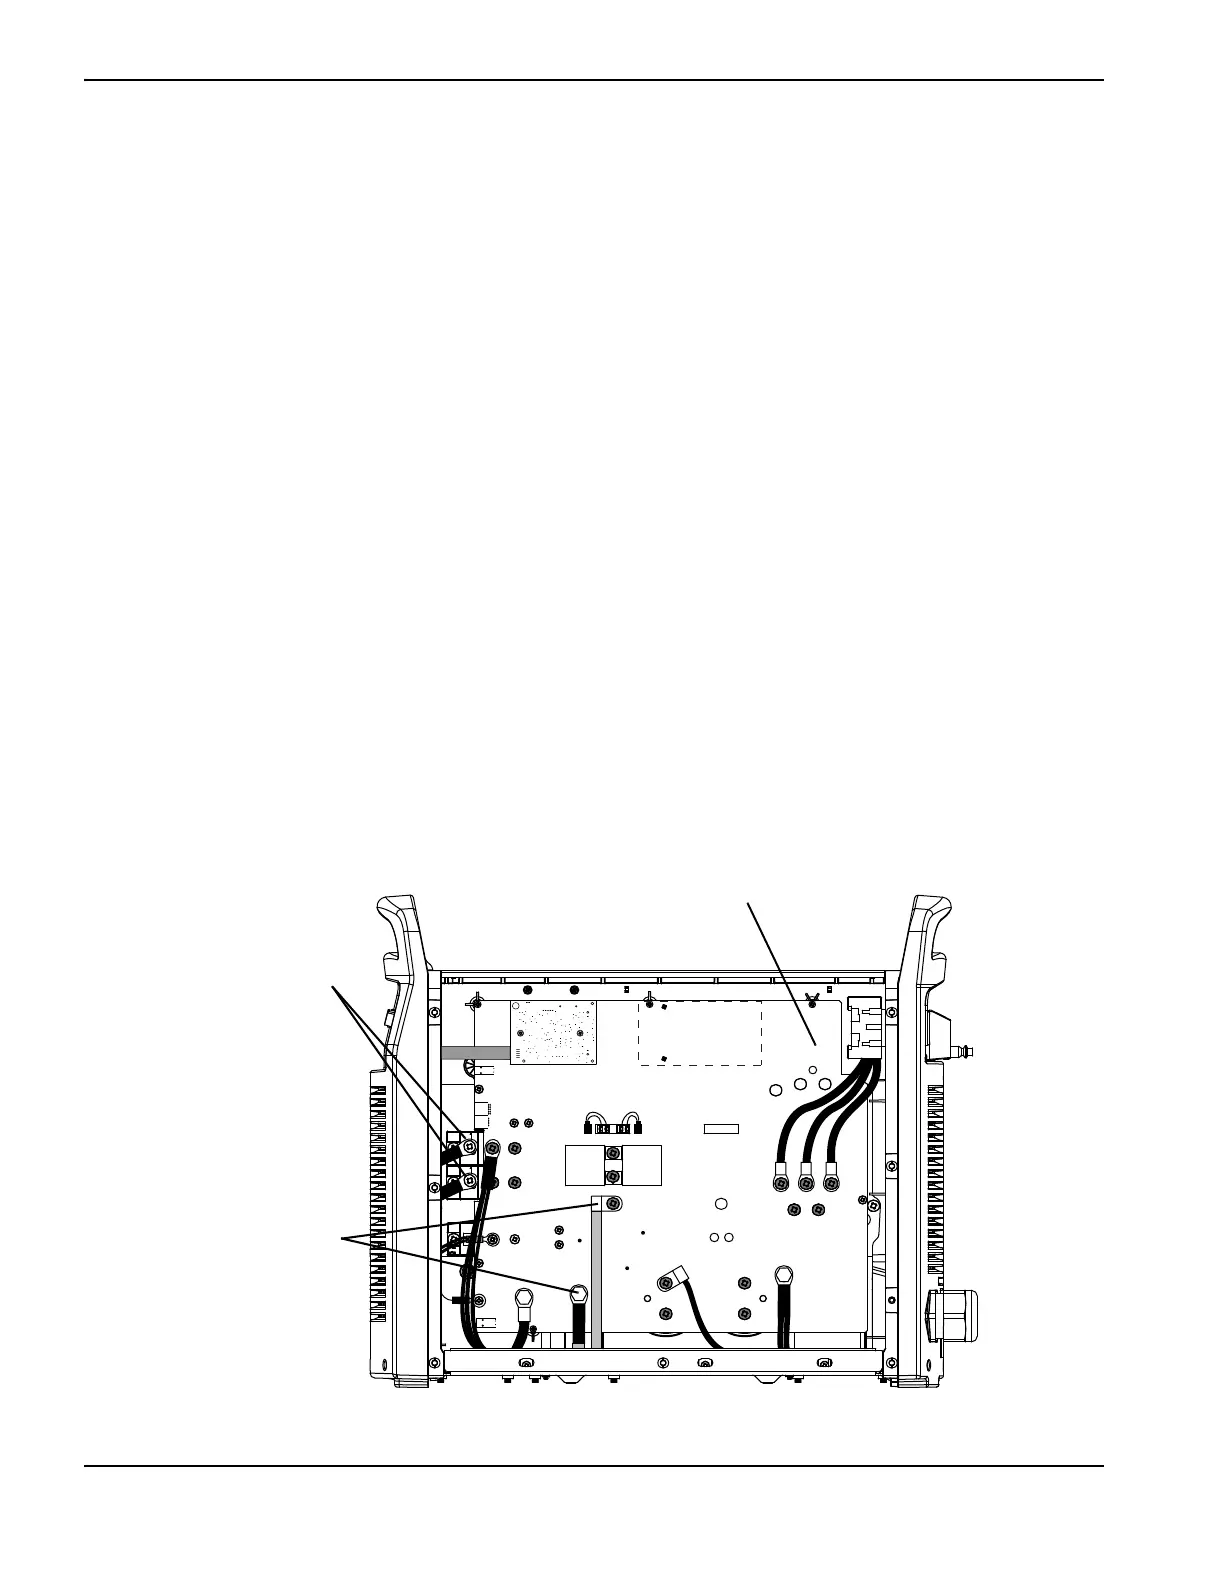
2. From the power board side of the power supply, remove the 2 screws securing the long transformer wires to the
output diode bridge.
3. Remove the screw and bolt securing the short transformer wires to the power board.
The power board in Figure 99 is a CSA model. The connections for the transformer wires
are the same for all models.
Figure 99
Kit number Description
428129 Kit: Powermax125 transformer 480 V CSA
428130 Kit: Powermax125 transformer 600 V CSA
428128 Kit: Powermax125 transformer 400 V CE/380 V CCC
J22 J21 J20 J19
J27
WORK
LEAD
J26
J25
+
_
+
_
RED
J18
ORG
J17
RED
J32
J11
B
R
J28
C152 C151
TP7
TP9
TP8
W
R
B
Long transformer wires
Short transformer wires
Power board

 Loading...


