Chapter 5 Disassembly and Assembly
5-12
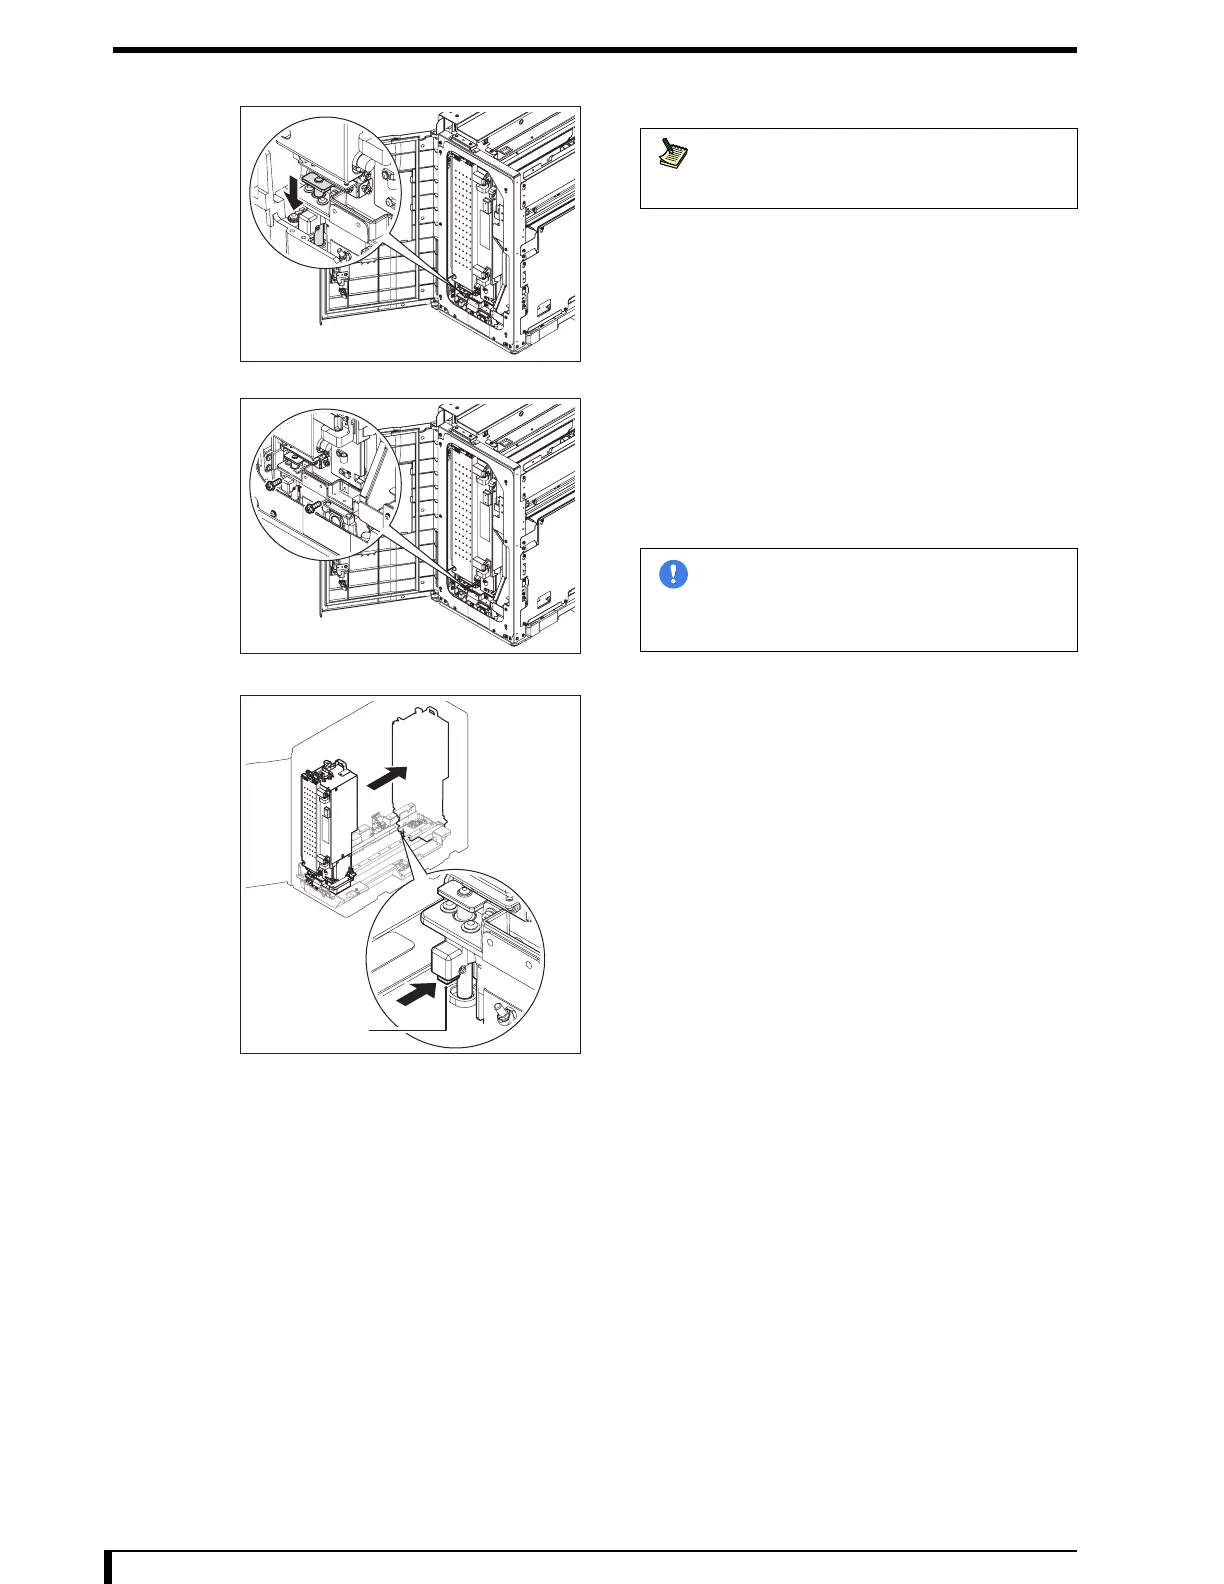
3 Fix the unit using a simple fixing lock.
4 Remove the setscrews on the second front side
of the optical unit.
•
2 hex/Phillips-head screws (M4 x 12)
5 Release the simple fixing lock.
Lock will be released by pulling up the blue knob.
6 Move the optical unit to the second front back
side.
7 Fix the unit using a simple fixing lock.
Push the blue fixing shaft lever to lower the fixing shaft
and have the unit locked.
Second Front Side
Note
When the optical unit moves all the way
toward the front, fixing shaft will
automatically lower to lock.
Second Front Side
Im
ortan
Push the optical unit slightly towards the
back when pulling up the knob. Fixing shaft
might move down, and get locked again if
the optical unit is at its hithermost position.
Fixing Shaft Lever
Second Front
Back Side

 Loading...