Chapter 6 Adjustment
6-10
6.4 Adjust Wire Tension
Adjust the tension of the wire in the subscan unit.
Work outline
Listed below are the number of people and the rough standard of work hours required for performing the
works described in this section.
Requirements
Shown below are the tools requiring to be prepared in addition to the standard tools before performing the
works in this section.
Positioning and adjustment parts for wire
Adjustment method
1 See " Removal Procedures (Page 5-6)" of the "5.2.3 Removing/Installing the Exterior Panel
and Insertion Unit", and remove the second font back panel.
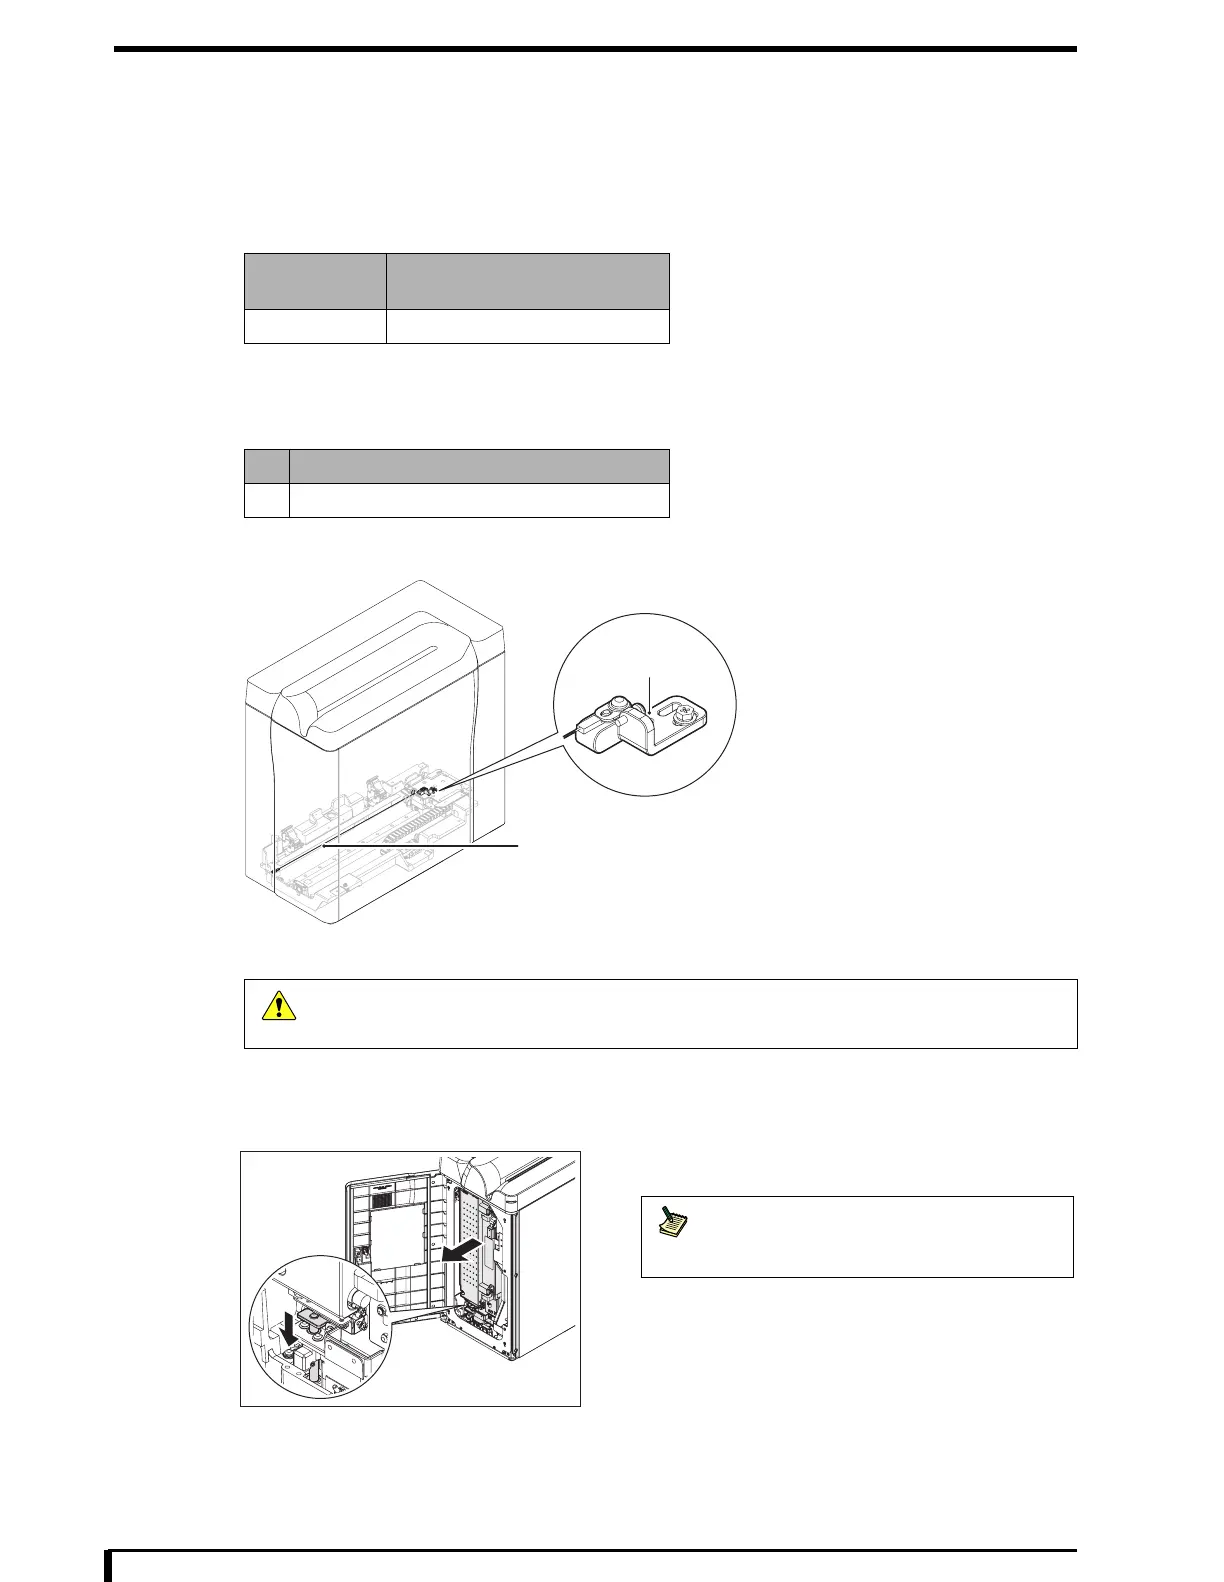
2 Move the optical unit to the second front side and
fix it using the simple fixing lock.
Personnel
Number
Work Hours (steps 2 to 7)
1
No. Tool
1 Acoustic wave tension meter
Caution
Be sure to turn off the power supply circuit breaker and unplug the power cable from the
equipment whenever you adjust the unit position of the equipment.
Wire
Wire
Retaining Plate
Note
When the optical unit moves all the way
toward the front, fixing shaft will
automatically lower to lock.

 Loading...