Chapter 5 Disassembly and Assembly
5-65
5.5 Replacing the Parts on the Subscan Unit
5.5.1 Replacing the Subscan HP Sensor
This section describes the instructions on how to replace the subscan HP sensor.
Work outline
Listed below are the number of people and the rough standard of work hours required for performing the
works described in this section.
Requirements
Shown below are the tools requiring to be prepared in addition to the standard tools before performing the
works in this section.
1 See " Removal Procedures (Page 5-6)" of the "5.2.3 Removing/Installing the Exterior Panel
and Insertion Unit", and remove the second font back panel.
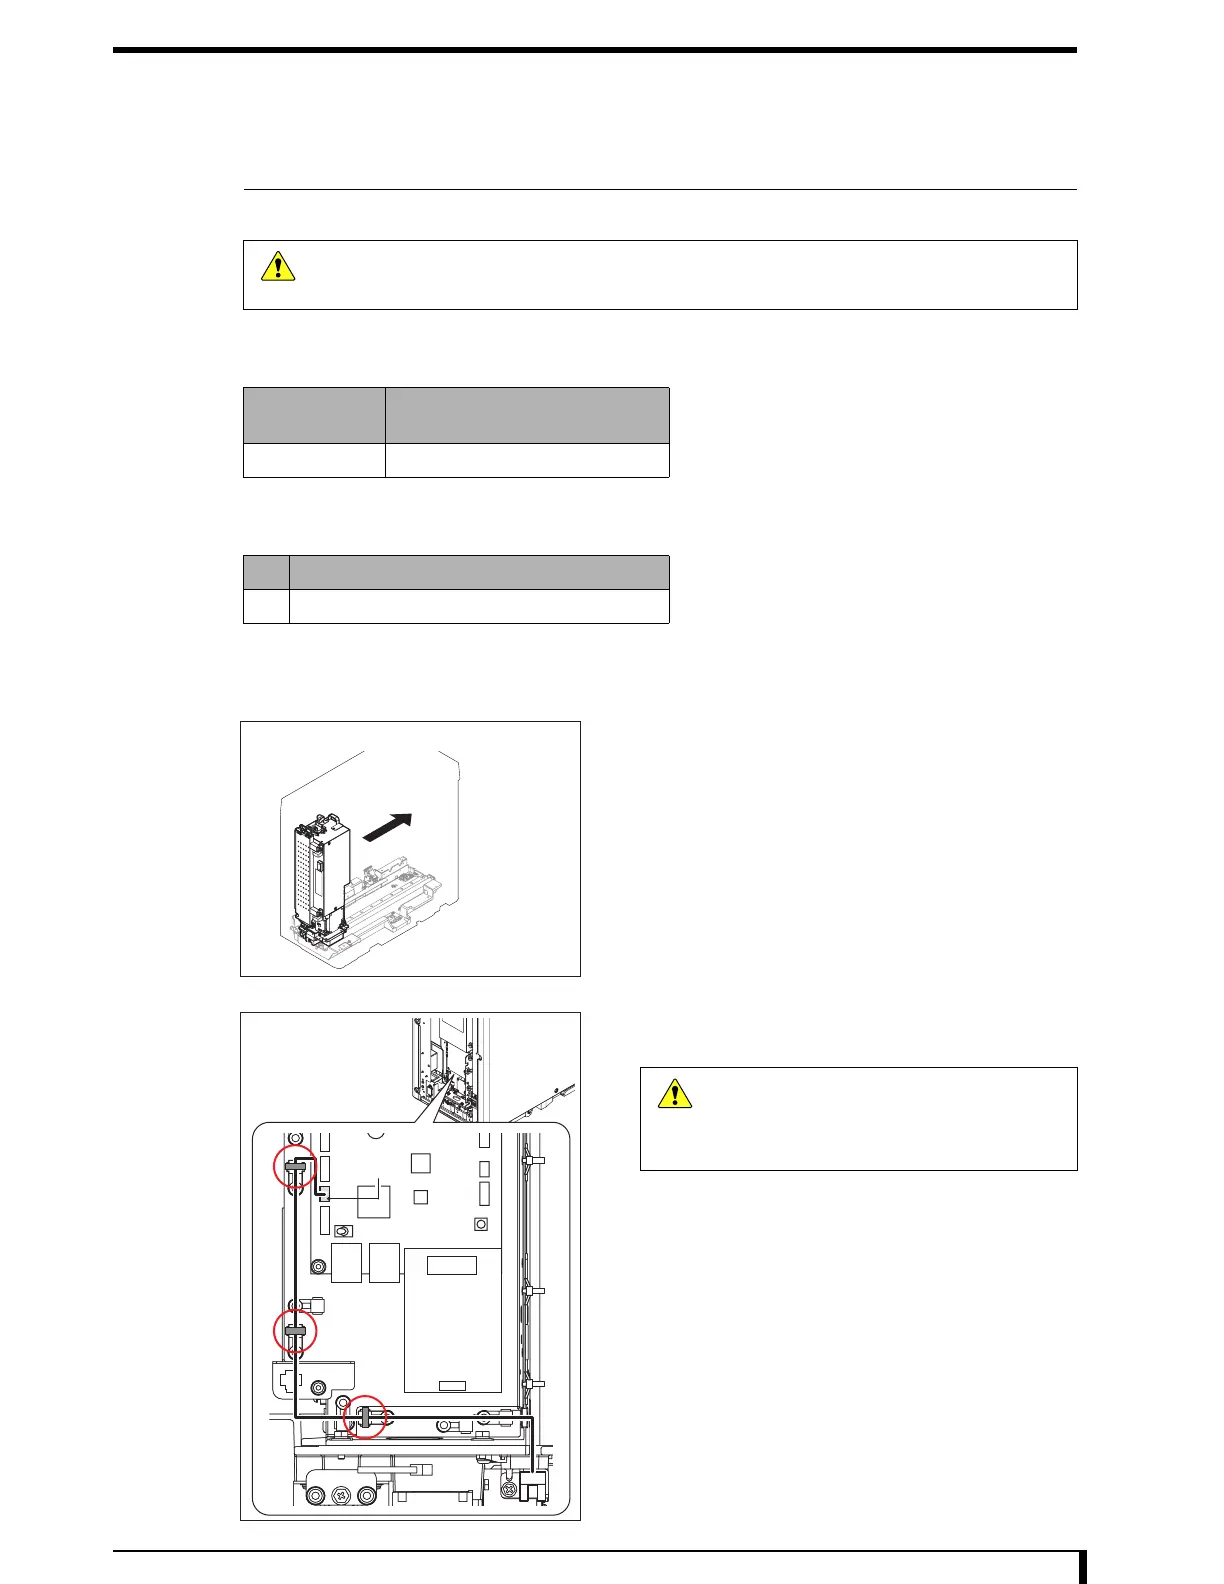
2 Move the optical unit to the second front back
side.
3 Unplug the subscan HP sensor cable from LMC.
•
CN5 (ACN5: subscan HP sensor cable)
4 Cut off the wiring band binding other cables (at 3
locations).
Caution
Be sure to turn off the power supply circuit breaker and unplug the power cable from the
equipment whenever you disassemble/assemble the equipment.
Personnel
Number
Work Hours (steps 2 to 10)
1
No. Tool
1 Wiring band
Second Front Back Side
CN5
Second Front
Back Side
Caution
When removing the connector, hold a notch
on the connector without pulling a cable.
Giving a strong pull to the cable may cause
it to be broken.

 Loading...