Chapter 5 Disassembly and Assembly
5-64
10 Temporarily secure the motor mount board to the
main unit.
•
3 hex/Phillips-head screws (M4 x 8)
11 Connect the connector (JP50) that was removed
in Step 6.
12 See Step 5 to install the timing belt on the justifier
guide.
•
Belt presser plate
• 1 tapping screw (M4 x 10)
13 Install the justifier base.
•
2 screws (M4 x 8)
Press the base upward to fix it.
14 See "6.1 Adjust Justifier Belt Tension (Page 6-2)"
to adjust the belt tension.
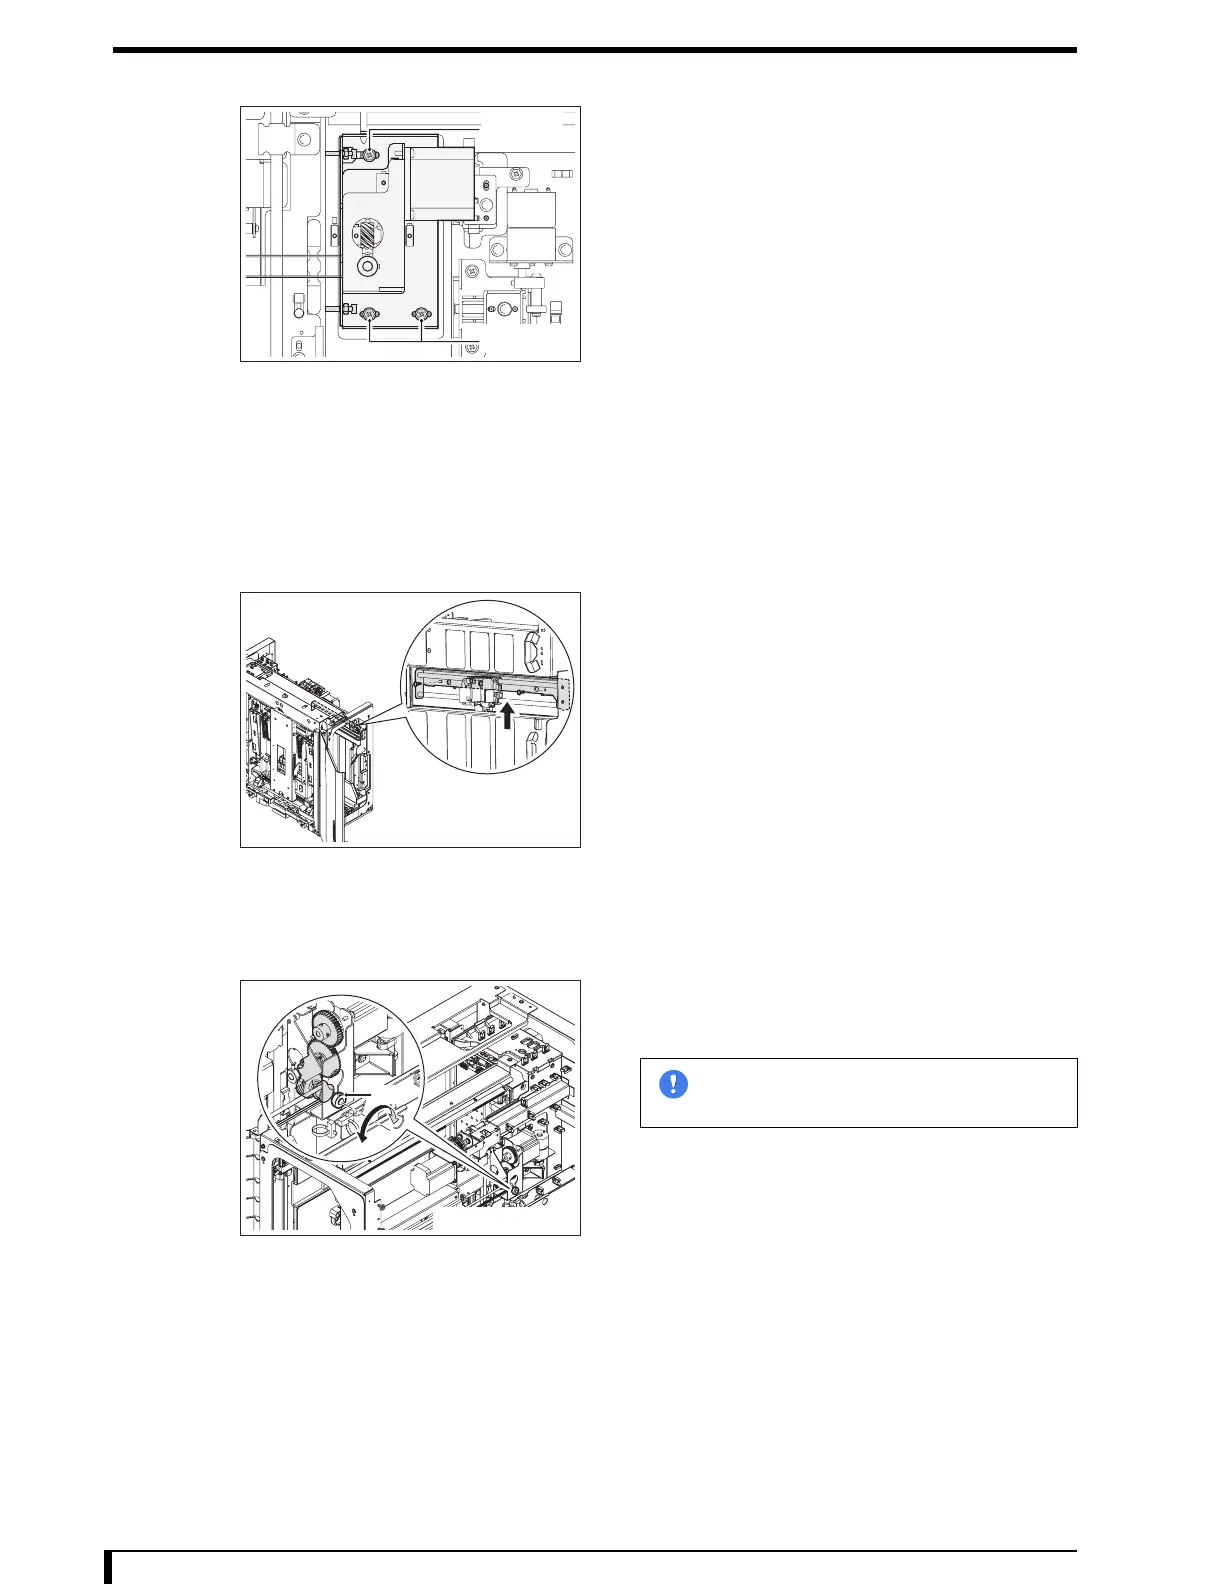
15 Apply grease to the justifier motor unit assembly
gear mechanism unit.
•
Grease: Plusguard No. 2 by Kyodo Yushi
Apply grease on entire area by turning A.
16 Install the exterior frame (front) that was removed
in Step 2.
•
4 screws (M4 x 8)
17 See " Installation Procedures (Page 5-8)" in "5.2.3 Removing/Installing the Exterior Panel
and Insertion Unit" to install the insertion unit and exterior panel.
Now, you have finished with the procedures to replace the justifier belt.
Setscrew
Setscrew
Second Front Side
A
First Front Side
Im
ortant
Always use the specified grease.

 Loading...