Chapter 5 Disassembly and Assembly
5-60
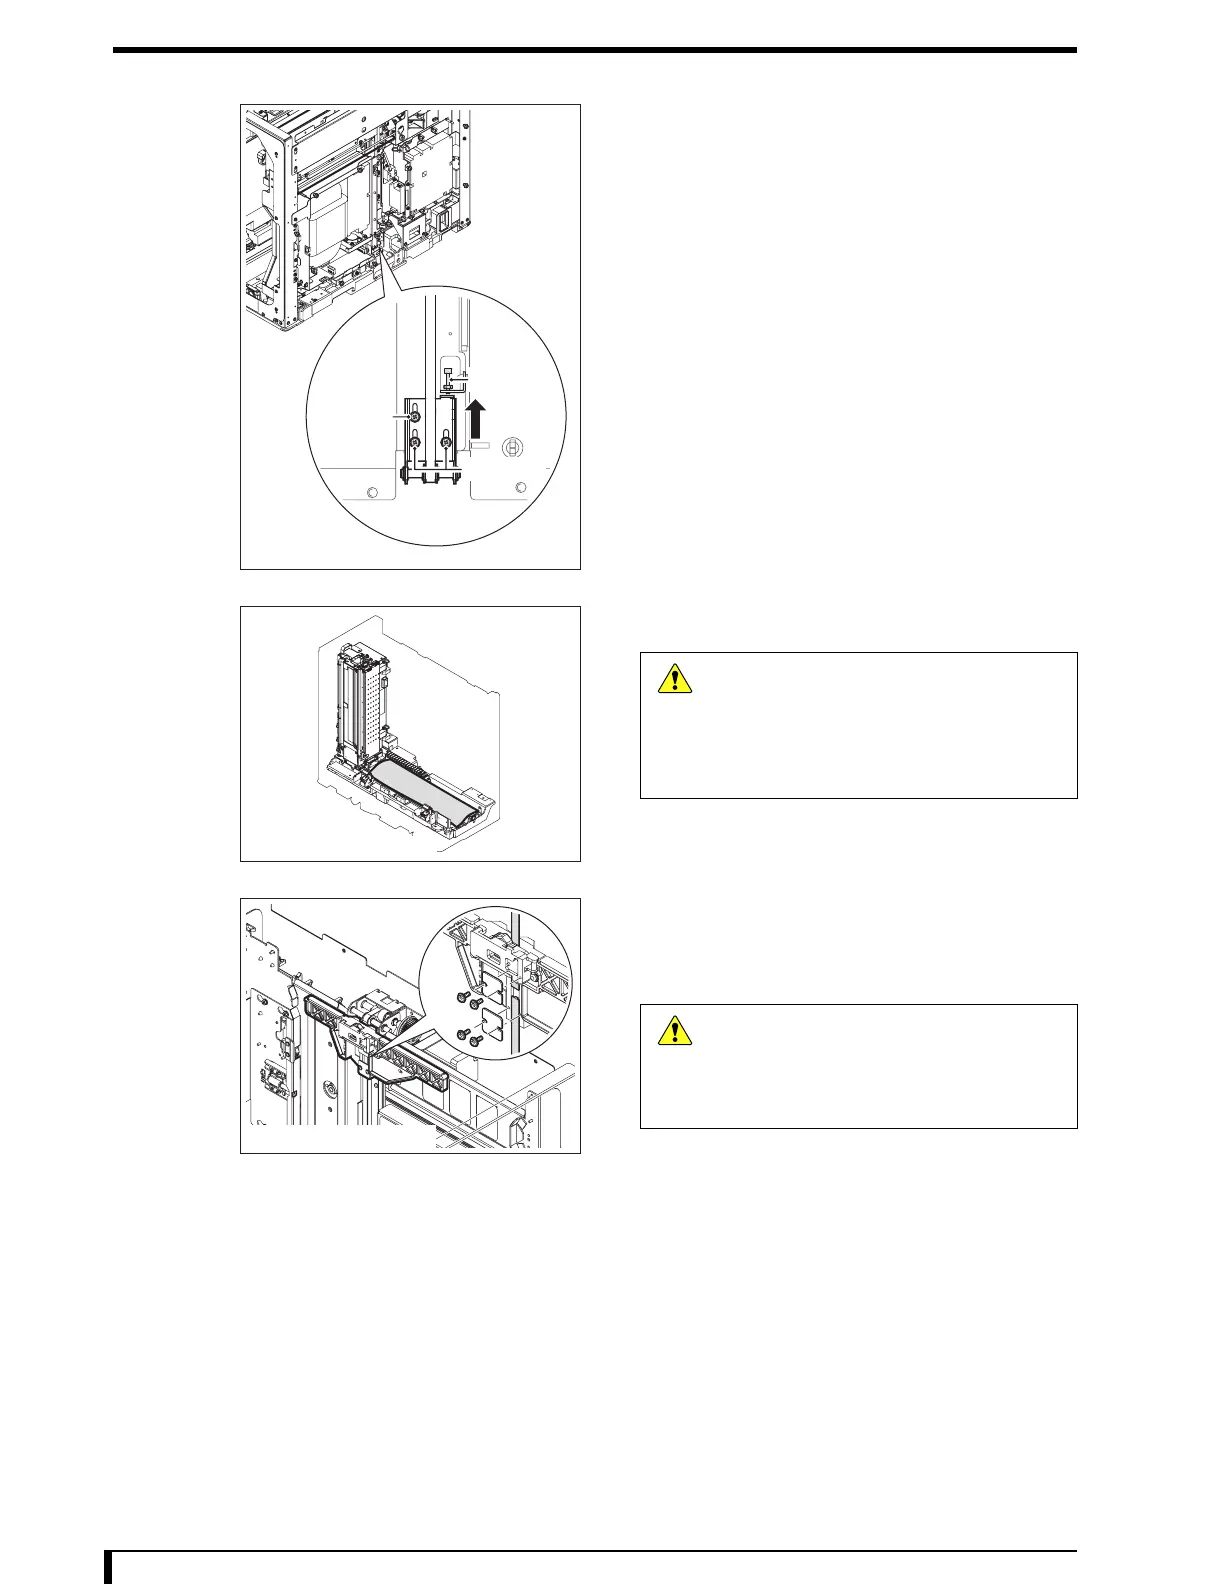
4 Loosen the receiver belt tension.
1. Loosen the setscrews on the receiver idler pulley unit
assembly.
• 3 hex/Phillips-head screws (M4 x 8)
2. Loosen the adjustable screws.
• 1 hexagon socket head bolts (M4 x 20)
• 1 hexagon nut
3. Raise the receiver idler pulley unit assembly fully,
then loosen the setscrews to fix the assembly.
• 3 hex/Phillips-head screws (M4 x 8)
5 Cover the LM guide and the magnet shaft on the
subscan unit using a rag or cardboard.
6 Remove the belt presser plates (2 pieces) first,
then the timing belt.
•
2 screws for each plate (M3 x 10)
Remove the lower belt presser plate first.
Setscrew
Adjustable
screw
Setscrew
First Front Side
First Front Back Side
Caution
Falling down or banging the parts onto the
LM guide or the magnet shaft may affect
performance of the equipment. Cover the
LM guide and the magnet shaft using a
shock-absorbing object before removing/
installing the parts inside the equipment.
First Front Back Side
Caution
Remove the upper belt presser plate to
automatically release the timing belt from
the receiver and drop the receiver. Be sure
to support the receiver when removing the
upper belt presser plate.

 Loading...