Chapter 3 Using the Operator Panel
3-45
Press the MENU key.
Press the or key repeatedly until Paper
Handling > appears.
Press the key.
Press the or key repeatedly until >Duplex
Mode appears.
Press the ENTER key. A blinking question mark (?)
appears.
Press the or key to display the desired duplex
mode. The display changes as shown below.
None (default)
Short edge bind
Long edge bind
When the desired duplex mode is displayed, press
the ENTER key.
Press the MENU key. The message display returns to
Ready.
Selecting the Output Device
You can select whether printouts will be received by the
printer’s top tray (face-down) or to the optional document
finisher’s output tray.
Press the MENU key.
Press the or key repeatedly until Paper
Handling > appears.
Press the key.
Press the or key repeatedly until >Stack
Select appears.
Press the
ENTER
key. A blinking question mark (
?
)
appears. The selected output device will be displayed.
Press the or key to display the desired destina-
tion. The output tray changes as shown below.
Top tray FaceDn
Finisher FaceUp (when document finisher is
equipped)
Finisher FaceDn
(when document finisher is
equipped)
When the desired paper source displayed, press the
ENTER key.
Press the MENU key. The message display returns
to Ready.
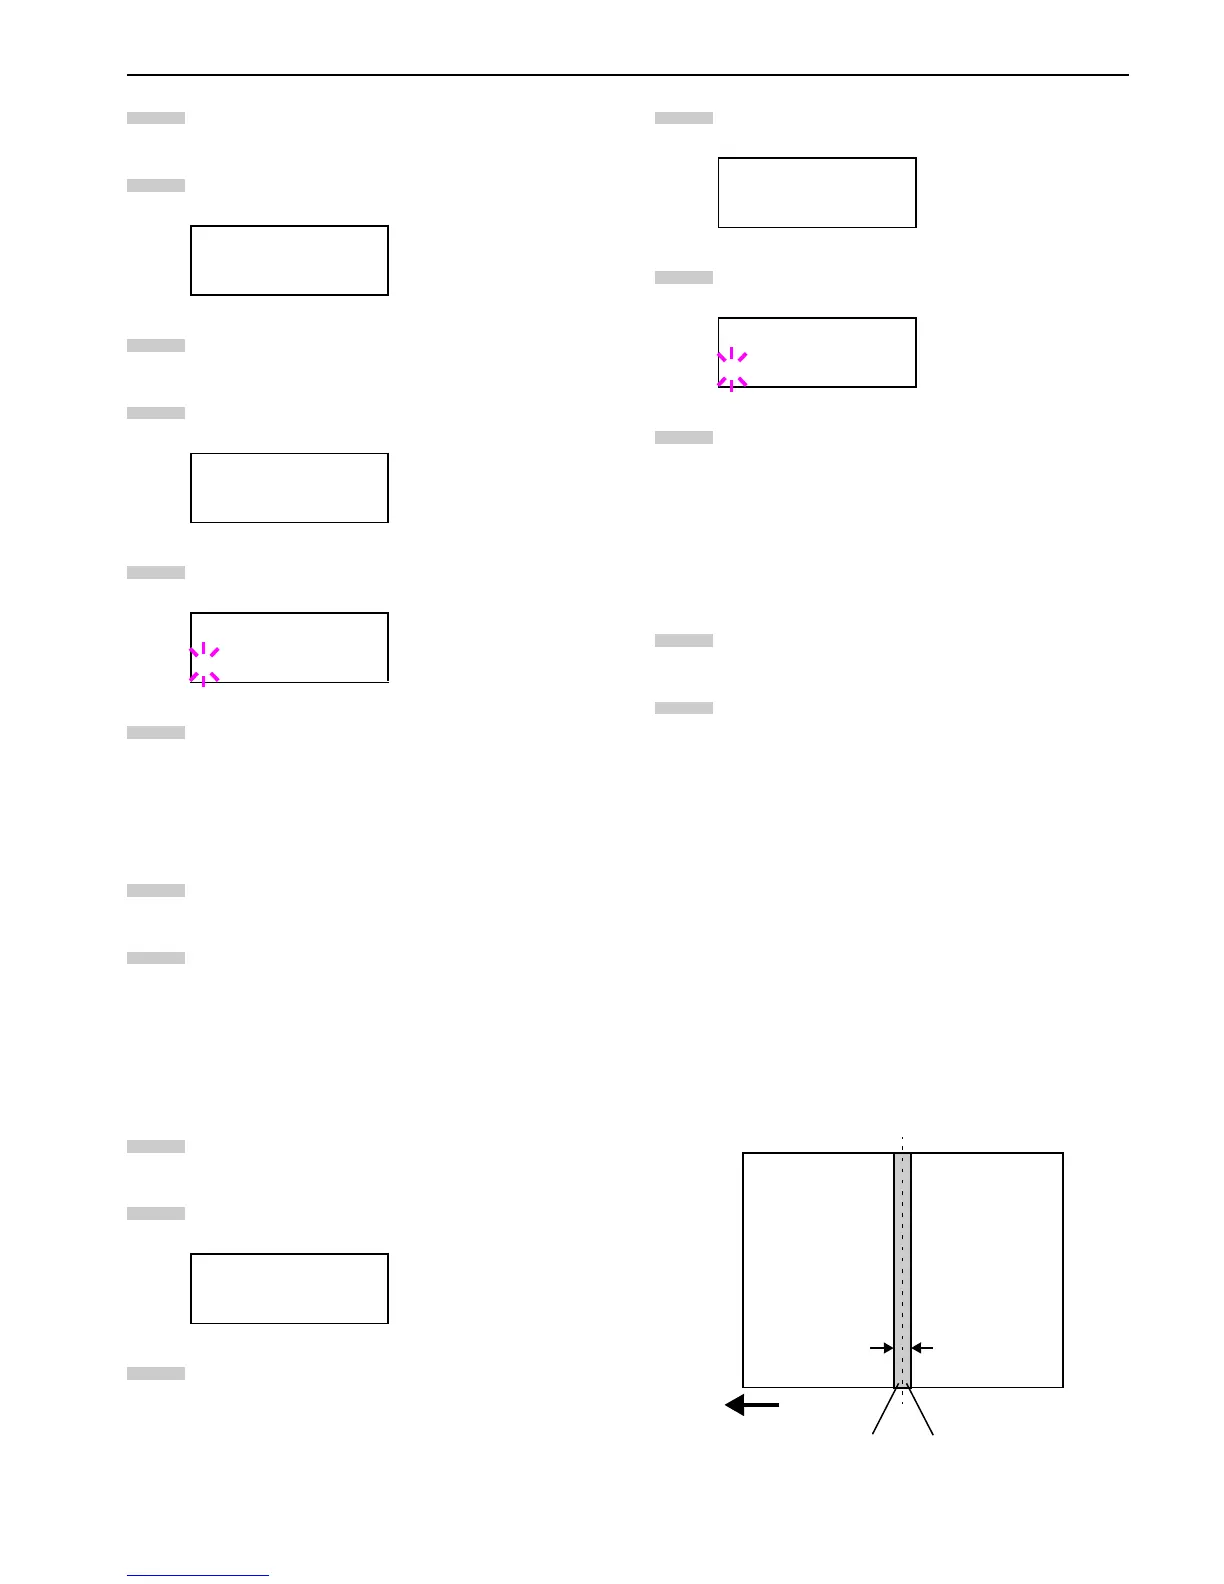
Adjusting the Stitch Positions
When installing the option document finisher DF-75, adjust the
stitch positions using the following procedures. In the default
settings, the stitch position is set in the center of the paper. De-
pending on the paper, a certain amount of deviation will occur.
In this case, also use this menu to adjust the stitch position.
The adjustment can be done by moving the stitch position
adjustment gear in the document finisher.
For example, select the range from -57 to +57 (1 = approxi-
mately 0.14 mm) to move the stitch position approximately 8
mm as shown in the following figure. The default setting is
000 (center of the paper.)
Figure 3-21
Paper Handling >
>Duplex Mode
None
>Duplex Mode
?None
Paper Handling >
1
2
3
4
5
6
7
8
1
2
3
>Stack Select
Top tray FaceDn
>Stack Select
?Top tray FaceDn
4
5
6
7
8
-57
(Approx. 8 mm)
+57
(Approx. 8 mm)
Feed direction
Default stitch position
(center of the paper)
 Loading...