QUICK START
Logicube Forensic Falcon™ User’s Manual 16
3.1.1 Step-by-step instructions – Imaging
Details on each selectable option on the Image screen can be
found in Section 5.0 Imaging.
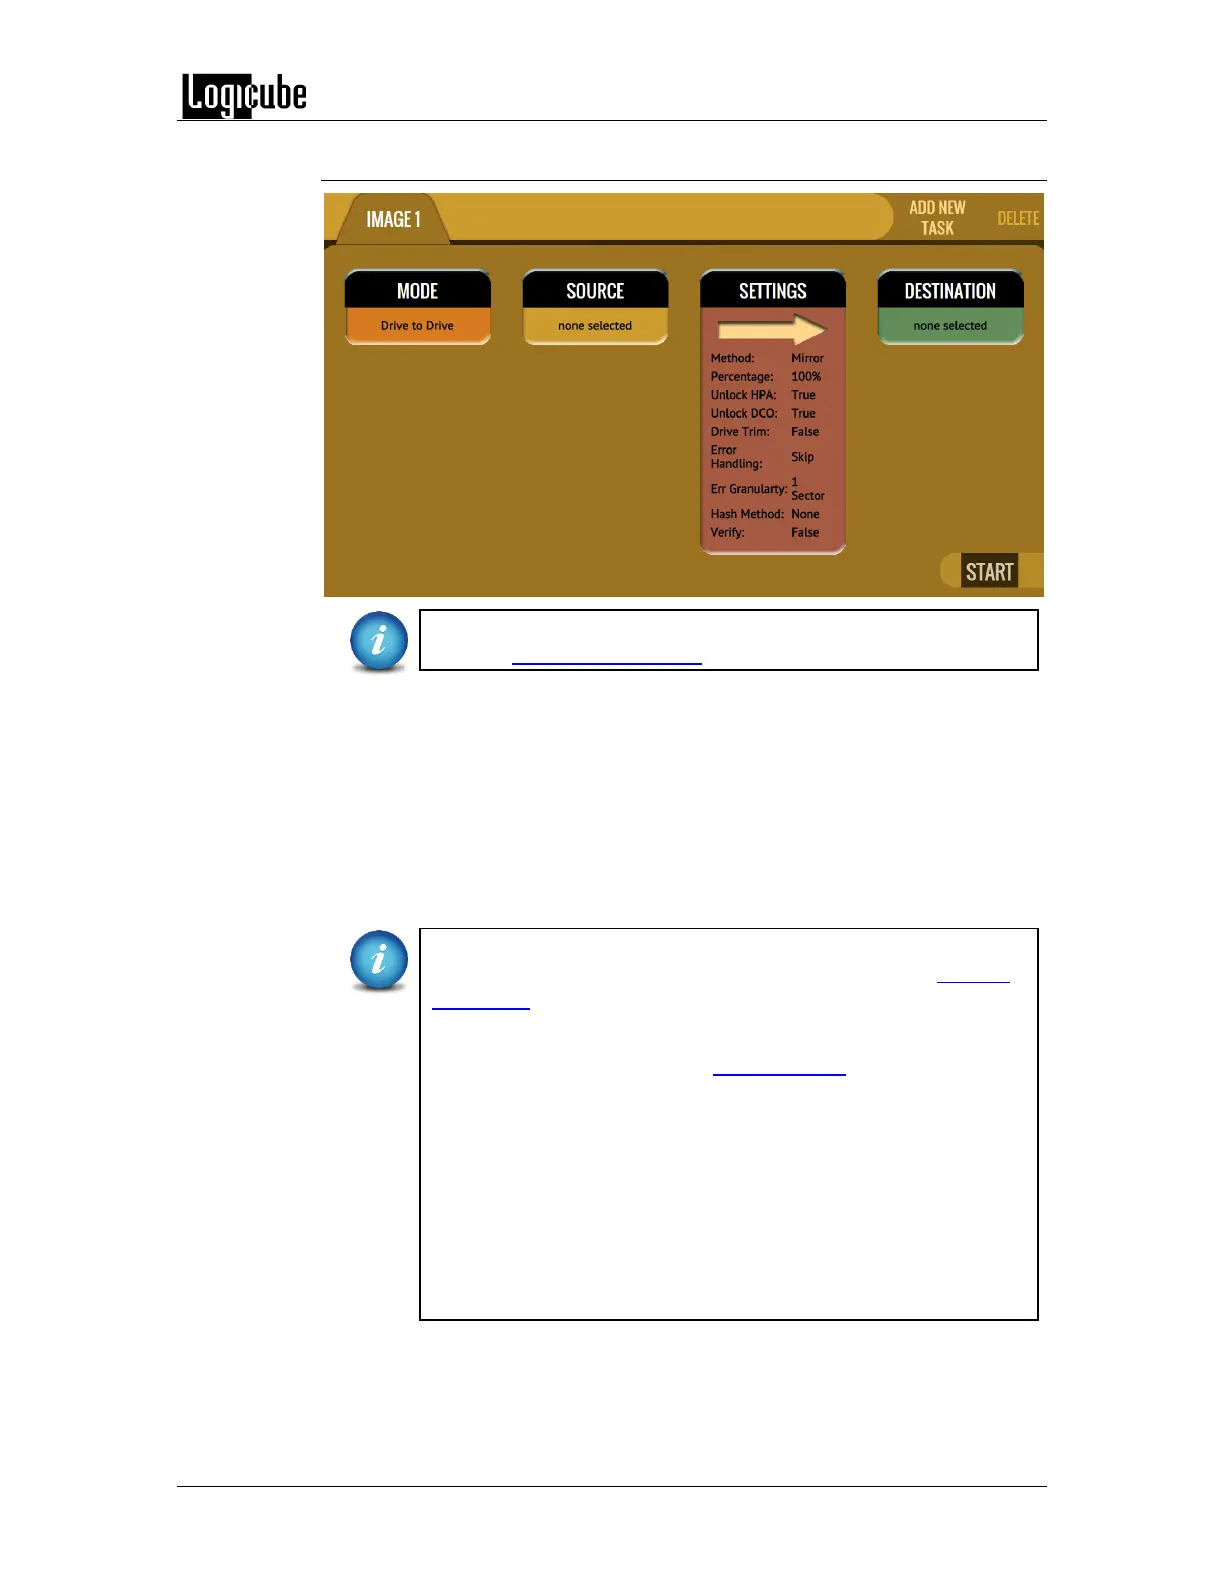
1. Select Imaging from the types of operation on the left side.
2. Tap the Mode icon and select Drive to Drive, Drive to File, File to File, or
File to Drive then tap the OK icon.
3. Tap the Source icon and choose the source from the list of connected
drives then tap the OK icon.
4. Tap the Settings icon and adjust the settings as needed (Case Info, File
Image Method Settings or Mirror Settings, HPA/DCO, Error Handling,
Hash/Verification Method, etc.) then tap the OK icon.
The Settings screen will be different for each of the three modes.
Details on the different Settings screens can be found in Chapter
5: Imaging.
Log file names can be set in Settings in the Case Info screen by
entering a Case/File name. See Section 5.0.3.1 for more
information.
The Falcon will convert any non-POSIX portable characters used in
Case/File Name field to underscores “_“ when creating the log or
file names.
POSIX portable characters are:
Uppercase A to Z Period (.)
Lowercase a to z Underscore (_)
Numbers 0 to 9 Hyphen/Dash (-)
 Loading...