OPERATING CONTROLS AND PROCEDURES RT9150E OPERATOR MANUAL
3-138
Published 2-23-2017, Control # 644-00
Canceling Teleautomation
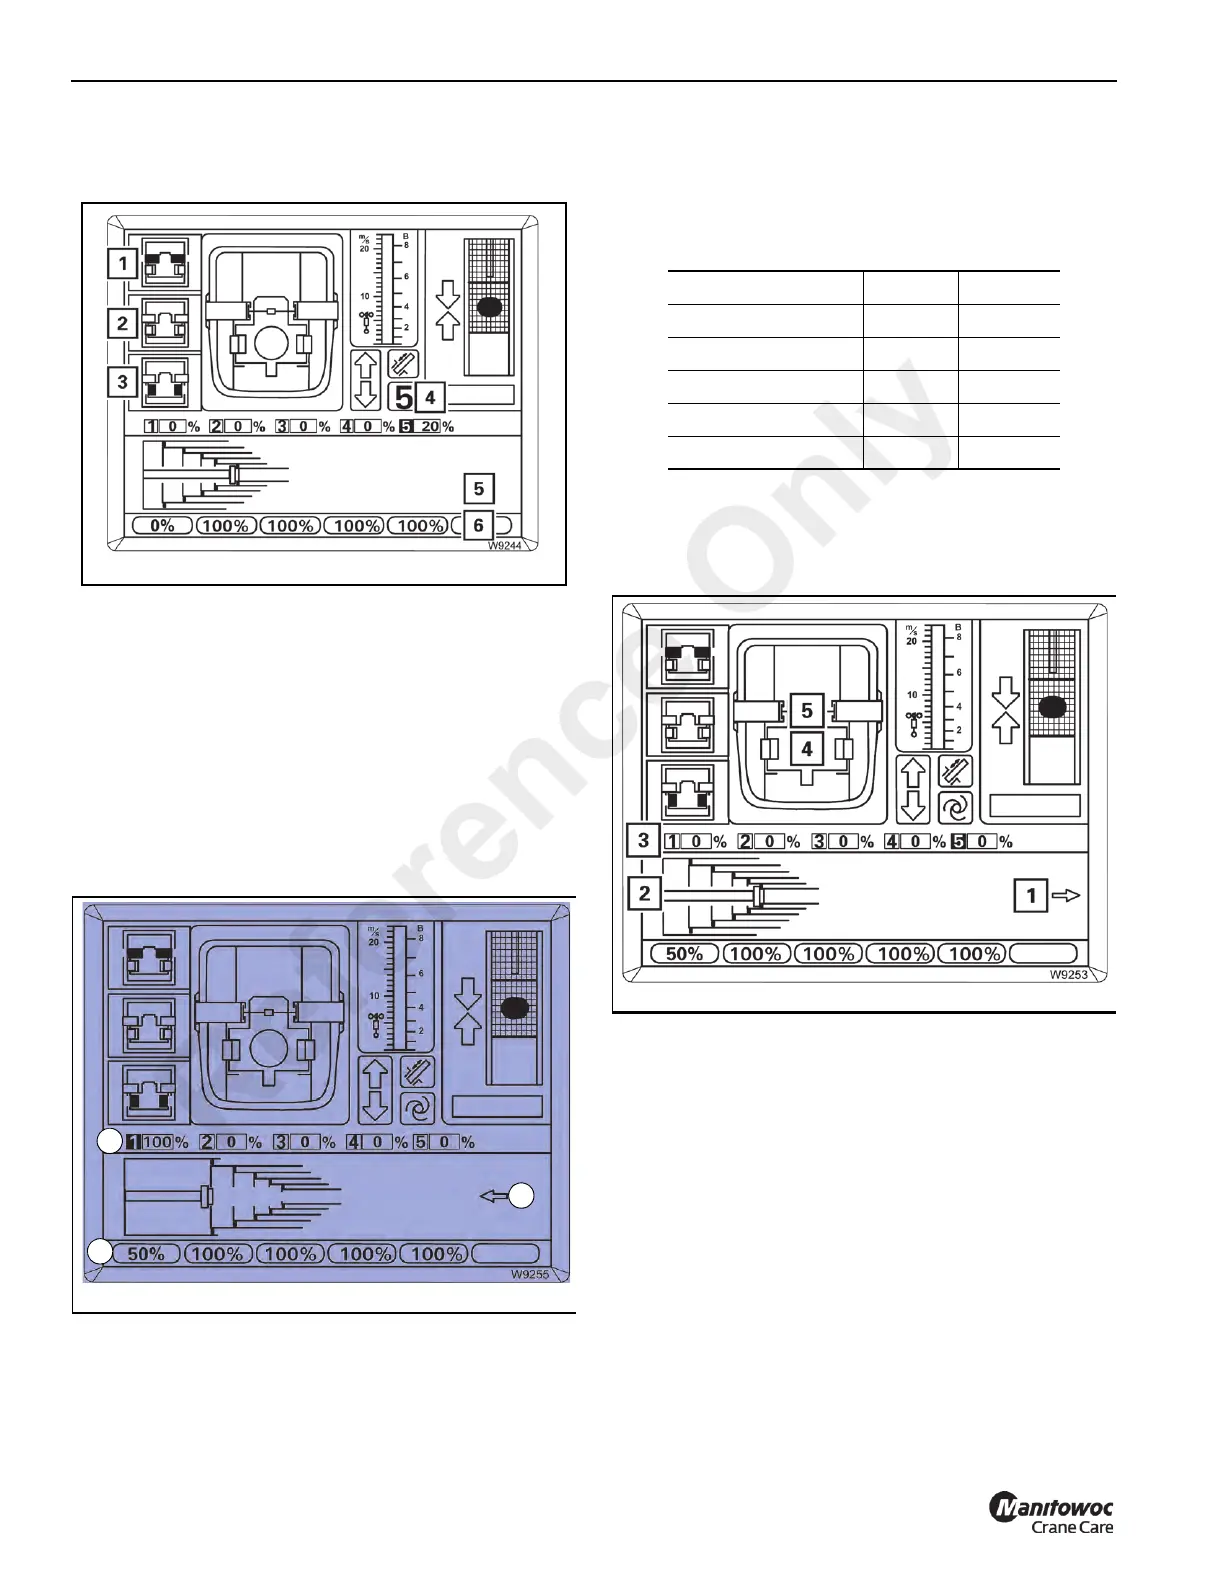
Refer to Figure 3-147.
To cancel teleautomation, press one of the F1 to F3 buttons
(1), (2) or (3) once.
The telescoping process is stopped:
• The display (5) goes out,
• the icon (4) appears,
• the values in the display (6) are red.
Teleautomation is now switched off.
Example of Telescoping with Teleautomation
Refer to Figure 3-148.
Assuming the current telescoping is 100/0/0/0/0 and the
telescoping cylinder is locked in telescopic section 1(1).
The desired telescope status is 50/100/100/100/100 (2).
The display should correspond to Figure 3-148 once you
have entered the desired telescope status and confirmed it.
ECOS calculates the following telescoping sequence:
Since the first step is retracting, the arrow (3) points to the
left.
1. Move the control lever for retracting and hold it there,
refer to (Figure 3-149).
Telescopic section 1 is fully retracted. The following
processes are carried out automatically, in order:
- Telescopic section 1 retracts; display (3) 0%
- Telescopic section 1 locks; pins (5) green
- Telescope cylinder unlocks; pins (4) red
- The telescope cylinder moves into telescopic
section 5; display (2)
- Telescope cylinder locks; pins (4) green
The arrow (1) shows the new telescoping direction,
extending.
NOTE: The arrow (1) flashes as long as you are moving
the control lever for retracting.
Telescopic section 1 retract to 0%
Telescopic section 5 extend to 100%
Telescopic section 4 extend to 100%
Telescopic section 3 extend to 100%
Telescopic section 2 extend to 100%
Telescopic section 1 extend to 50%
Reference Only

 Loading...


