8-66
8.74 Disassemble the Auto/Manual Position Detection Switch
8.74.1 Prepare for Disassembly
8.74.1.1 Tools
During parts disassembly and replacement, the following tools may be required:
Phillips screwdriver
8.74.1.2 Preparations
Before disassembly,
Make sure that the anesthesia machine is turned off and disconnected from the A/C power
source.
Maneuver the anesthesia machine to an appropriate location and then apply the brake.
8.74.1.3 Pre-disassembly
1. Refer to 8.1.4Remove the Work Surface Cover Plate FRU to remove the work surface
cover plate.
2. Refer to step 1 in 8.23.2Remove the Patient Circuit Assembly to remove the patient circuit.
3. Refer to 8.28Disassemble the Volume Exchanger Assembly to remove the volume
exchanger assembly.
4. Refer to 8.29Disassemble the VE Box Assembly to remove the VE box assembly.
5. Refer to 8.20Disassemble the Sodalime Absorber Canister Assembly to remove the Venturi
negative pressure control panel assembly.
6. Refer to 8.24Disassemble the APL Valve Assembly to remove the APL valve assembly.
7. Refer to 8.1.6Remove the Upper-Left Cover Plate to remove the upper-left cover plate
assembly of the work surface.
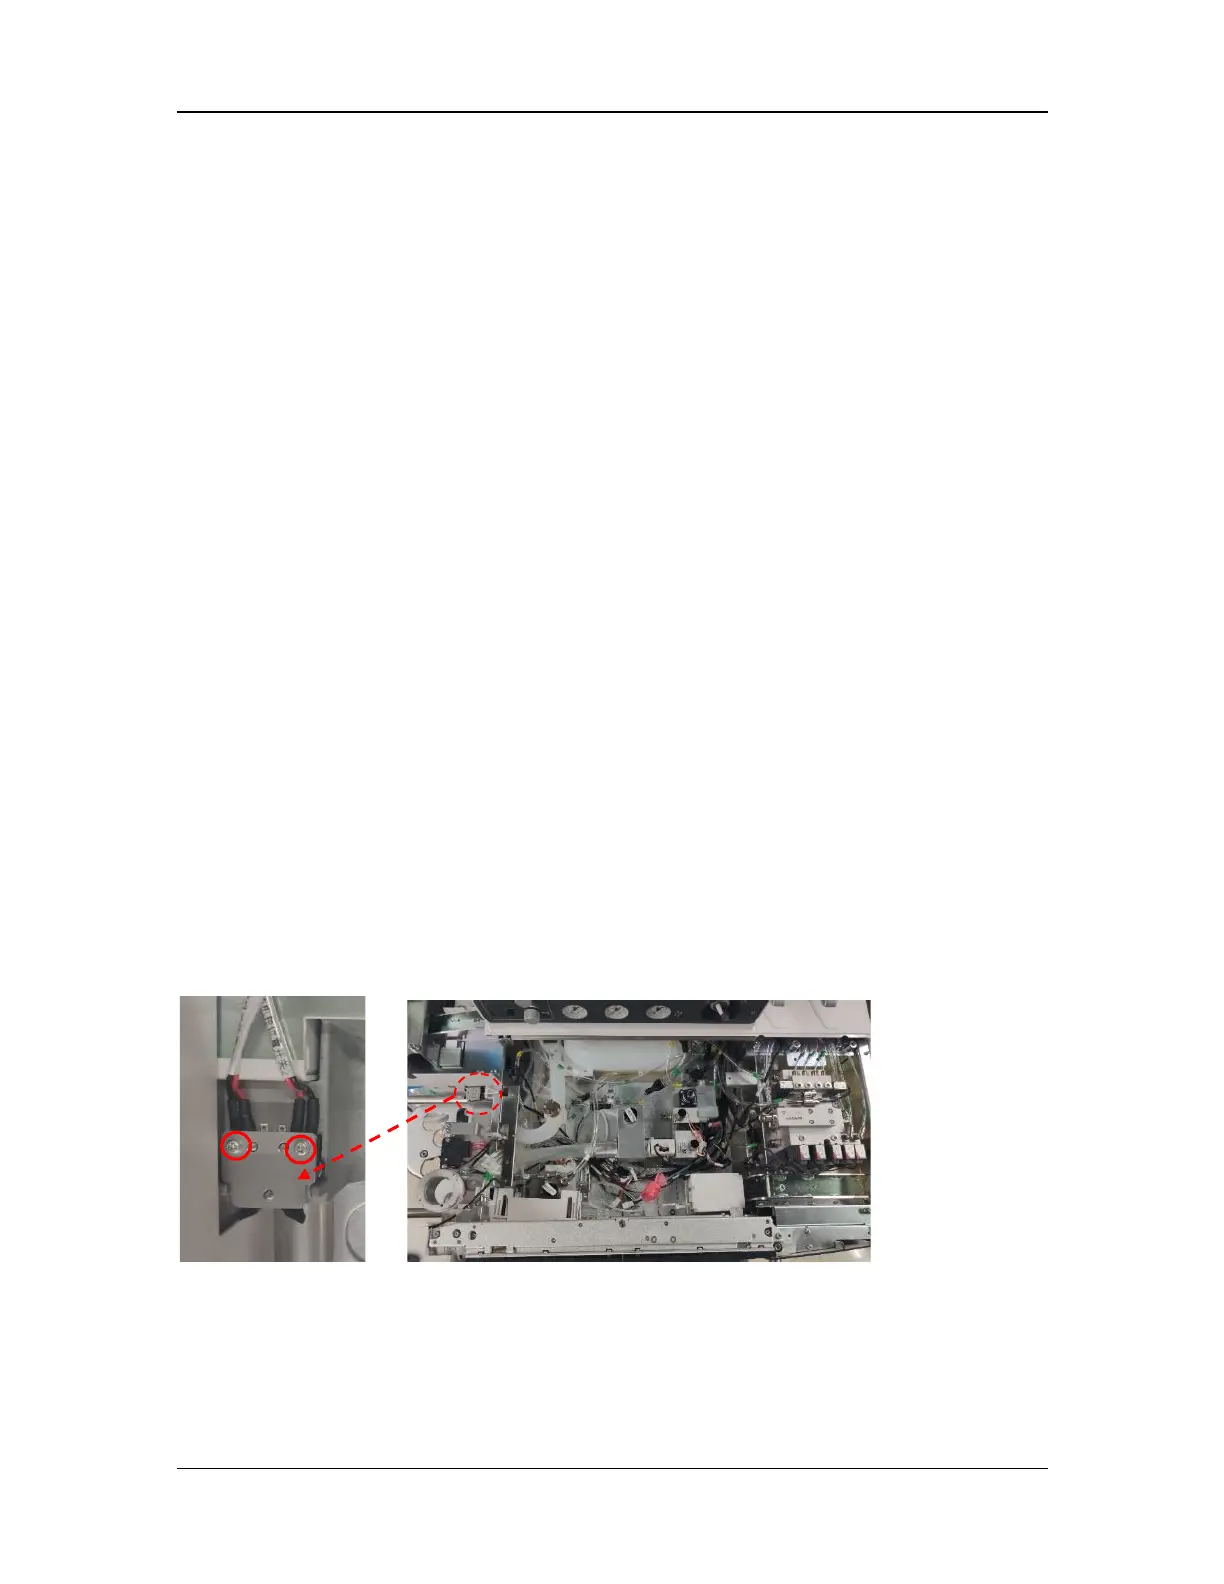
8.74.2 Remove the Auto/Manual Position Detection Switch
1. Disconnect the cable from the auto/manual position detection switch.
2. Remove the two screws with the Phillips screwdriver to remove the auto/manual position
detection switch.
 Loading...