Teaching Box System overview
2 - 18
2.5.2 R32TB
R001440E
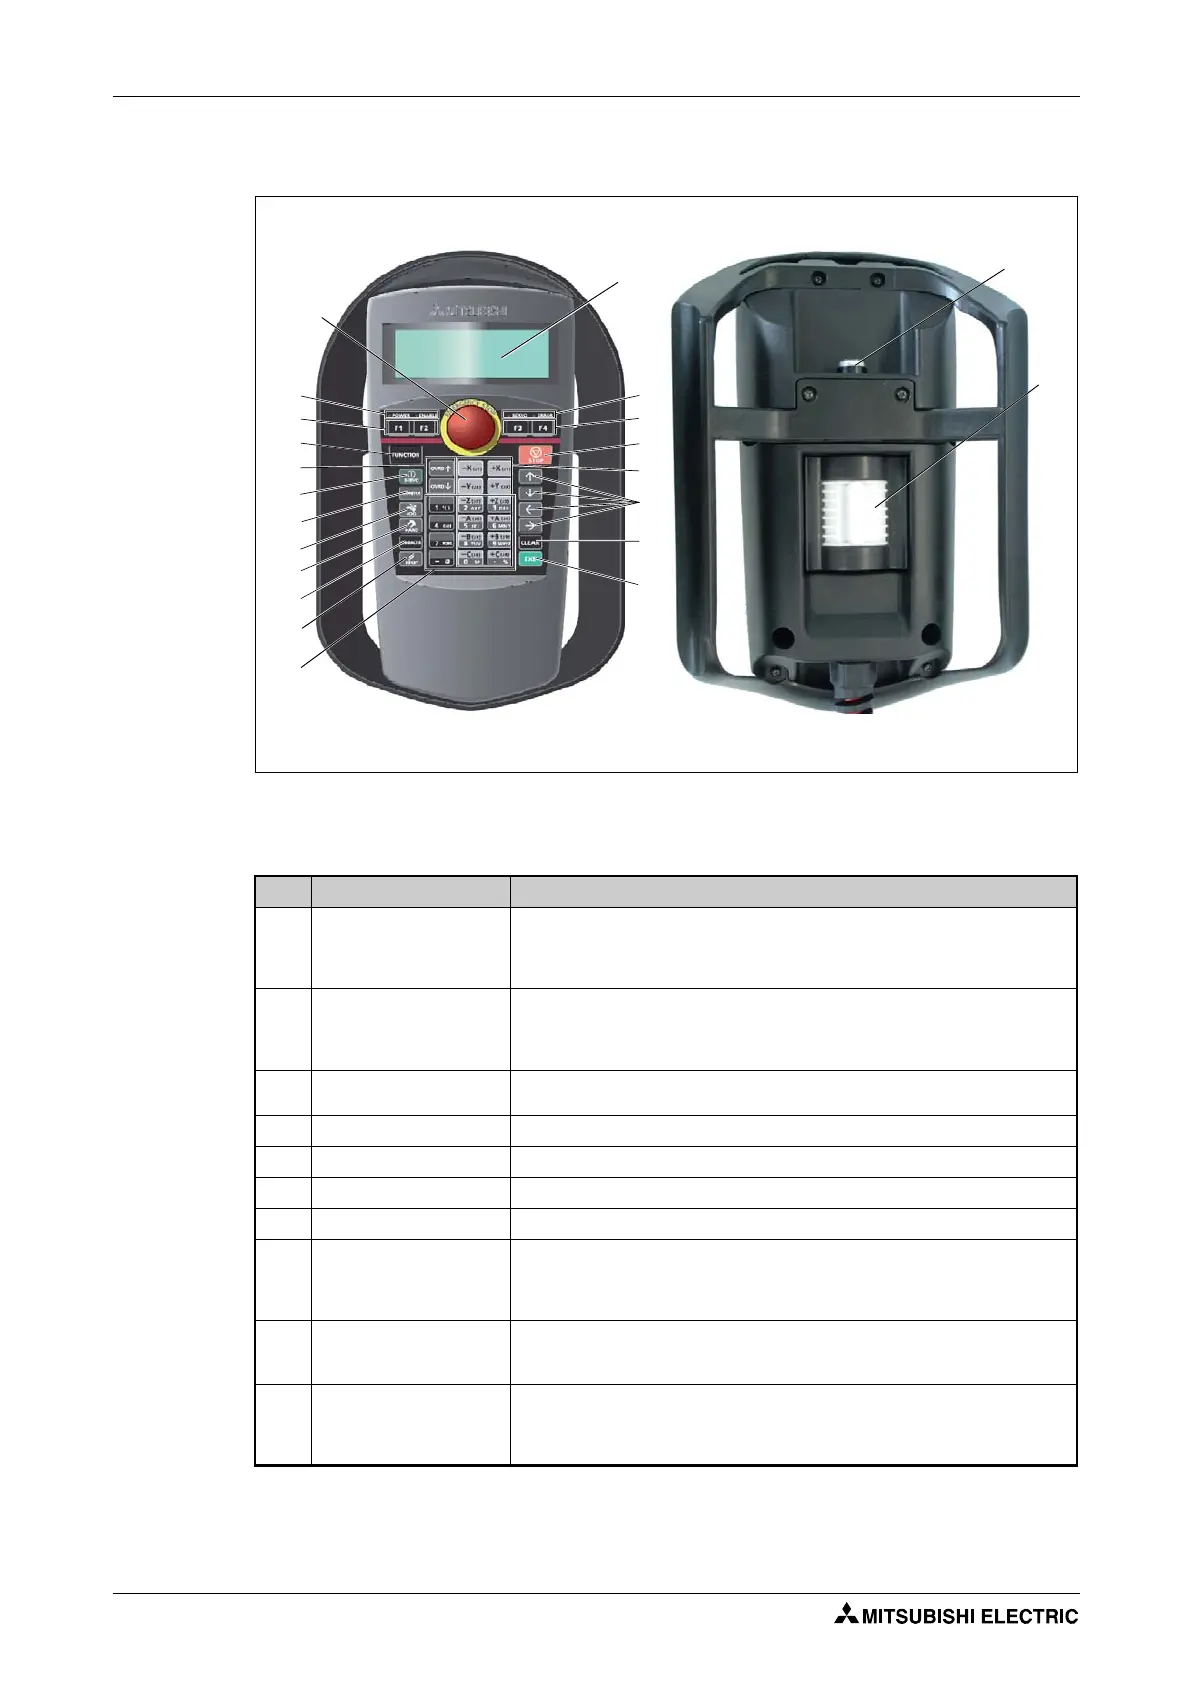
Fig. 2-15: Views of Teaching Box R32TB
No. Name Function
[EMG.STOP]
pushbutton switch
EMERGENCY-STOP pushbutton with locking function
If you press the pushbutton then the robot arm stops instantaneously. The servo
power supply is switched off The pushbutton switch is unlocked by turning it
clockwise.
[ENABLE/DISABLE]
selector switch
Releases control over the Teaching Box
Put switch into "ENABLE" position to control the robot arm via the Teaching Box.
As long as the Teaching Box is enabled, the robot arm can neither be controlled
from the control panel of the control unit nor externally.
Three-step switch
The three-step enable switch must be actuated to switch on the servo drive when
the Teaching Box is switched on.
LCD display The status of the program or the robot arm is displayed on the LCD.
Status display The LED displays the status of the robot or the Teaching Box.
[F1], [F2], [F3], [F4] key Run the functions currently shown on the display
[FUNCTION] key Toggle the displayed functions
[STOP] key
Cancel the running program and stop the robot
This function is the same as the function of the [STOP] key on the control panel of
the control unit. This key function is always available, independent of the position of
the [ENABLE/DISABLE] selector switch.
[OVRD ]-, [OVRD ] key
Change the movement speed
Press the [OVRD ] key to increase the movement speed, and press the [OVRD ]
key to decrease the speed.
12 keys for JOG mode:
[X/(J1)]...[+C/(J6)]
Function key for jog mode
All articulated joints can be moved individually in articulated joint-jog mode. The
robot arm can be moved along any of the coordinate axes in XYZ jog mode. These
keys are also used to enter the menu selection numbers or step numbers.
Tab. 2-9: Overview of Teaching Box R32TB (1) controls
Weight: 0.9 kg
 Loading...


