9.7
BODY / FRAME
9
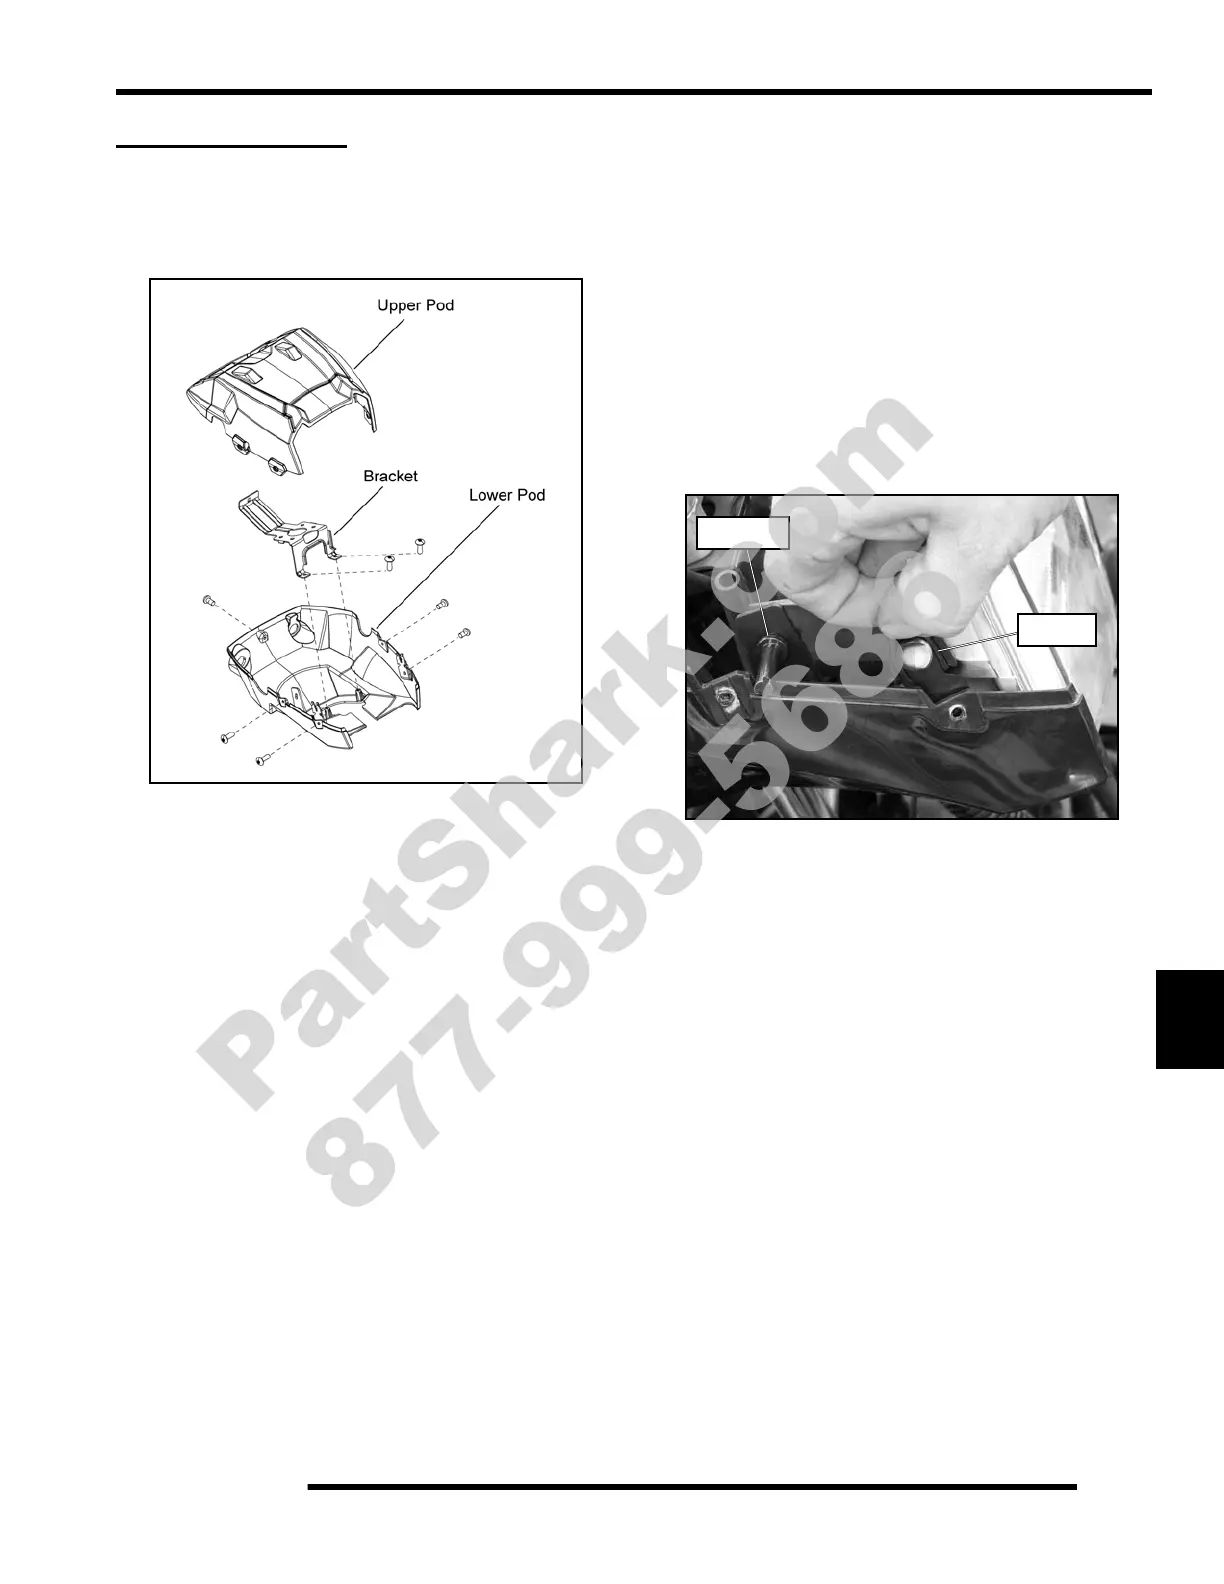
HEADLIGHT POD
Disassembly / Removal
1. Remove the (5) Torx-headed screws retaining the upper
and lower headlight pods.
2. If removing the instrument cluster, unplug the two
harnesses and push the instrument cluster out from the
upper pod.
3. Disconnect and remove the headlight assembly from the
lower pod.
4. Remove the (2) Torx-headed screws retaining the lower
headlight pod to the mount bracket.
5. Disconnect the key switch and 12V outlet. If replacing the
lower pod, remove the key switch and 12V outlet.
IMPORTANT: Take note of all vent line, wire harness
and throttle cable routing for reassembly purposes.
6. Remove the lower pod from the vehicle.
Assembly / Installation
1. Reverse the “Disassembly / Removal” procedure.
NOTE: Make sure to route all vent lines, wire
harness and throttle cable correctly into the lower
headlight pod.
2. When installing the headlight into the lower pod, be sure
to install the O-rings prior to installing the headlight.
3. Place the headlight into the lower pod mounting tabs and
press firmly until the headlight snaps into place.
4. Lift the O-ring up and over the headlight mounting tab to
secure it.
5. Reinstall the adjustment screw.
6. Properly align the upper headlight after reassembly.
Adjuster
O-Ring
PartShark.com
877-999-5686

 Loading...