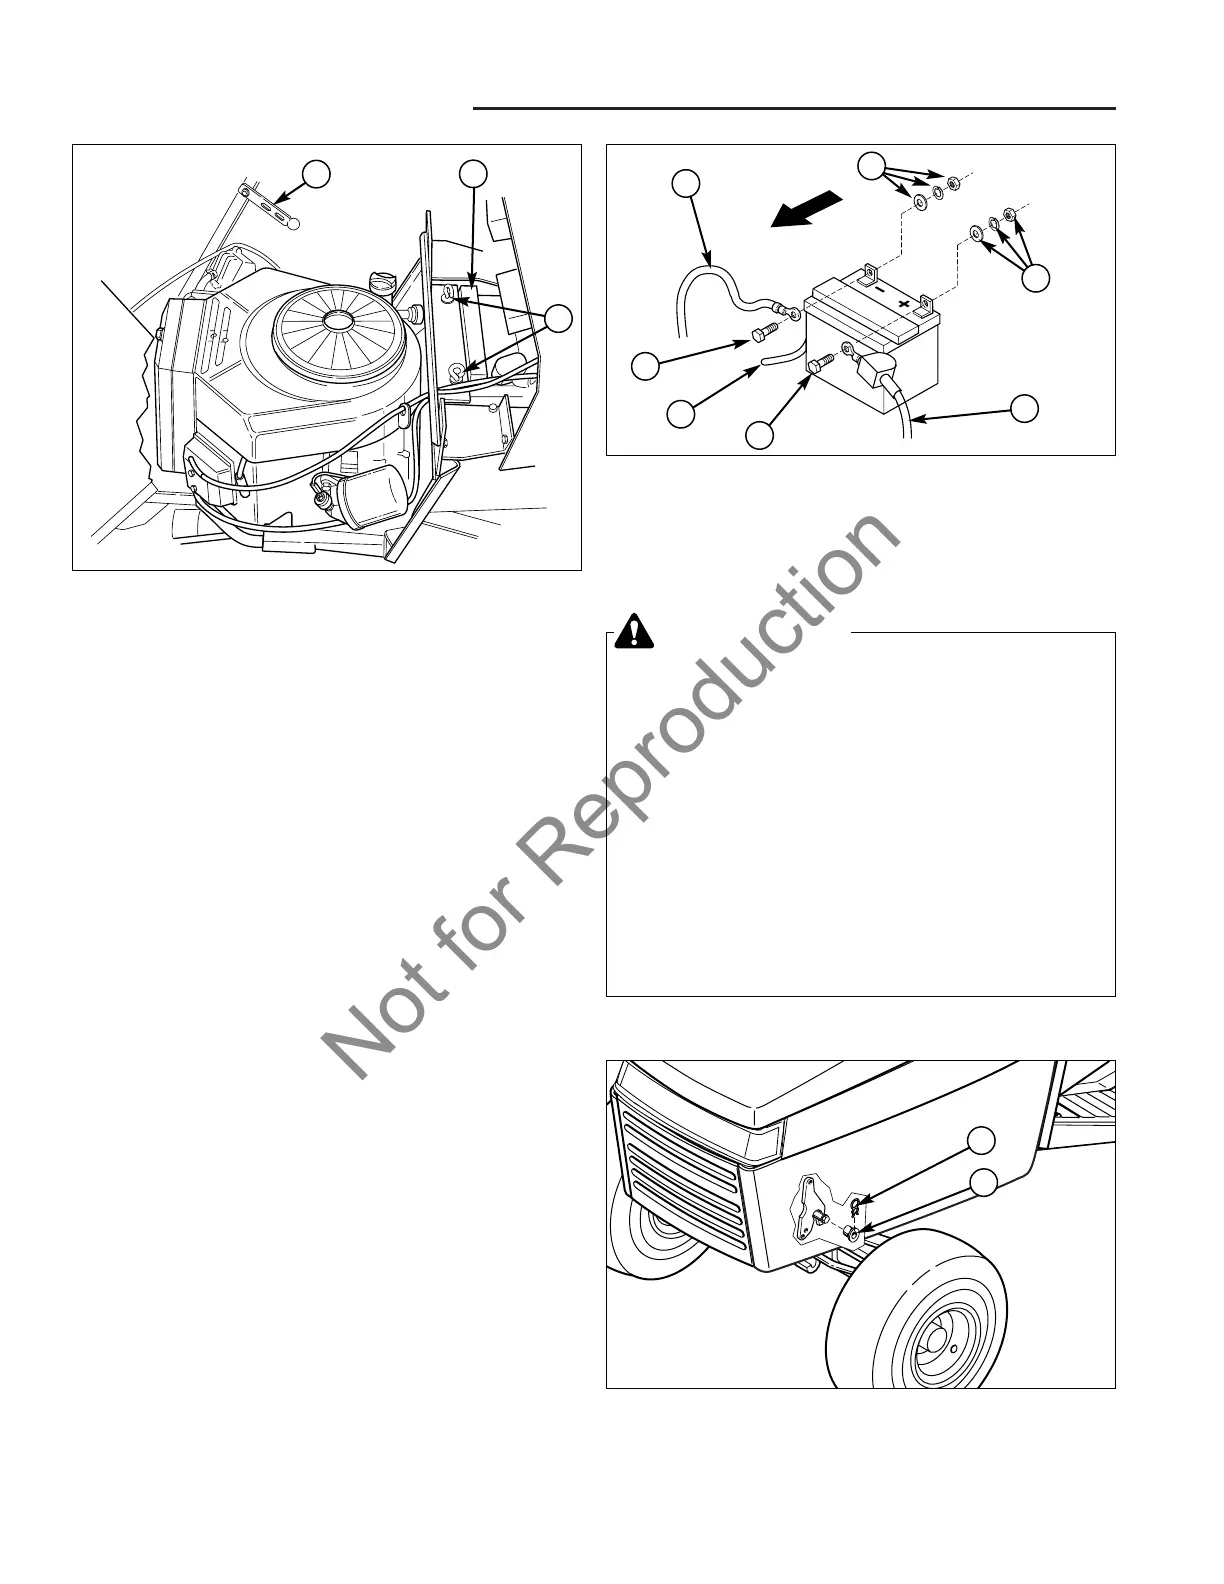
Figure 13. Battery Cables - Air Cooled Models
A. Negative Cable D. Capscrew
B. Positive Cable & Cover E. Vent Hose
C. Nut, Lockwasher, & Washer
C
B
E
A
D
D
C
Figure 14. Hood
A. Retaining Clip
B. Spacer
B
A
WARNING
Battery Safety Rules:
●●
Be careful when handling the battery. Avoid
spilling electrolyte.
●●
When removing or installing battery cables,
disconnect the negative cable FIRST and
reconnect it LAST. If not done in this order, the
positive terminal can be shorted to the frame
by a tool.
●●
Battery acid causes severe burns. Avoid
contact with skin.
●●
Wear eye protection while handling battery.
●●
To avoid an explosion, keep flames and sparks
away from battery, especially while charging.
Reinstall the Battery
1. Carefully place the battery back in the engine com-
partment (see Figure 12). Secure the battery using
the hold-down rods (C) and hold-down bar.
2. Attach the red positive cable (B, Figure 13) and cover
to the positive post as shown.
3. Attach the black negative cable (A, Figure 13) to the
negative post as shown.
4. Install the vent hose (if equipped) on the battery cap
and route the hoses out of the bottom right side of the
engine compartment through the frame. Make sure
the tubes go all the way through the frame and will
not drip on any belts, pulleys, or the mower deck.
Reinstall Hood
1. Rest the hood assembly on the pivot bolts. Tilt the
hood forward.
2. Install the spacers (B, Figure 14) on the pivot bolts.
3. Secure the spacers (B) with retaining clips (A).
4. Close the hood to check the fit between the hood and
dashboard. If the fit must be adjusted, loosen the
hardware securing the dashboard and shift the
assembly.
 Loading...