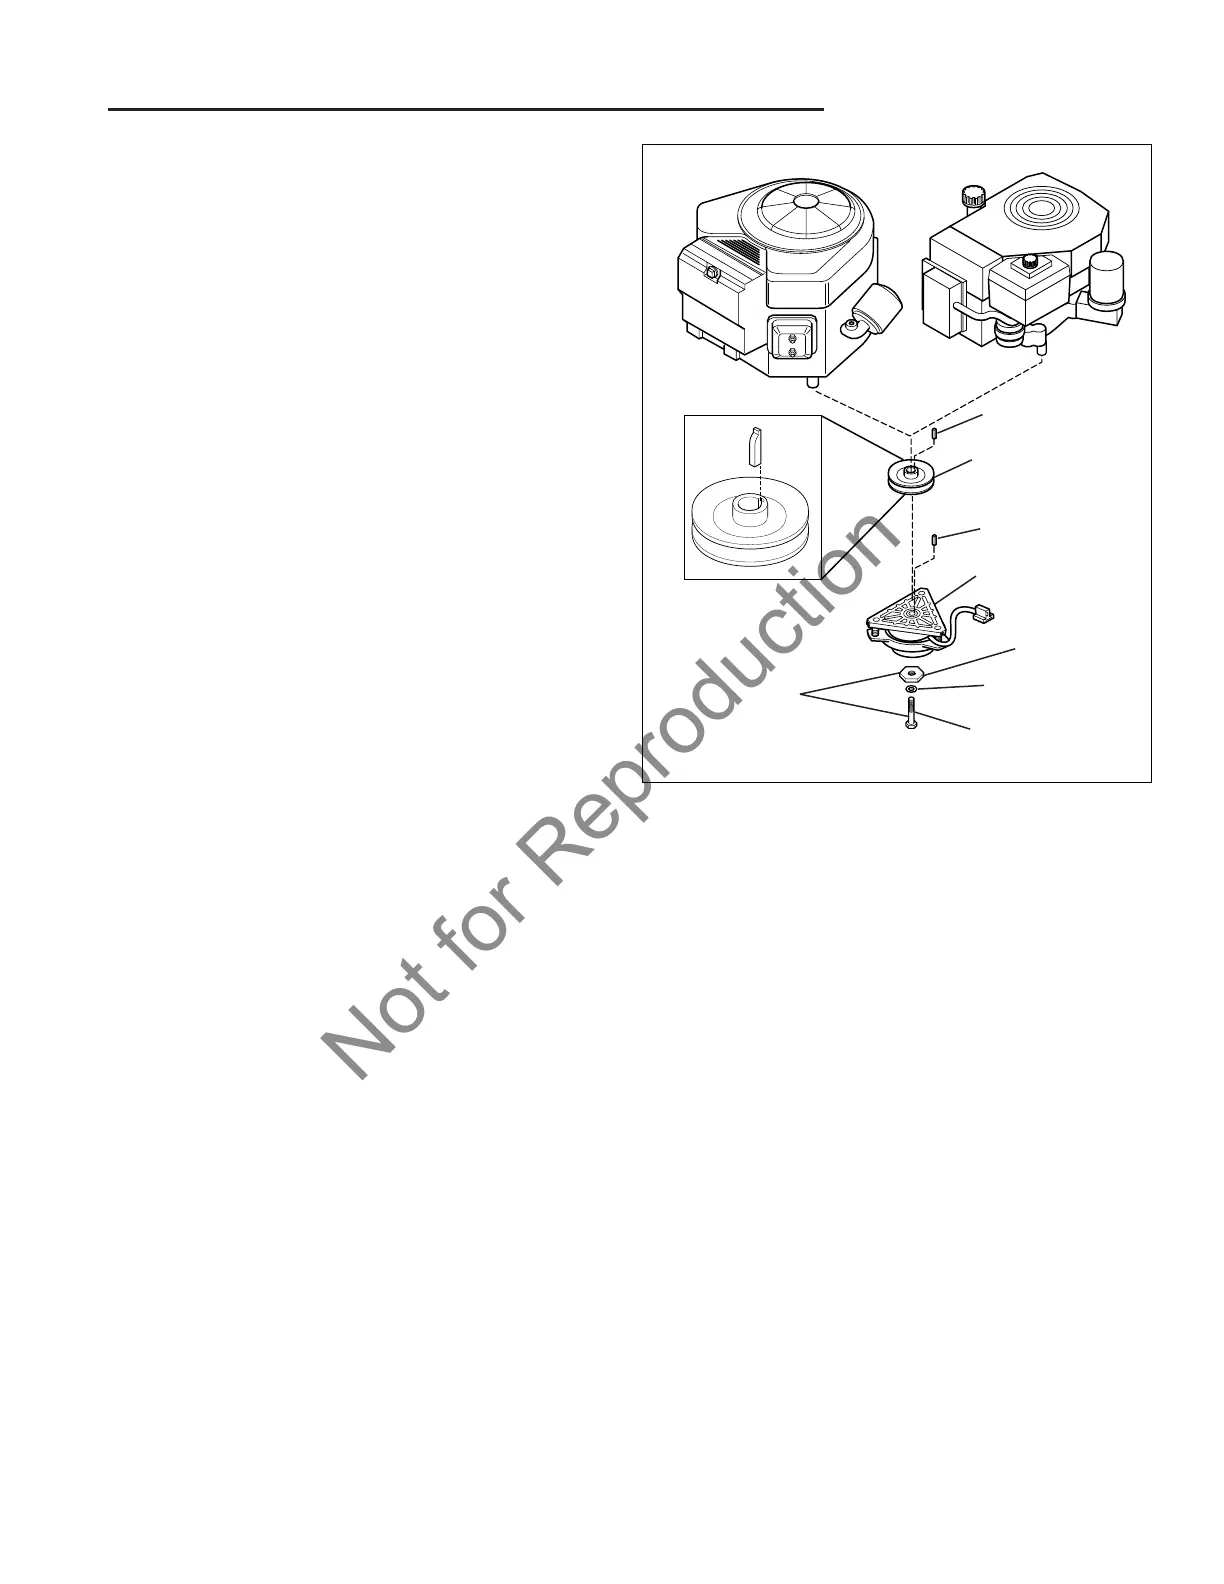
PTO CLUTCH REPLACEMENT
Removal
Refer to Figure 6.
1. Remove the mower deck, block the wheels, and dis-
engage the parking brake.
2. Disconnect the electrical harness.
3. Remove the capscrew, lockwasher, and hex washer
securing the clutch to the crank shaft.
4. Remove the clutch and square key. Note: belt ten-
sion should keep the transmission belt pulley in
place.
Installation
Refer to Figure 6.
1. Lubricate the crankshaft with anti-seize compound.
2. Make sure the rounded key (FIgure 6) is installed as
shown.
3. Install the square key.
4. Install the PTO clutch. Be sure the square key is in
the keyway. Be sure the clutch anchor is inserted
into the clutch body.
5. Secure with the 7/16-10 x 4” capscrew, lockwasher,
and hex washer. Hold the hex washer with a wrench
and tighten the capscrew to 45-50 ft. lbs.
BURNISHING THE ELECTRIC PTO
CLUTCH
New PTO clutches must be burnished to remove anti-
corrosion coatings on the clutch components.
1. Select a safe area to operate the mower deck. With
the drive in neutral, the PTO switch disengaged, and
an operator in the seat, start the tractor engine. Run
the engine at full throttle.
2. Engage the PTO switch and run the deck for fifteen
seconds. Disengage the PTO switch and wait for the
mower drive belt to stop.
3. Repeat step 2 above ten times, and then re-check
the mower blade stopping time. (Stopping time must
be five seconds or less. If not, readjust the clutch air
gap.)
Figure 6. Clutch Assembly
 Loading...