Jump Starting
92
10. If you are using a vehicle to jump start the unit, start the
vehicle and let it run for a few minutes. This will help
charge the discharged battery.
11. Turn the unit on and let it start automatically or start it
manually. If the unit will not crank or start, contact a
qualified technician.
NOTE: Some units with microprocessors will show an
alarm code and will not try to start until the battery
voltage is above 10 volts.
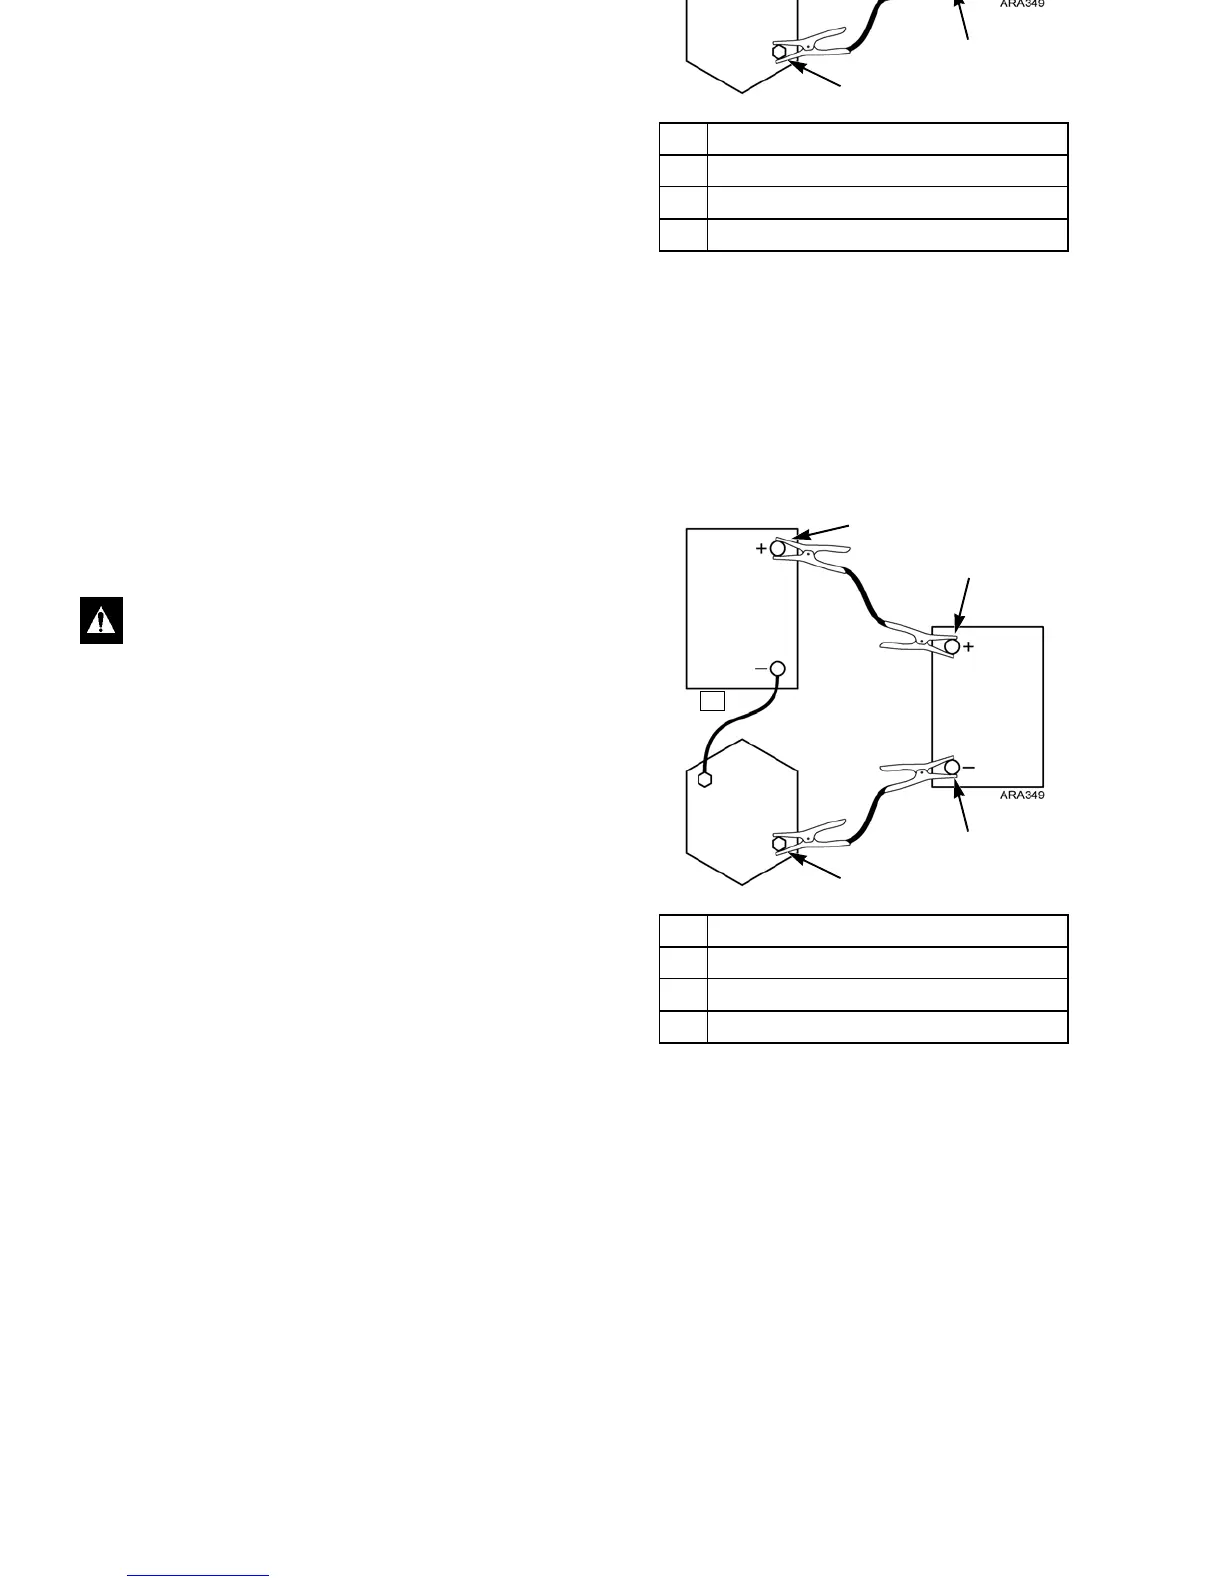
12. After the unit starts, remove the jumper cables in reverse
order: black negative (–) from the unit starter mounting
bolt, black negative (–) from the good battery, red positive
(+) from the good battery, and red positive (+) from the
unit battery (that was discharged).
CAUTION: Be careful around fans and belts.
Keep your hands away from moving parts when an
engine is running.
1. Starter Mounting Bolt on Unit Engine
2. Negative (–) Terminal on Good Battery
3. Positive (+) Terminal on Good Battery
4. Positive (+) Terminal on Unit Battery
Figure 34: Sequence for Disconnecting Jumper Cables
Unit
(Discharged)
12-Volt
Battery
Good
12-Volt
Battery
Unit
Engine
3
2
1
Jump Starting
92
10. If you are using a vehicle to jump start the unit, start the
vehicle and let it run for a few minutes. This will help
charge the discharged battery.
11. Turn the unit on and let it start automatically or start it
manually. If the unit will not crank or start, contact a
qualified technician.
NOTE: Some units with microprocessors will show an
alarm code and will not try to start until the battery
voltage is above 10 volts.
12. After the unit starts, remove the jumper cables in reverse
order: black negative (–) from the unit starter mounting
bolt, black negative (–) from the good battery, red positive
(+) from the good battery, and red positive (+) from the
unit battery (that was discharged).
CAUTION: Be careful around fans and belts.
Keep your hands away from moving parts when an
engine is running.
1. Starter Mounting Bolt on Unit Engine
2. Negative (–) Terminal on Good Battery
3. Positive (+) Terminal on Good Battery
4. Positive (+) Terminal on Unit Battery
Figure 34: Sequence for Disconnecting Jumper Cables
Unit
(Discharged)
12-Volt
Battery
Good
12-Volt
Battery
Unit
Engine
3
2
1
 Loading...