45
EN
Selecting the stitch width
The stitch width (zigzag width) can be adjusted to make the stitching wider or narrower.
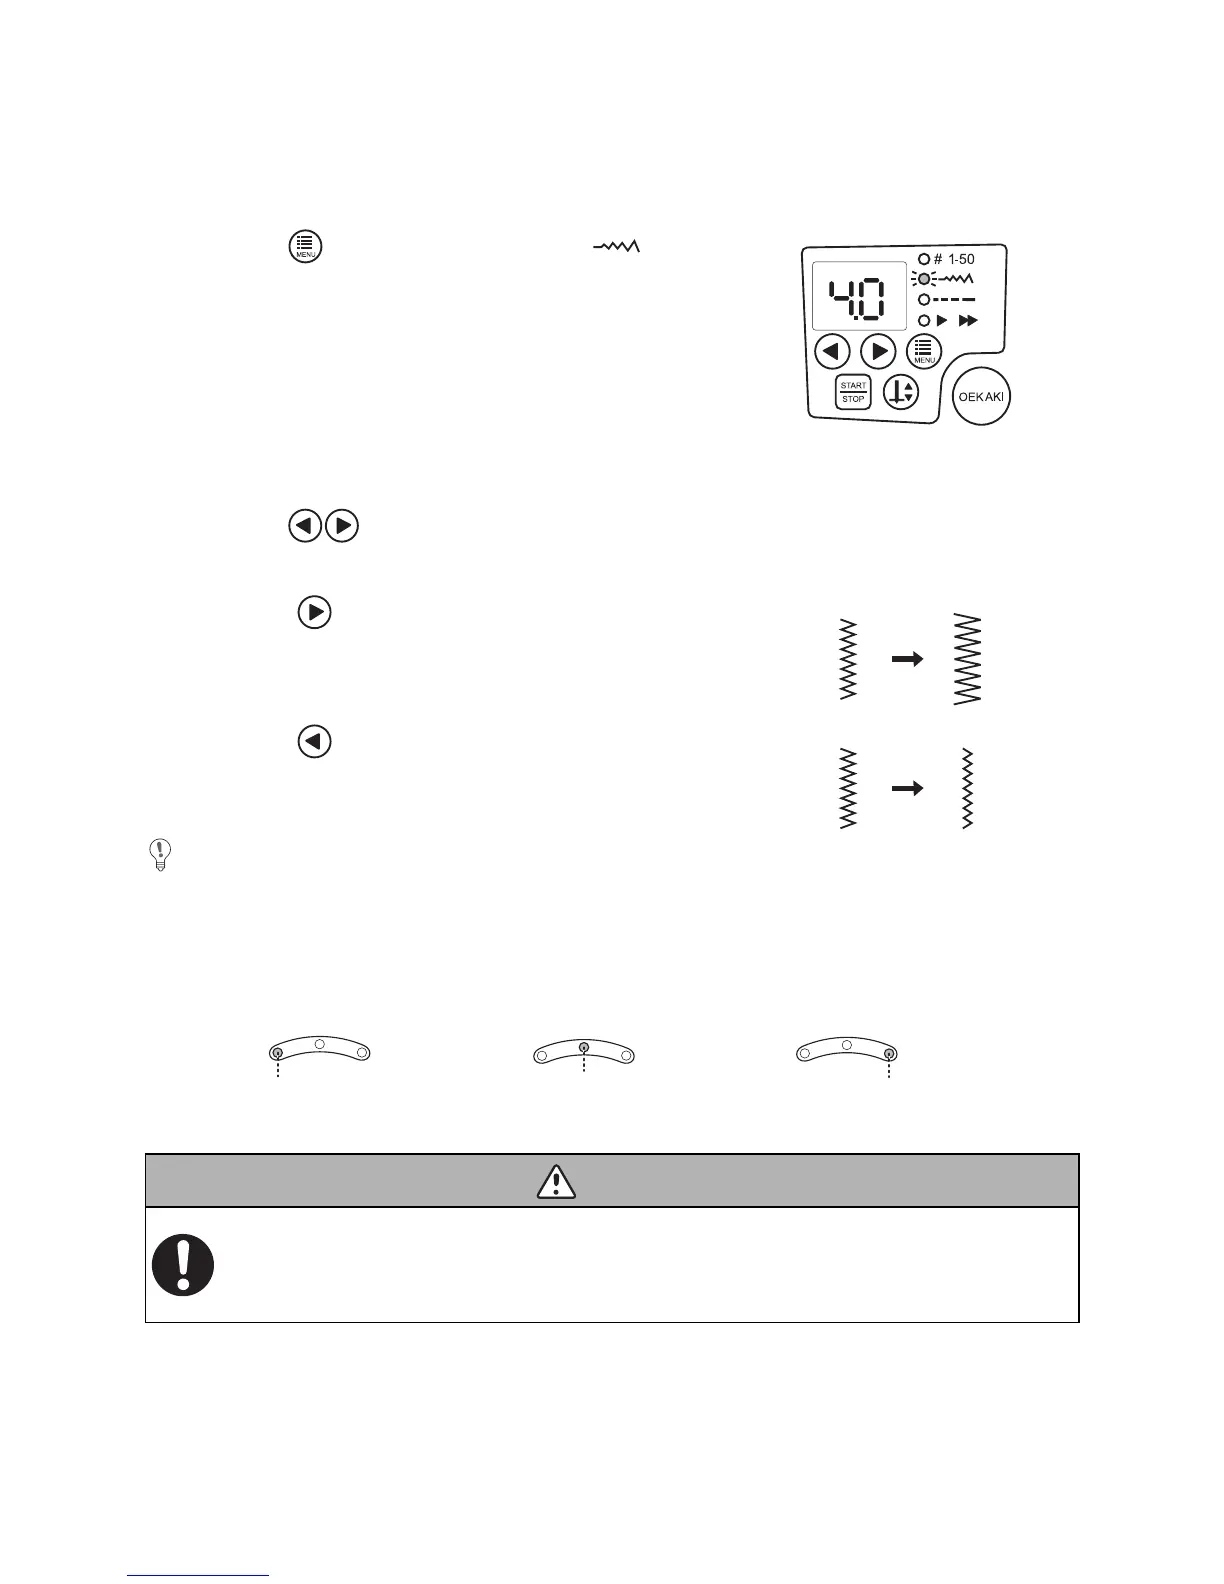
1 Press the (function) button until the LED
lights up.
* The stitch width appears in the LED display.
2 Press the (setting) buttons to select a stitch width.
* The settings that are available differ depending on the selected stitch. For details, refer to “Stitch patterns” (page 48).
Each press of increases the stitch width (zigzag width).
Each press of decreases the stitch width (zigzag width).
• This setting cannot be changed with some stitches.
• If the sewing machine is turned off or a different stitch is selected after this setting has been
changed, the setting will return to the default.
• When the straight stitch with variable needle entry point is selected, changing the stitch width moves
the position of the needle.
After changing the stitch width, slowly turn the handwheel and check that the needle
does not hit the presser foot.
Otherwise, the needle may bend or break.
Not doing so could cause injuries.
Left needle entry point
LED display setting “0.0”
Center needle entry point
LED display setting “2.5”
Right needle entry point
LED display setting “5.0”
 Loading...