74
OEKAKI (free-motion embroidering) preparations
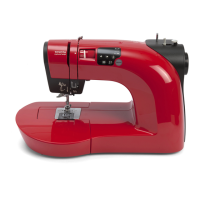
1 Change the presser foot to the embroidering foot.
Remove the presser foot and the presser foot holder.
Position the pin of the embroidering foot above the needle
clamp screw, and align the clamp in the lower-left of the
embroidering foot with the presser foot holder clamp screw.
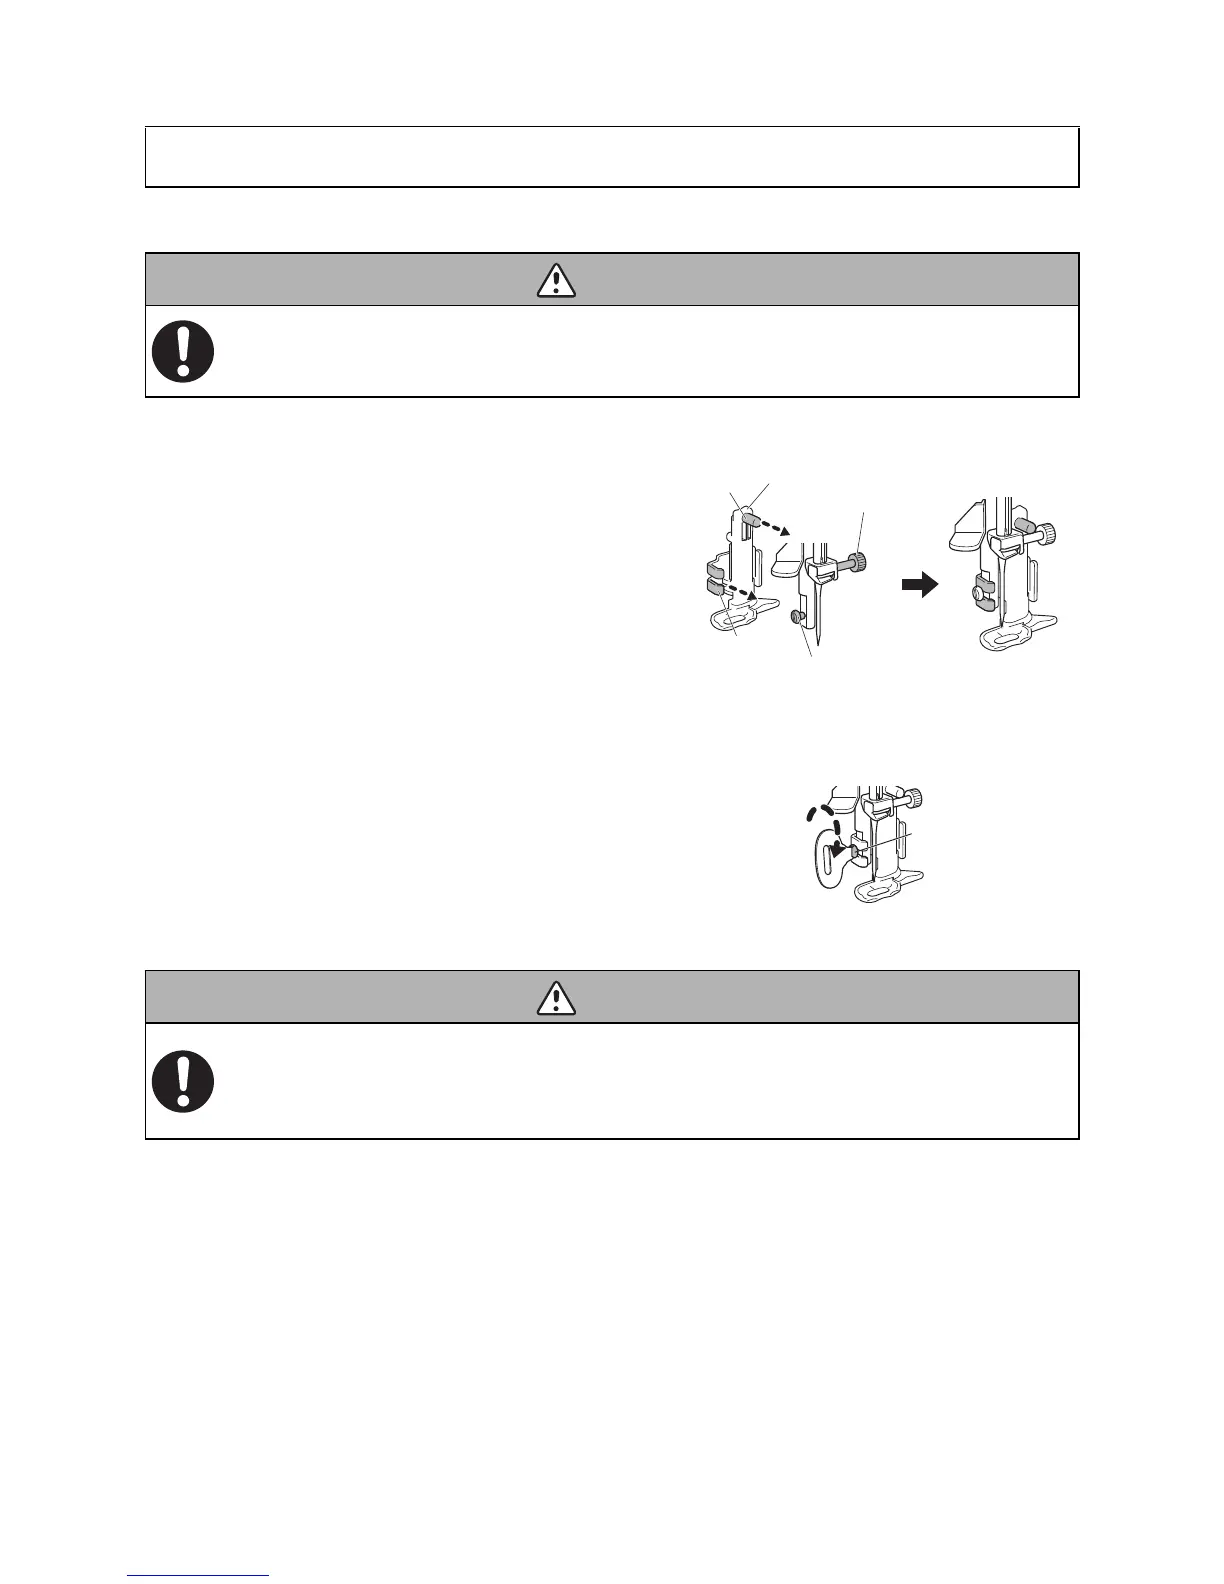
2 Secure the embroidering foot.
While holding the embroidering foot straight with your right
hand, tighten the presser foot holder clamp screw with the
needle plate screwdriver in your left hand.
9 Sewing (free-motion embroidering)
Before changing the presser foot, use the main power switch to turn off the sewing
machine.
Not doing so could cause injuries.
Firmly tighten the screw with the included screwdriver, and check that the needle does
not hit the presser foot.
If the screw is loose, the needle will hit the presser foot and break or bend, which could cause
injuries.
Clamp
Pin
Needle clamp screw
Presser foot holder
clamp screw
Embroidering foot
Presser foot
holder clamp
screw
 Loading...