66
■ Buttonhole sewing
For video tutorial, visit http://www.toyotaoekakisewing.com
Buttonholes can be sewn to match the size of the button. With stretch fabrics or thin fabrics, it is recommended
to use a stabilizer for a better buttonhole finish.
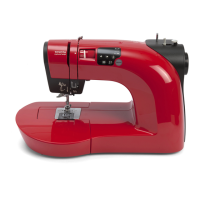
1 Select the stitch in the operation panel.
* Check that the OEKAKI (free-motion embroidering) button is not lit.
* Refer to “Selecting the stitch” (page 44).
* Before sewing buttonholes, check the stitch length and stitch width by sewing a trial buttonhole on a scrap piece of
fabric.
* Maximum size of the button is diameter 25.4mm.
The buttonhole will automatically be sewn in the order of the numbers shown in the illustration.
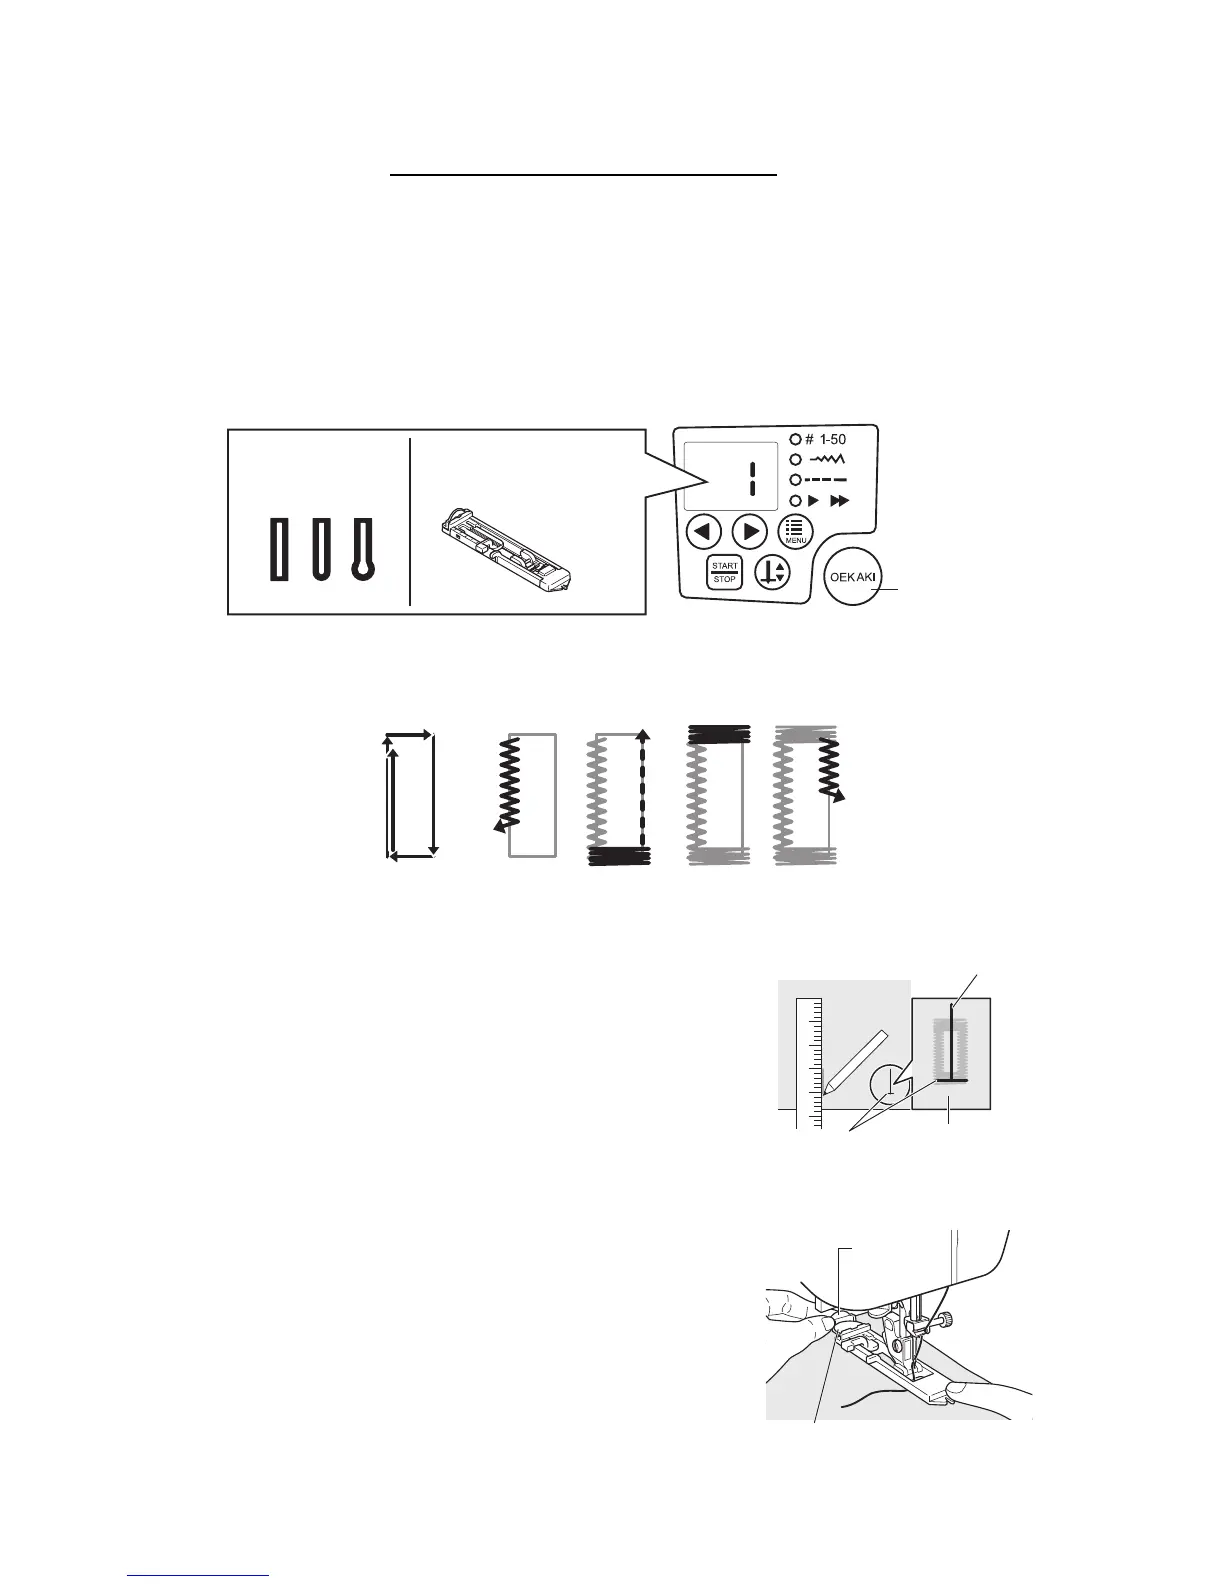
2 Mark the position of the beginning of sewing for the
buttonhole.
3 Pull out the button holder plate on the presser foot,
and then insert the button to fit into the holder.
* The size of the buttonhole to be sewn is determined by the size of
the button placed in the button holder plate.
 Loading...