84
Tacking
For video tutorial, visit http://www.toyotaoekakisewing.com
Tacking (temporary stitching) can be sewn with the sewing machine to prevent overlapping layers of fabric from
becoming misaligned.
1 Follow steps 1 through 5 in “Sewing (free-motion embroidering)” (refer to page 74).
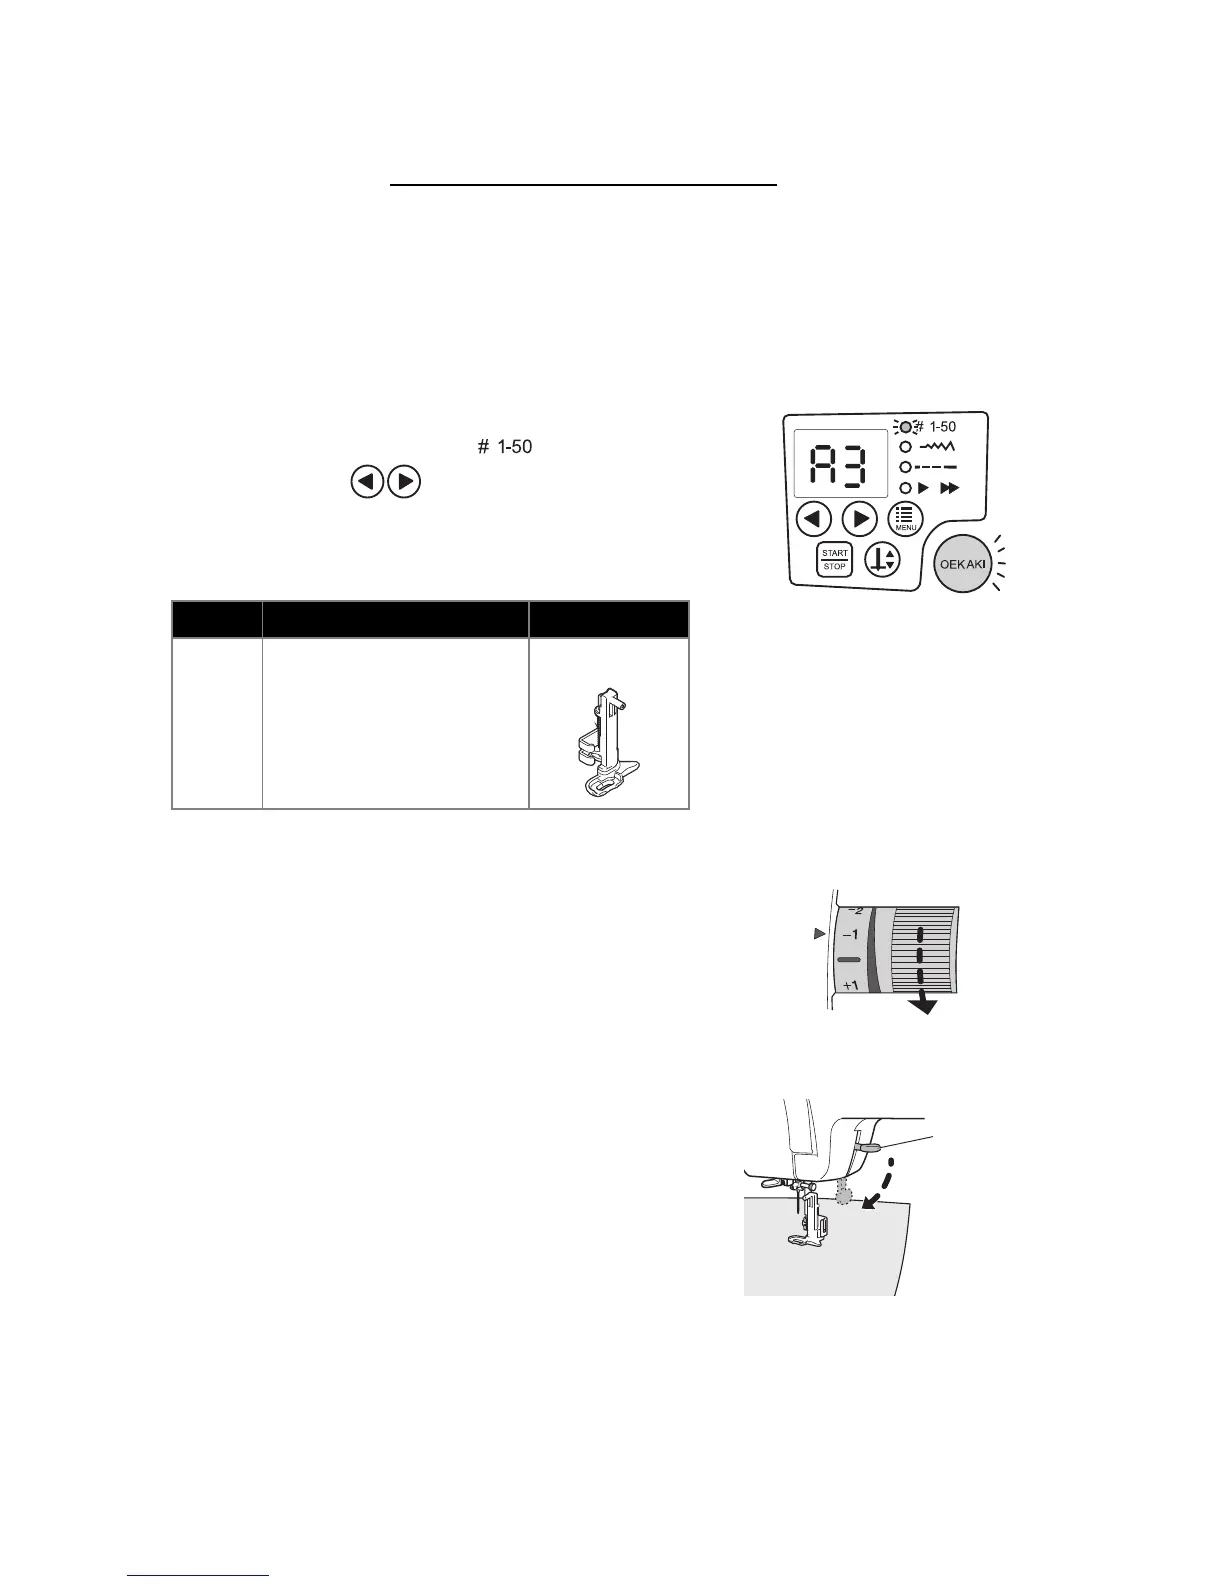
2 From the operation panel, select stitch number A3.
Press the function button until the LED lights up,
and then press the (setting) buttons to set the
stitch number to A3.
* The stitch number appears in the LED display.
<Stitches that can be used>
3 Adjust the upper thread tension.
Set the upper thread tension dial to “-1”.
4 Position the fabric under the presser foot, and
then lower the presser foot lever.
5 Lightly guide the fabric with your hands, and then step on the foot controller.
* When stitch number A3 is selected, pressing the foot controller only sews one stitch. Only one stitch is sewn, even if
you keep the foot controller pressed down.
No. Application Presser foot
A3 Tacking (left needle position)
Embroidering foot
 Loading...