56 Installation and maintenance instructions 0020308118_05
Result:
Heat exchanger dirty
▶ Clean the heat exchanger. (→ Section 12.8.2)
15. Check the insulating mat on the heat exchanger for
damage.
Result:
Insulating mat damaged
▶ Replace the insulating mat (→ Spare parts instruc-
tions for the heat exchanger insulating mat).
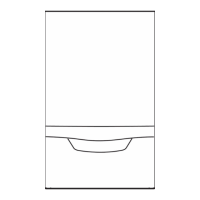
12.7.2 Installing the compact thermal module
1. Connect the compact thermal module to the heat ex-
changer (1).
2. Tighten the four new nuts in a cross-wise pattern until
the burner flange fits closely and uniformly onto the
mating surfaces.
– Tightening torque: 6 Nm
3. Reconnect the earth cable (6) to the ignition electrode
(4). Reconnect the two plugs on the ignition trans-
former (5) and the plug for the control electrode's cable
(3).
4. Reconnect the plug or, if required, the two plugs to the
fan motor (2).
5. Reconnect the two plugs to the gas valve assembly (3).
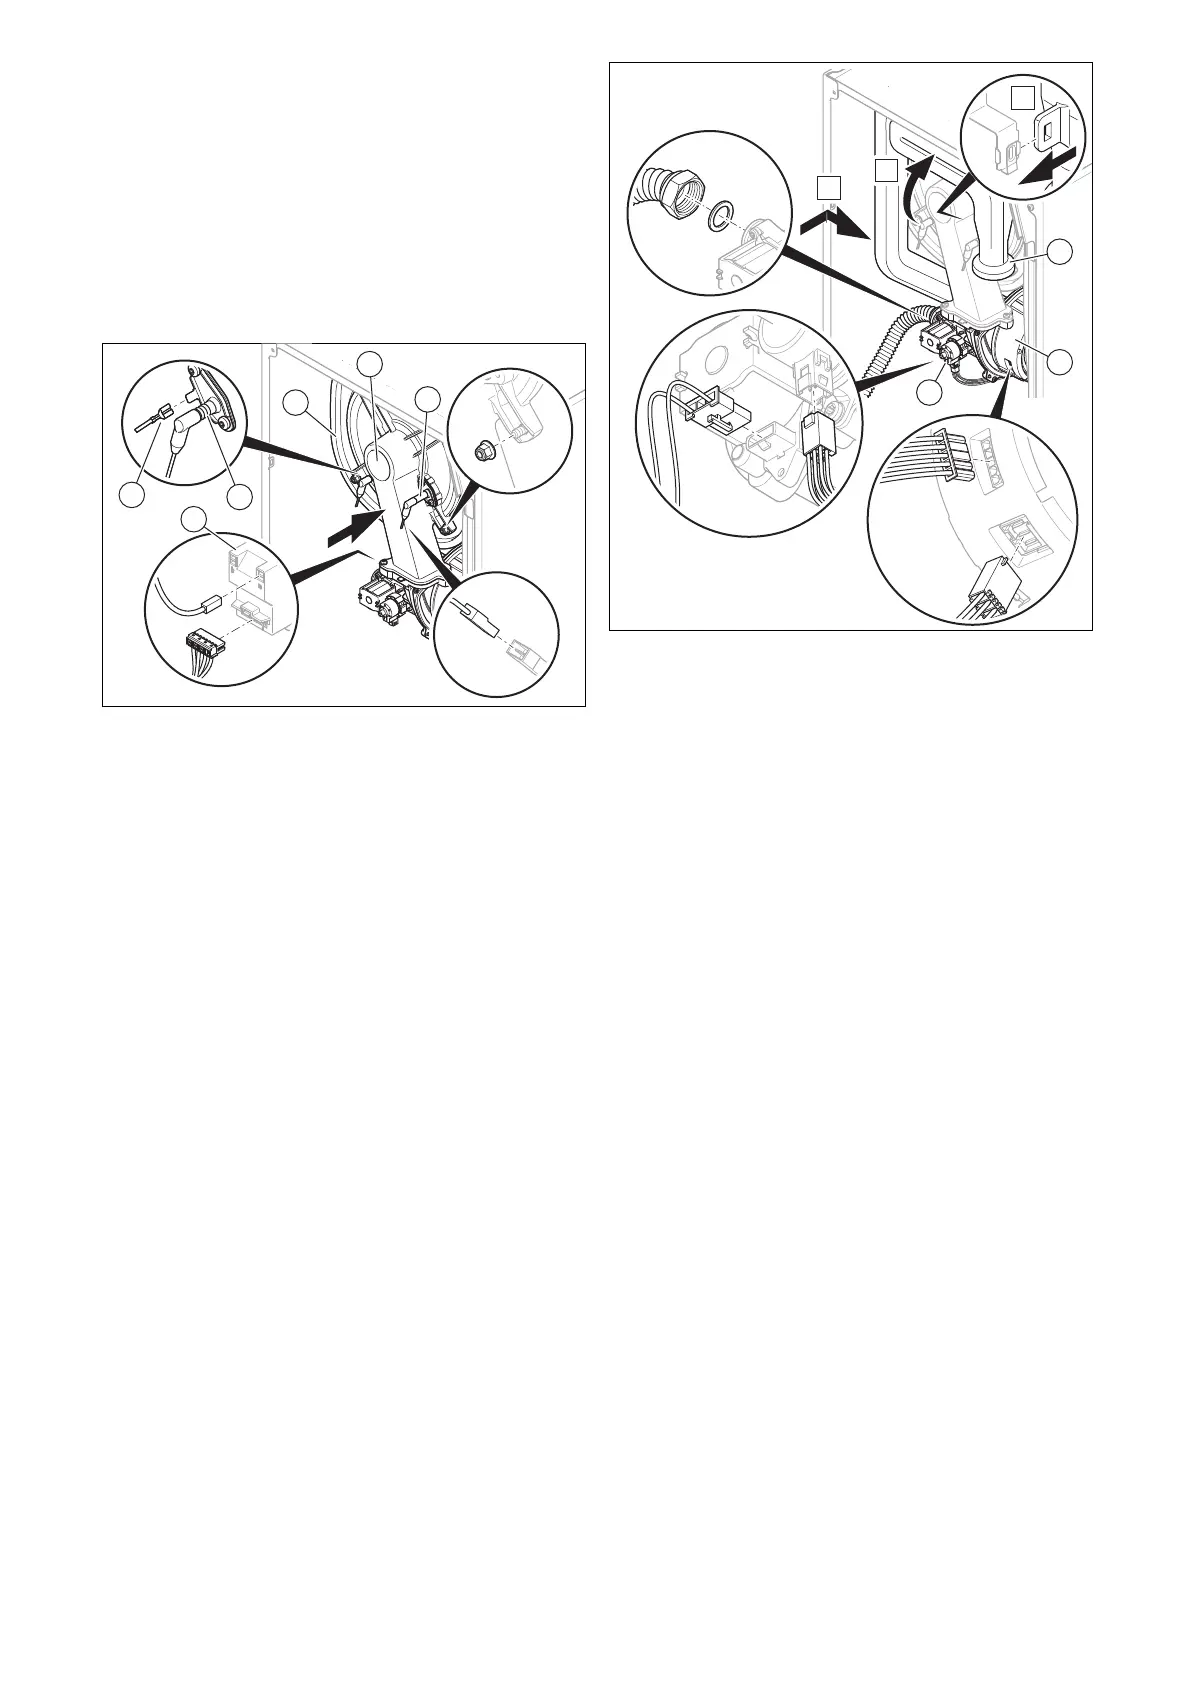
6. Screw the union nut onto the gas valve assembly with
a new seal. In the process, secure the gas pipe against
twisting. Tightening torque, see appendix.
7. Open the gas stopcock.
8. Check the product for tightness. (→ Section 9.17)
9. Check whether the sealing ring is positioned correctly
in the air intake pipe.
10. Plug the air intake pipe (1) onto the intake stub and
push the air intake pipe into the upper retainer, as
shown in the figure.
11. Check the gas connection pressure/gas flow pressure.
(→ Section 9.13.3)
12. Observe the tightening torques for the screw plug on
the gas valve assembly and on the gas isolation valve,
see appendix.
12.8 Cleaning/checking the components
1. Carry out the preparatory work before
cleaning/checking any of the components.
(→ Section 12.8.1)
2. Carry out the work required to finish the task
after cleaning/checking any of the components.
(→ Section 12.8.7)
12.8.1 Preparing the cleaning and inspection work
1. Temporarily decommission the product.
(→ Section 14.2)
2. If required, remove the installed modules from below
the product (→ Module installation instructions).
3. Remove the front casing. (→ Section 7.10.2)
4. Hinge the electronics box downwards.
5. Protect the electronics box against spraying water.
6. Remove the compact thermal module.
(→ Section 12.7.1)
 Loading...