February, 2008
4-68
WorkCentre 5225, 5230
REP 11.4.1
Launch Version
Repairs and Adjustments
• Rotation: degree
• Direction: +ve: Right, -ve: Left
12. Turn off the power.
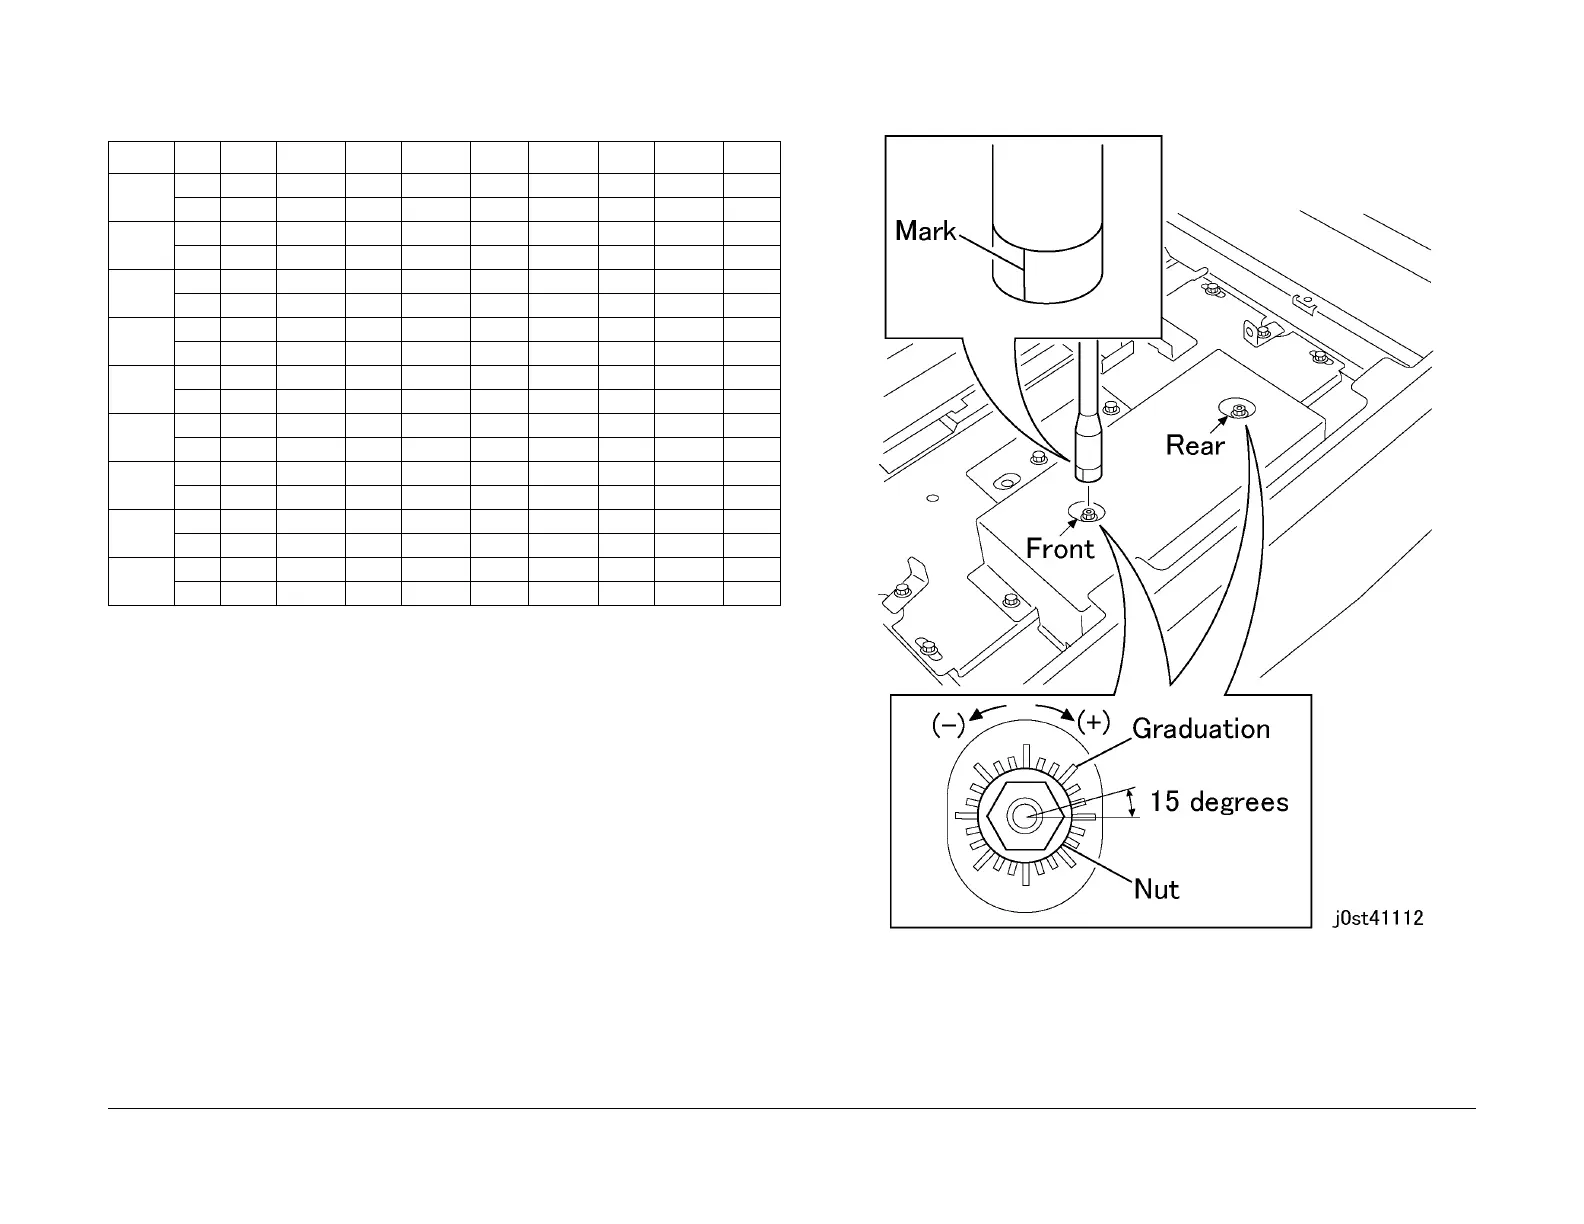
13. Remove the Platen Glass. Turn the respective nuts using the Box Driver according to the
direction and amount given in Step 11. (Figure 6)
NOTE: As it is difficult to control the rotation amount, draw a line on the paper to make a
mark at the tip of the Box Driver using tape as shown in the figure below.
Figure 6 Making the mark(j0st41112)
14. Turn on the power again and repeat Steps 9 and 10.
15. Adjustment is complete if L0 and R0 satisfy the specifications. Repeat Steps 11 to 14 until
L0 and R0 satisfy the specifications (L0=15+/-1.6 mm, R0=15+/-1.6 mm).
16. Check the Side Registration. If it does not fall within the specifications, perform ADJ
11.1.1 IIT Lead/Side Registration Adjustment.
Table 1 Adjustment Table (Nut Rotation Amount)
R0=13 R0=13.5 R0=14 R0=14.5 R0=15 R0=15.5 R0=16 R0=16.5 R0=17
L0=13 Front +165 +240 +315 +390 +465 +555 +630 +705 +780
Rear +165 +45 -90 -210 -330 -450 -570 -690 -810
L0=13.5 Front +45 +120 +195 +270 +360 +435 +510 +585 +660
Rear +240 +120 0 -120 -240 -375 -495 -615 -735
L0=14 Front -75 0 +75 +165 +240 +315 +390 +465 +555
Rear +330 +195 +75 -45 -165 -285 -405 -525 -645
L0=14.5 Front -195 -120 -45 +45 +120 +195 +270 +345 +435
Rear +405 +285 +165 +45 -75 -210 -330 -450 -570
L0=15 Front -315 -240 -150 -75 0 +75 +150 +240 +315
Rear +495 +360 +240 +120 0 -120 -240 -360 -495
L0=15.5 Front -435 -345 -270 -195 -120 -45 +45 +120 +195
Rear +570 +450 +330 +210 +75 -45 -165 -285 -405
L0=16 Front -555 -465 -390 -315 -240 -165 -75 0 +75
Rear +645 +525 +405 +285 +165 +45 -75 -195 -330
L0=16.5 Front -660 -585 -510 -435 -360 -270 -195 -120 -45
Rear +735 +615 +495 +375 +240 +120 0 -120 -240
L0=17 Front -780 -705 -630 -555 -465 -390 -315 -240 -165
Rear +810 +690 +570 +450 +330 +210 +90 -45 -165

 Loading...


