Lower hitch disassembl
Height adjustment and disassembly of the multi-level hitch attachment tail piece
Never insert your fingers into the holes in the multi-level hitch console as there is a risk of
injury.
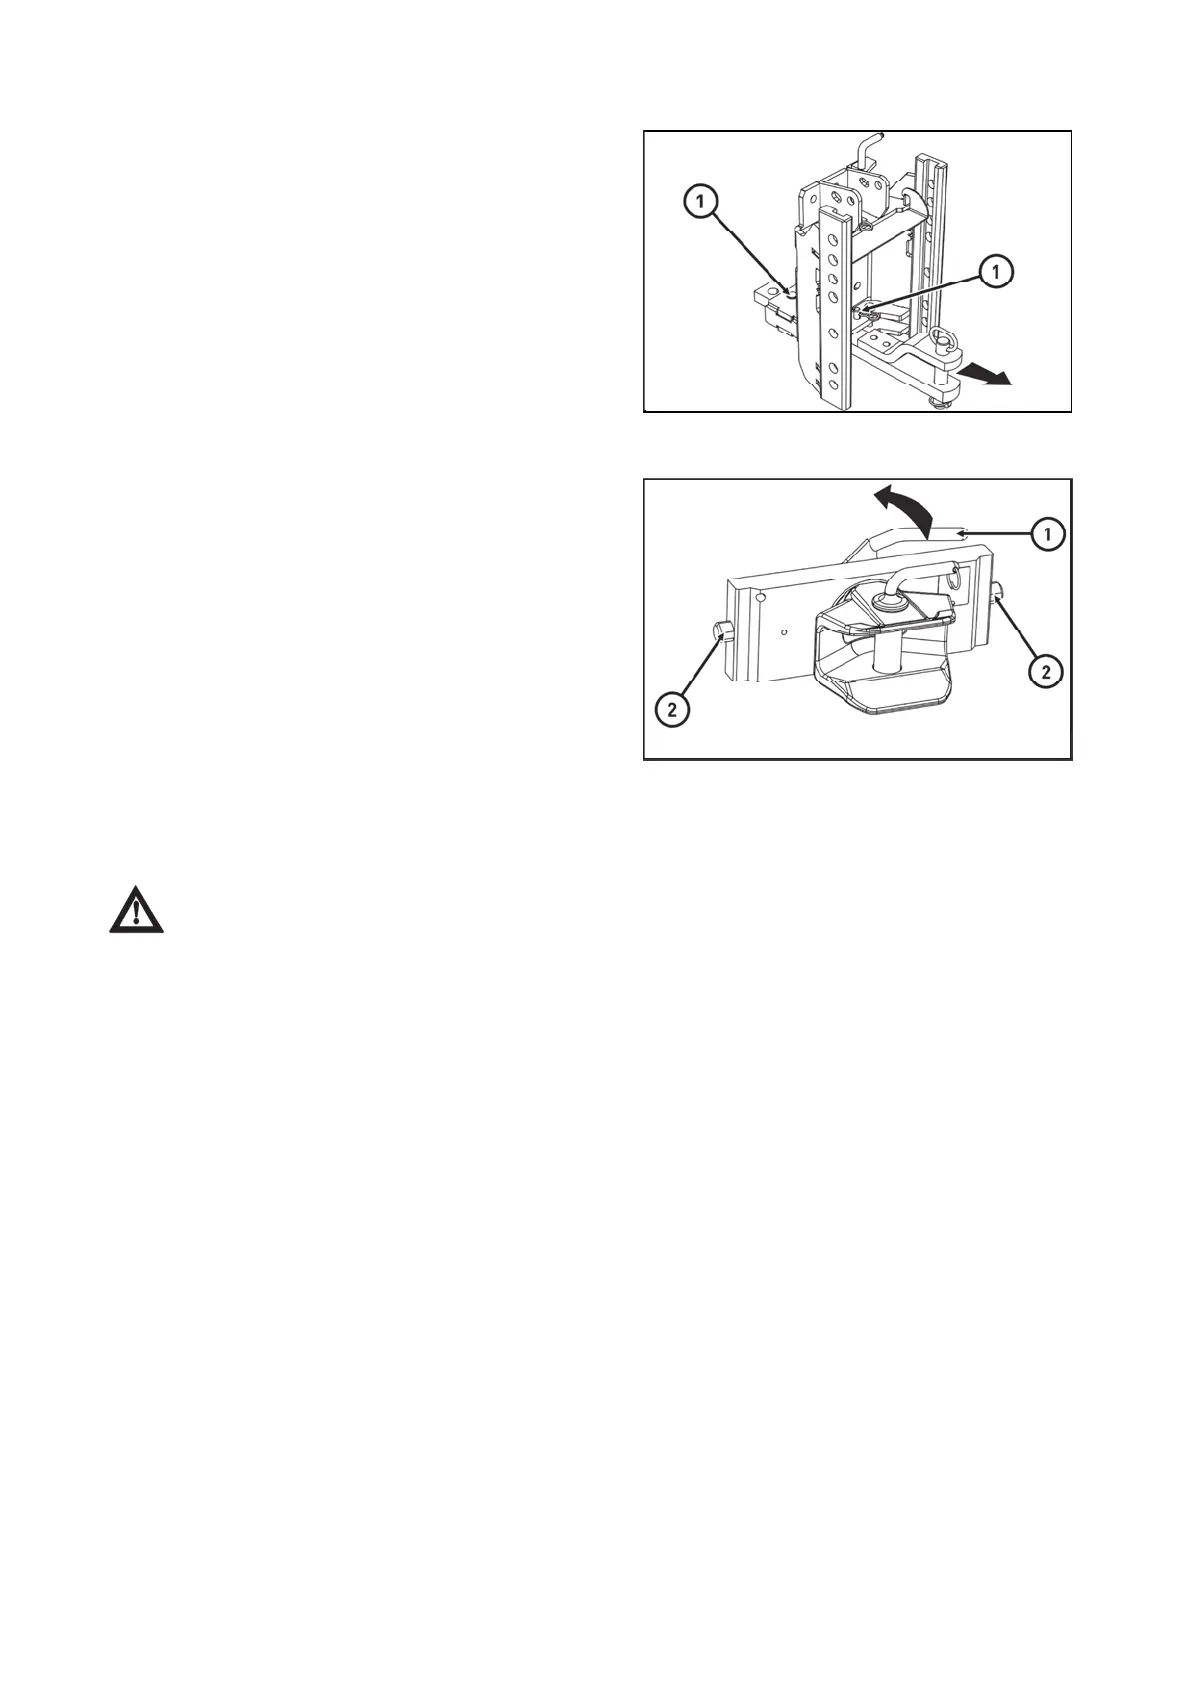
fter releasing the locking devices, remove the two pins
(1).
Remove the lower hitch by pulling it backwards in the
direction of the arrow.
Follow the reverse procedure to reassemble the lower
hitch.
UCL18NN009
Remove the rear PTO cover and, if necessary, the lower
hitch before handling the multi-level hitch attachment tail
piece.
Grasp the multi-level hitch attachment tail piece firmly.
Moving the lever (1) in the direction of the arrow (upwards)
engages the locking pins (2) and the tail piece is freely
movable in the grooves of the multi-level console.
Adjust the multi-level hitch attachment tail piece to
a suitable height so that the locking pins (2) are aligned
with the holes in the multi-level hitch console and release
the lever (1); the locking pins (2) slide into the holes in the
multi-level hitch console.
Check that the pins (2) slightly overlap the outer edge of
the multi-level console.
Perform the disassembly of the multi-level hitch
attachment tail piece after pulling the lever (1), by sliding
the tail piece upwards out of the grooves of the multi-level
console. Perform the assembl
in the reverse order
UCL18NN008
CONTROLS, INSTRUMENTS & OPERATIONS
 Loading...