NoteAction
Note
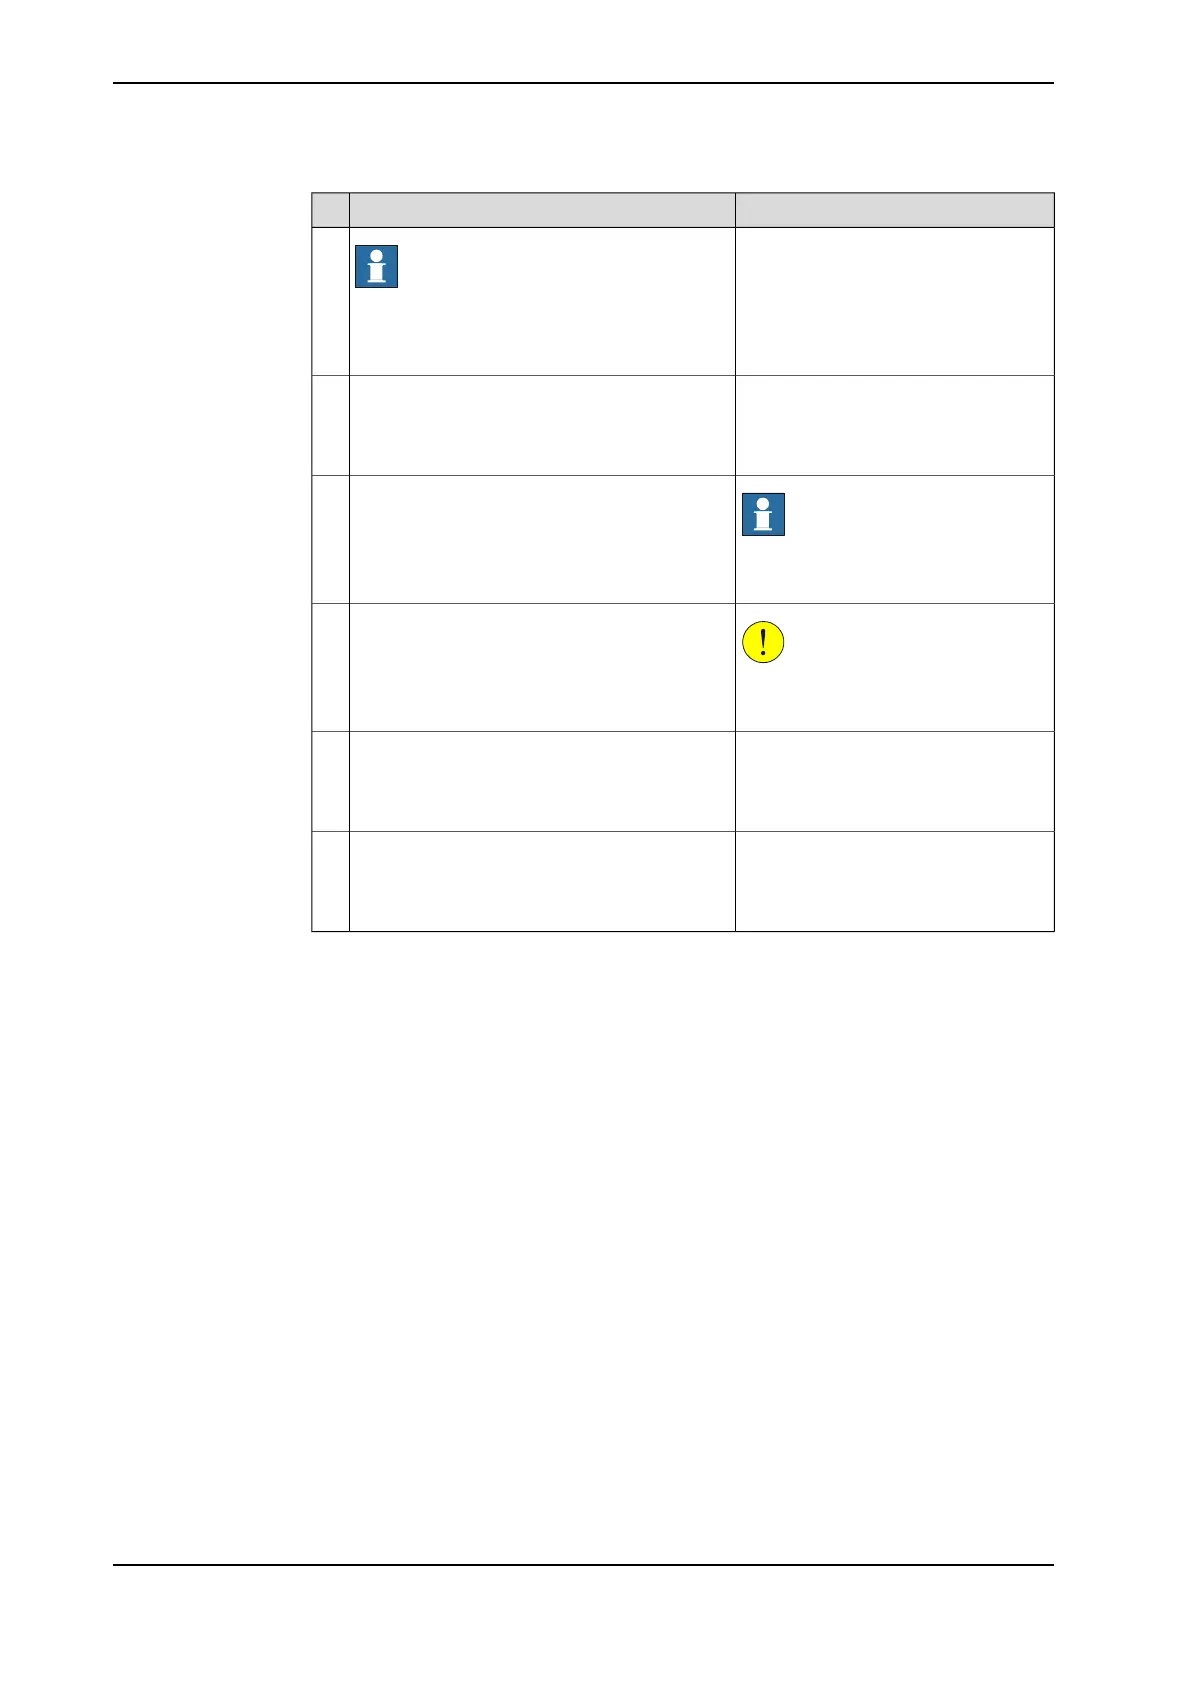
Whenever parting/mating motor and gearbox,
the gears may be damaged if excessive force
is used!
13
See the figure in:
• Location of axis-1 and axis-2
motors on page 301
Remove the attachment screws securing the
motor.
If needed use a 300 mm extension for bits 1/2"
(Motor axis 1).
14
Note
Always use removal tools in pairs diag-
onal to each other.
If required, press the motor out of position by
fitting two threaded bars in the threaded holes
in the motor flange.
15
CAUTION
Lift the motor gently in order not to
damage pinion or gears.
Remove the motor!16
See the figure in:
• Location of axis-1 and axis-2
motors on page 301
Only applicable to motor axis 1!
Cover the hole if replacement of motor axis 1
is not immediate, in order to avoid contamina-
tion.
17
See the figure in:
• Location of axis-1 and axis-2
motors on page 301
Only applicable to motors axes 4, 5 and 6!
Check that the o-ring also is removed. It might
stay in the armhouse when the motor is re-
moved.
18
312 Product manual - IRB 2600
3HAC035504-001 Revision: Q
© Copyright 2009-2018 ABB. All rights reserved.
4 Repair
4.7.1 Removing motors
Continued
 Loading...
