60 Chapter 3
Removing the Keyboard
IMPORTANT: The keyboard is easily warped or damaged during the removal process. Take care not to use
excessive force when removing the keyboard and replace if any damage occurs.
1. See “Removing the Battery Pack” on page 46.
2. Turn the computer rightside up and open the lid to the full extent.
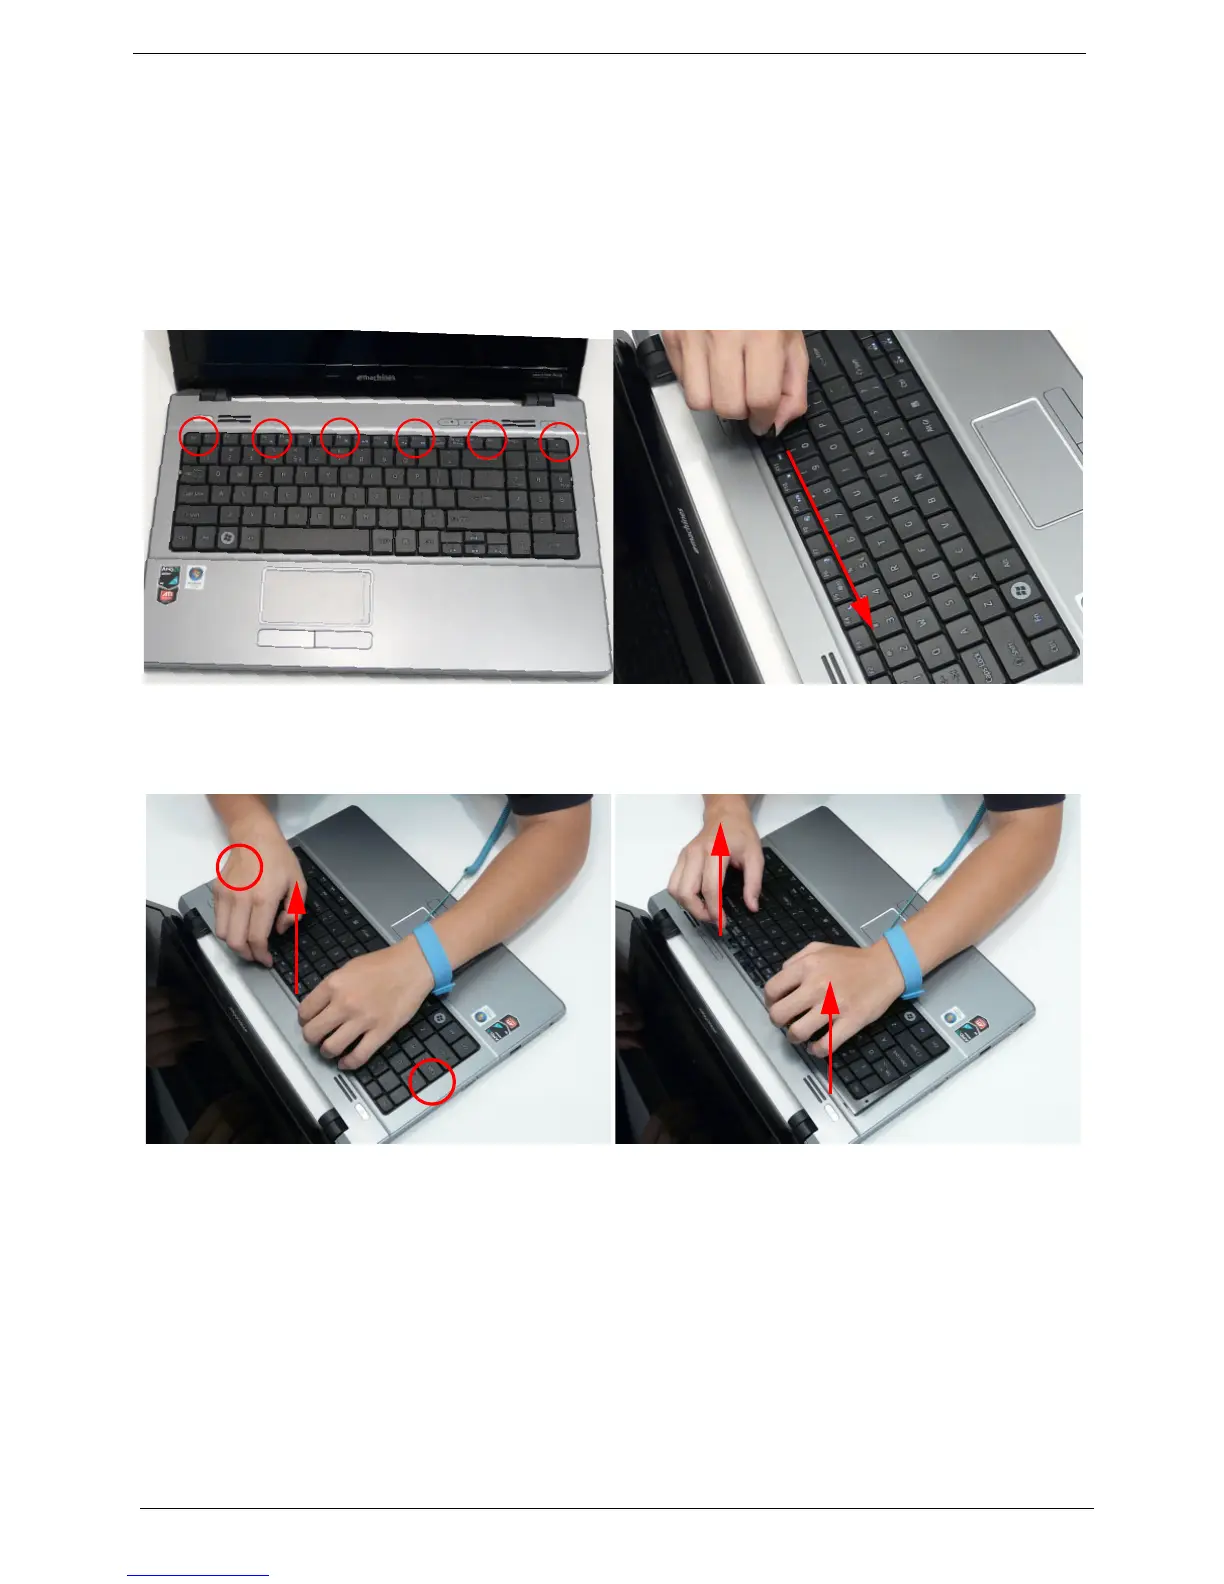
3. Unlock the six securing latches by pressing down with a suitable plastic tool then sliding along the back
edge of the keyboard.
IMPORTANT: The use of metal tools may damage the outer casing. Use plastic tools where available.
4. Pull up on the center of the keyboard to release the two tabs on each side and lift the Keyboard away from
the Upper Cover as shown.
IMPORTANT: Do not remove the Keyboard from the Upper Cover; the Keyboard FFC is still attached.
5. Place the keyboard as shown.

 Loading...