Stamped/Wire Guard Spark Arrester Screw(s)
TorqueModels
71-124 lb-in (8-14 N-m)130G00, 131G00, 13R200
27-44 lb-in (3-5 N-m)13U100, 13U200
NOTE: Spark arrester is installed in either the 9 o'clock
or the optional 6 o'clock position.
Change 6:1 Gear Reduction Oil (If Equipped)
1. Remove spark plug wire from spark plug terminal.
Secure spark plug wire to prevent unintentional contact
with spark plug terminal.
2. Place engine on a flat, level surface.
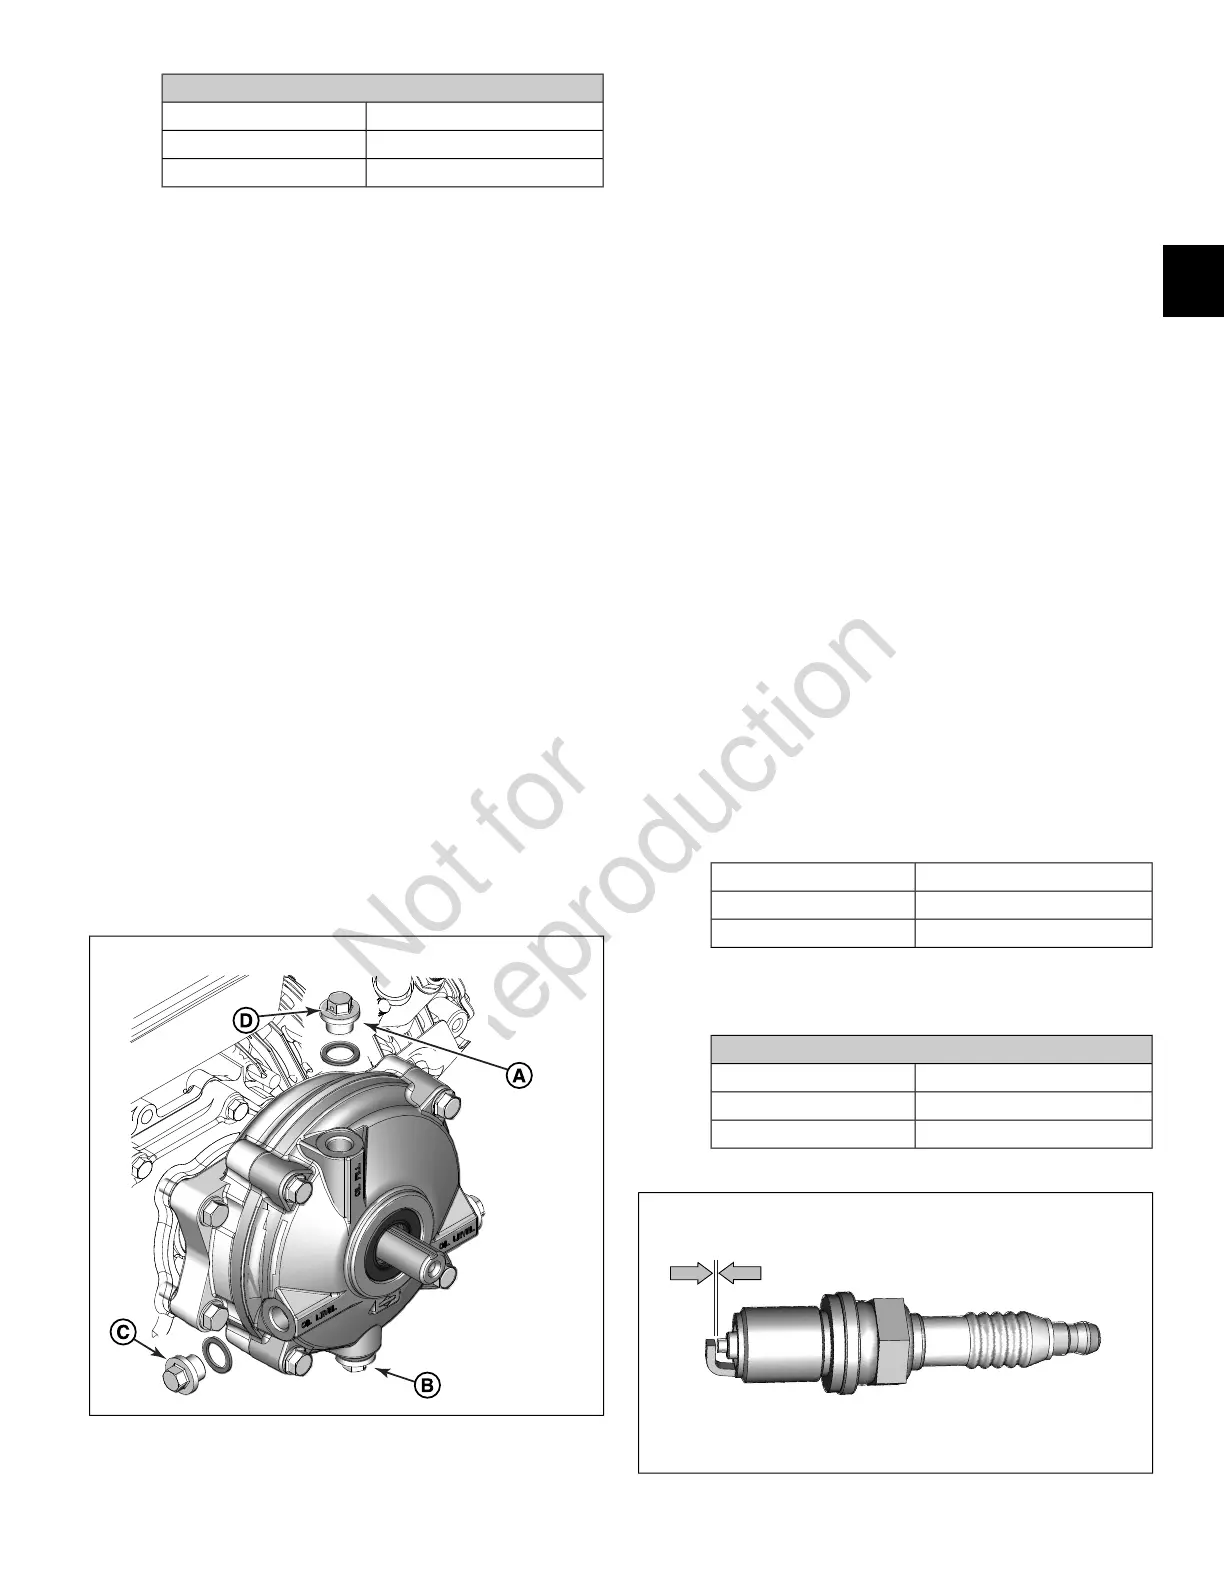
3. See Figure 9. Remove oil fill/vent plug (A) with sealing
washer from the gear case cover.
4. Remove oil drain plug (B) with sealing washer and drain
oil into an approved container.
5. Install oil drain plug with sealing washer and tighten to
180-210 lb-in (20.3-23.7 N-m).
6. Remove oil level plug (C) with sealing washer.
7. Slowly add the appropriate oil into the oil fill hole until
oil begins to run out of the oil level hole (approximately
4 ounces).
• Use SAE 80W-90 above 40° F (10° C)
• Use SAE 10W-30 below 40° F (10° C)
8. Install oil level plug with sealing washer. Install oil
fill/vent plug with copper washer. Tighten each plug to
180-210 lb-in (20.3-23.7 N-m).
9
NOTE: Verify that vent hole (D) of oil fill/vent plug is
facing outside.
9. Dispose of used oil at a proper waste disposal or
recycling center.
Clean/Gap/Replace Spark Plug
NOTE: Spark plugs have different thread lengths and heat
ranges. Always use the specified replacement spark plug
or engine damage can occur.
NOTE: Some localities require use of a special resistor type
spark plug to suppress ignition noise. If the engine was
originally equipped with a resistor type spark plug, be sure
to use the same replacement spark plug.
1. Remove spark plug wire from spark plug terminal.
2. Thoroughly clean area around spark plug to keep dirt
and debris out of combustion chamber.
3. Remove spark plug from cylinder head using the 5/8
inch Spark Plug Wrench (Part No. 19576S).
4. Check condition of threads in cylinder head. If
necessary, soften deposits with penetrating oil and
clean out with a thread chaser.
5. Clean spark plug using a wire brush and commercial
solvent. Do not bead blast spark plug. Obtain new spark
plug if electrode is pitted or burned, or if porcelain is
cracked.
6. See Figure 10. Using a feeler gauge, verify spark plug
gap is as follows. If necessary, adjust gap by carefully
bending ground electrode.
Spark Plug GapModels
0.027-0.033 in (0.69-0.83 mm)130G00, 131G00, 13R200
0.028-0.035 in (0.70-0.90 mm)13U100, 13U200
7. Finger tighten spark plug into cylinder head, and then
tighten as follows.
Spark Plug
TorqueModels
140-200 lb-in (15.8-22.6 N-m)130G00, 131G00, 13R200
230-319 lb-in (26-36 N-m)13U100, 13U200
10
15
2
 Loading...