134
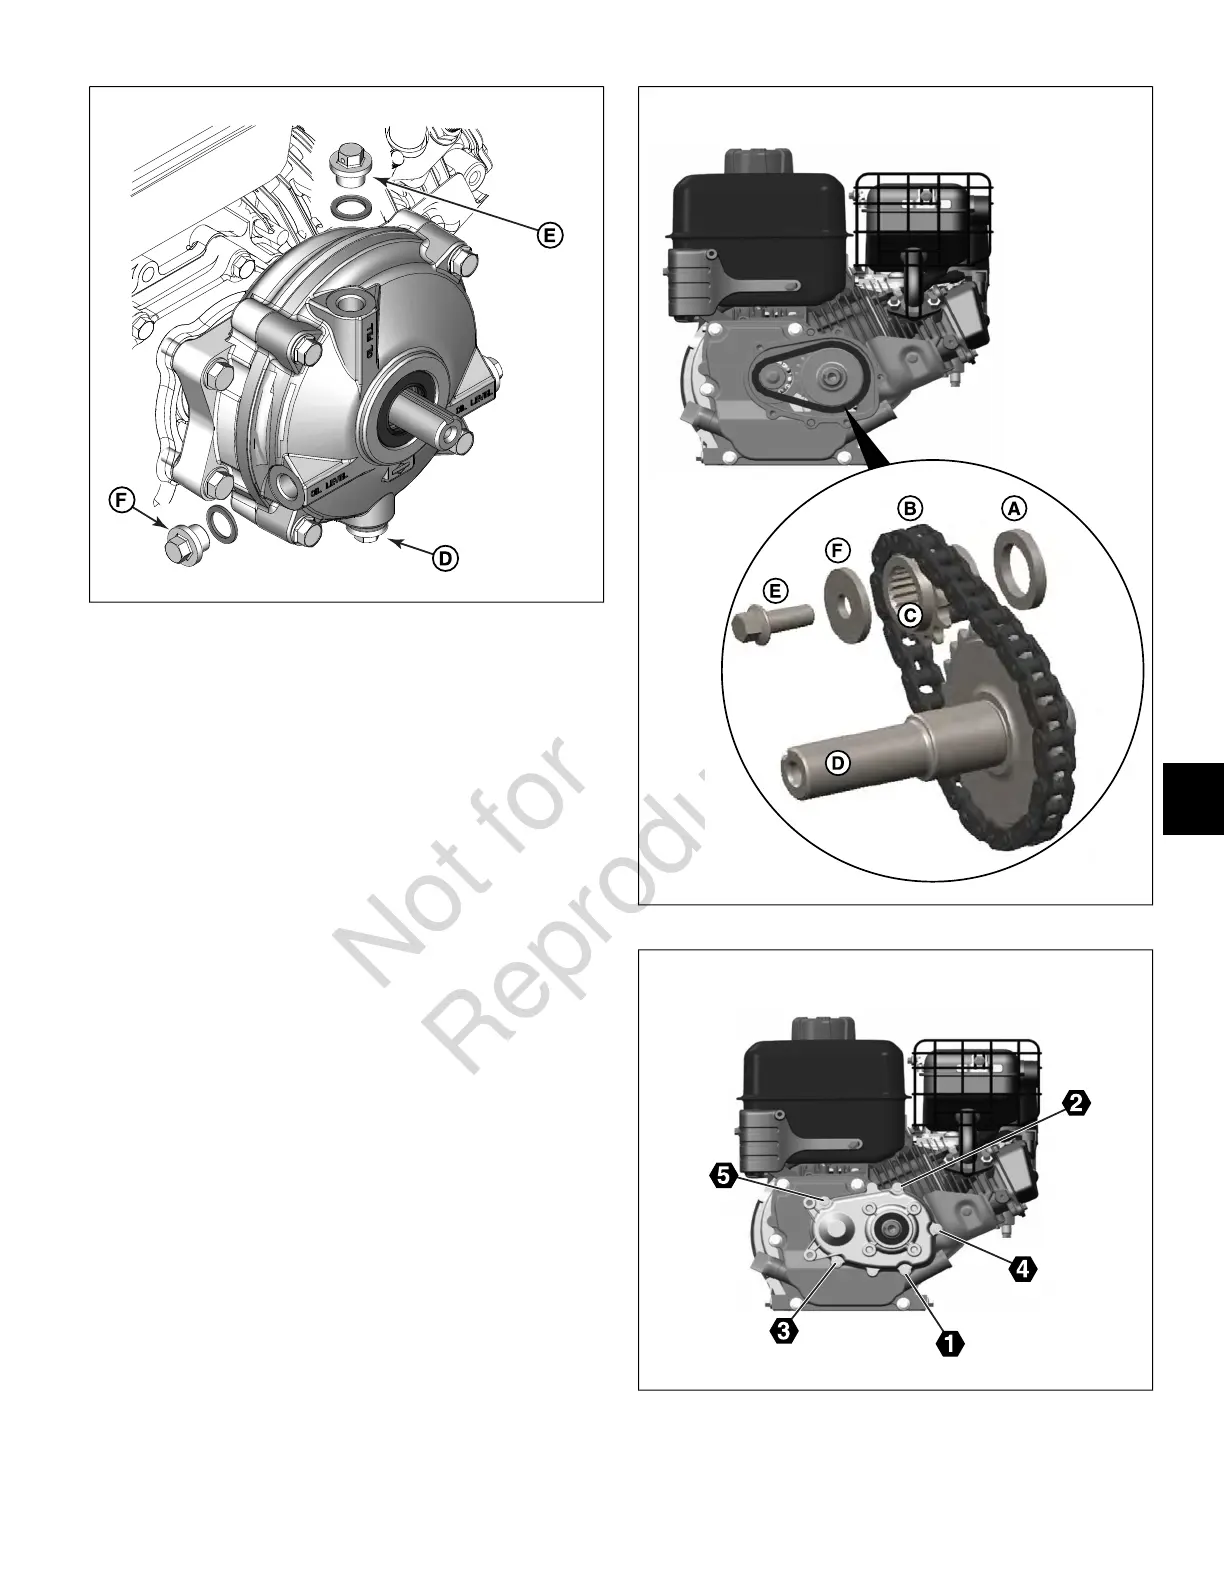
17. Install oil level plug with sealing washer. Install oil
fill/vent plug with copper washer. Tighten each plug to
180-210 lb-in (20.3-23.7 N-m).
NOTE: Verify that vent hole of oil fill/vent plug is facing
outside.
2:1 Gear Reduction Unit
1. Verify that PTO bearing oil seal is NOT installed in
crankcase cover.
2. See Figure 135. Install spacer (A) onto crankshaft.
3. Install chain (B) on sprocket (C) and output shaft (D).
4. Slide sprocket over crankshaft while fitting output shaft
into crankcase cover bore.
5. Start hex flange screw (E) with flat washer (F) into
crankshaft. Tighten screw to 255-315 lb-in (28.8-35.6
N-m).
6. Install two locating pins at the 6 o'clock and 12 o'clock
positions on the crankcase cover flange.
7. Place new gear cover gasket onto locating pins.
8. See Figure 136. Start five screws to fasten gear cover
to crankcase cover. Alternately tighten screws to 75-95
lb-in (8.5-10.7 N-m) using the sequence shown.
135
136
91
8
 Loading...