Synchronizing with an External Device
88
Synchronizing with an External Device
Using genlock synchronization, you can synchronize this camcorder’s video signal to that of an external video
device. Similarly, using an external time code signal, you can synchronize this camcorder’s time code to the
external signal. Using the external time code signal with multiple cameras allows you to set up a multi-camera
recording. You can also output the time code signal from this camcorder to achieve the same result. If you
output the time code from the HD/SD SDI terminal to an editing device, the editor can create video with the
same time code.
Connecting an External Device
When synchronizing the camcorder to an external signal, input a reference video signal* through the GENLOCK
terminal or output the camcorder’s signal as a reference signal for an external device through the SYNC OUT
terminal.
When synchronizing a time code signal, use the TIME CODE terminal. Be sure to set the TIME CODE terminal to
input or output in advance.
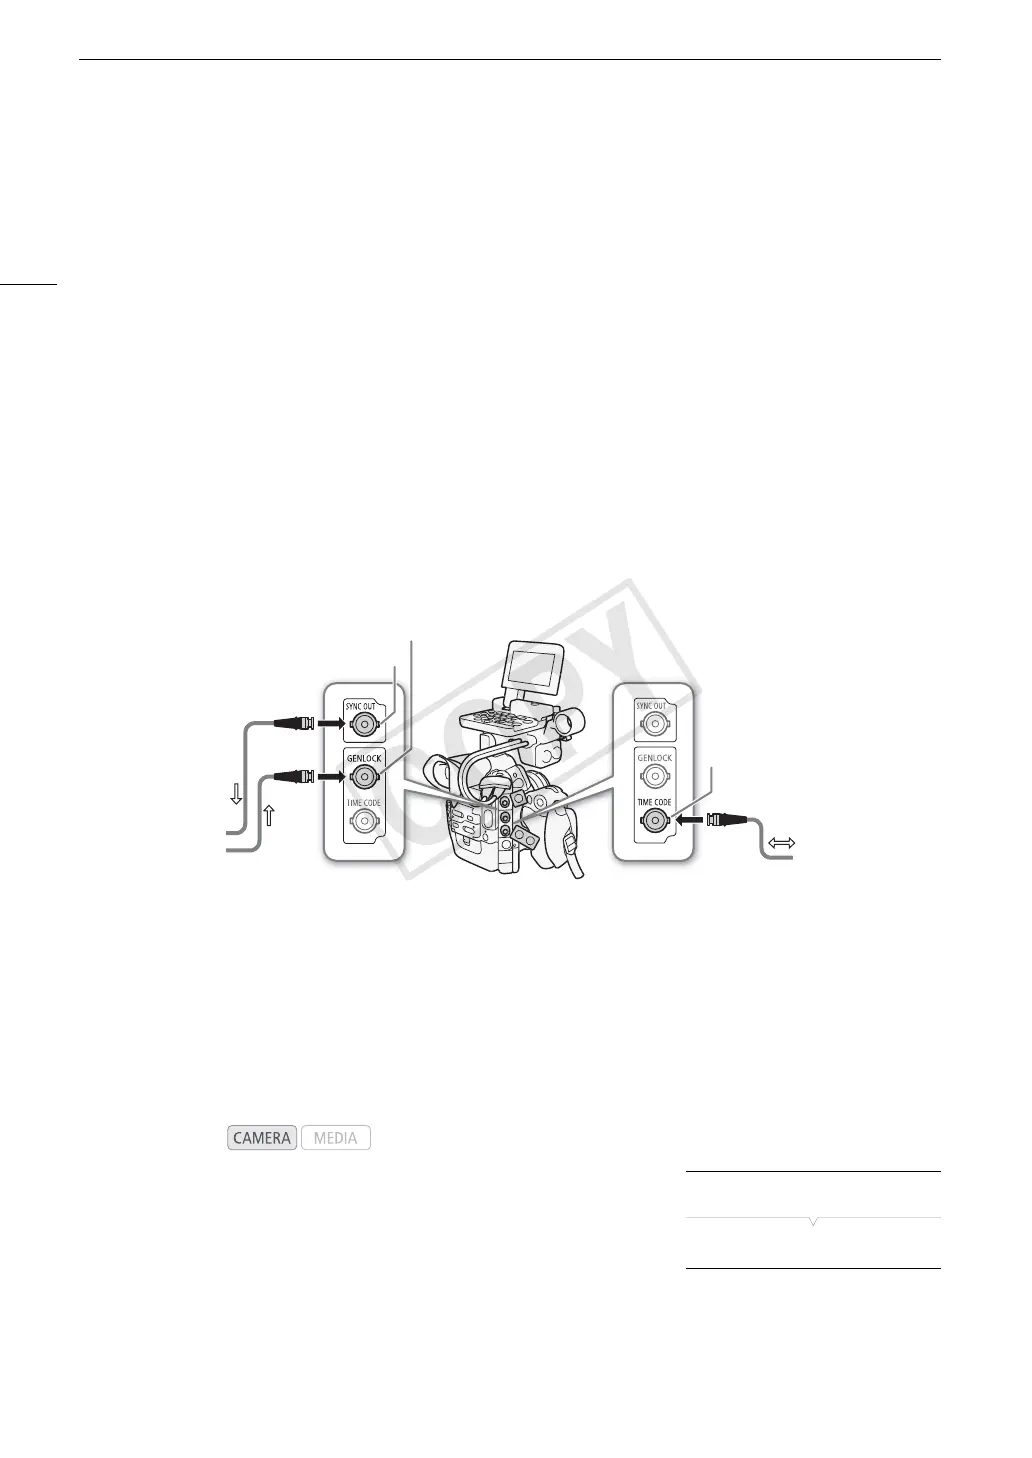
Connect the external device to the camcorder as shown in the following diagram.
* For the reference video signal, you can use an analog blackburst or tri-level signal.
Connection Diagram
Reference Video Signal Input (Genlock Synchronization)
When a reference sync signal (analog blackburst or tri-level signal) is input through the GENLOCK terminal, the
phases of the camcorder’s V and H sync will automatically be synchronized to it. The phase difference between
the external Genlock signal and the camcorder is initially set to 0. The H phase can be adjusted within the range
of approximately ±0.4 H (HD equivalent).
1 Open the [Genlock Adjust.] submenu.
[w Other Functions] > [Genlock Adjust.]
2 Adjust the phase to the desired level, select [Set] and then press
SET.
• Use the joystick (Ý) or SELECT dial to select the value for each field
and press SET to move to the next field.
Operating modes:
SYNC OUT terminal
TIME CODE terminal
GENLOCK
synchronization
Time code
synchronization
GENLOCK terminal
[w Other Functions]
[Genlock Adjust.]
 Loading...