SiBE18-821_C Outdoor Unit
Removal Procedure 445
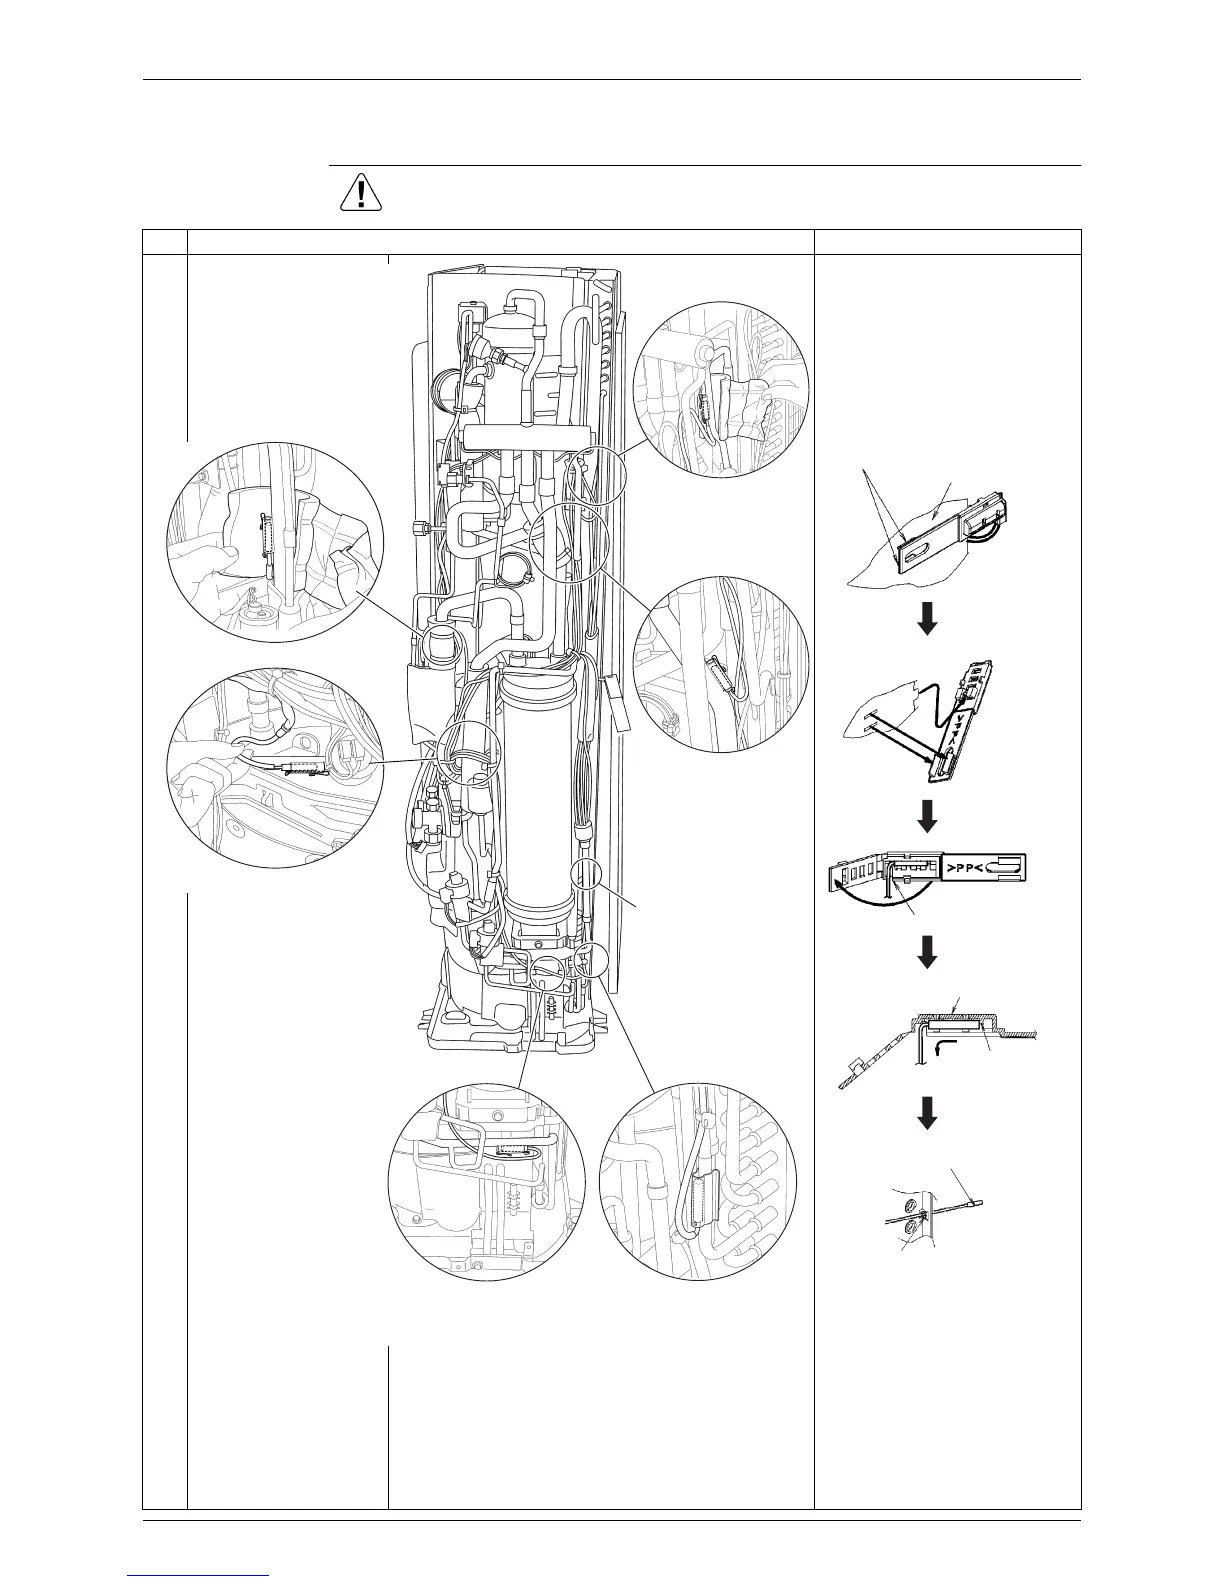
1.4 Removal of Thermistors
Procedure Warning Be sure to commence the disassembling work after 10 minutes or
more elapsed from all power supplies have been turned off.
Step
Procedure Points
1 For the details of the
removal of the outdoor
temperature thermistor
(R1T), see the points
on the right column.
Preparation
Remove the front panel (2)
and the right side panel
according to the "Removal of
Outer Panels".
2 Pull out the discharge
pipe thermistor (R2T).
Removal of the outdoor
temperature thermistor
(R1T)
3 Pull out the suction pipe
thermistors (R3T)
(R5T).
4 Pull out the subcooling
thermistor (R6T) and
the liquid pipe
thermistors (R7T)
(R8T).
5 Pull out the outdoor
heat exchanger
thermistor (R4T).
When reassembling, pass
the outdoor temperature
thermistor through the hole
of the tube plate so as the
yellow marking comes to the
inside edge of the tube plate.
Suction pipe thermistor 2 (R5T)
Discharge pipe thermistor (R2T)
(R13072)
Subcooling
thermistor (R6T)
Suction pipe
thermistor 1 (R3T)
Liquid pipe
thermistor 2 (R8T)
Liquid pipe thermistor 1
(R7T)
Outdoor heat exchanger
thermistor (R4T)
Hooks (2 places)
Right side panel
Notch
Fixing plate for thermistor (R1T)
Stopper
Outdoor temperature thermistor
Marking (yellow)
(R13061)
Removal
direction
 Loading...