XNX Universal Transmitter
Section 3 - Calibration
105
Using the Calibration Cup
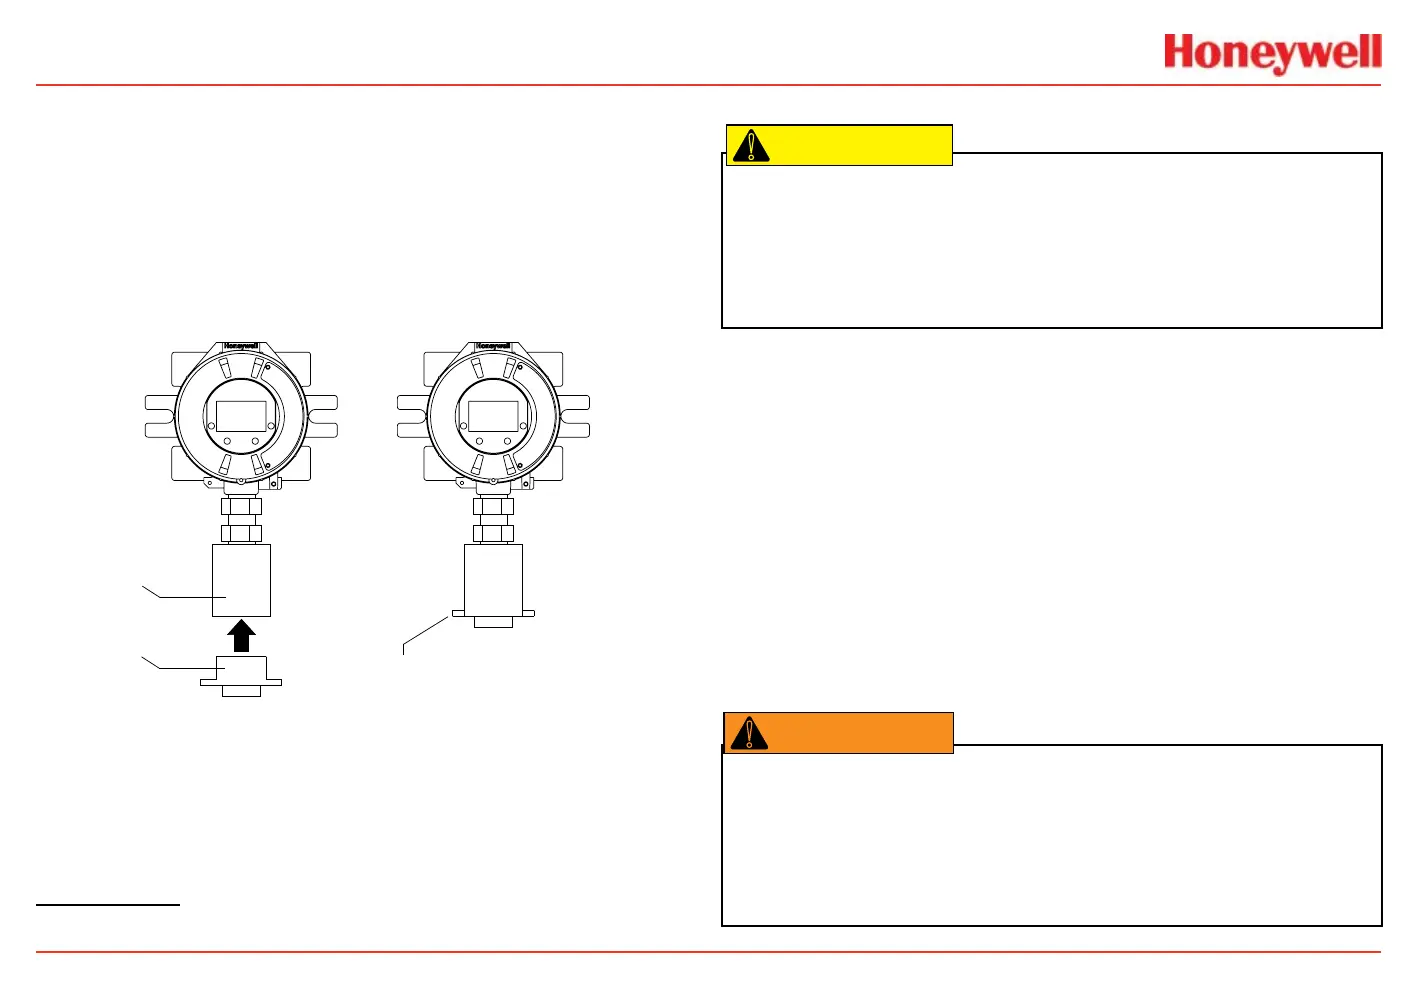
Refer to Figure 202 to attach the calibration cup:
1. Snap the calibration cup into the weather protector. The two
protrusions on the cup t into recesses in the weather protector.
2. Attach the hose from the gas cylinder to the calibration cup. Note
that the cup’s ow is unidirectional. There is an arrow on the
bottom showing ow direction
3. Adjust the calibration ow rate
1
.
weather
protector
calibration cup
attach gas
cylinder hose
Figure 202. Attaching the Calibration Cup
1 300-375 ml/min for XNX EC sensors, 300-700 ml/min for XNX mV sensors, unless other-
wise directed.
Zero and Span Calibration of EC Sensors
Caution: Before initial calibration, allow the sensor to stabilize for 30 minutes after applying power.
When in zero and span calibration modes, the current output from the sensor is inhibited (default
2mA) to avoid false alarms.
Caution: Recalibrate if the temperature of local environment has varied by more than ±15°C from
the temperature of calibration.
!
Hydrogen Sulde
Hydrogen Sulde sensors can be affected by extreme humidity
changes. A sudden increase in ambient humidity can result in a short-
term positive drift in the instrument’s reading. A sudden decrease
in ambient humidity can result in a short-term negative drift in the
instrument’s reading. These are most likely to be noticed during
calibration with dry or cylinder gas.
When calibrating hydrogen sulde cartridges, follow the procedure
in Calibration Procedure. To zero the sensor, use a compressed gas
cylinder of 20.9%Vol oxygen (not nitrogen). Do not use background air.
If a span calibration is to be performed, apply the span calibration gas
immediately after the zeroing procedure. Do not allow the sensor to
return to ambient air conditions.
Warning: Long-term exposure (>20 minutes) to concentrations exceediing the full-scale range of
the H
2
S sensor Type 2 can cause it to lose sensitivity. The measured value may then decrease
even though high levels of toxic gas are still present. If such conditions can occur, set the control unit
to latch at overrange. In standalone operation, set alarms to latching. When resetting the overrange
or alarm, verify the correct operation of the transmitter. Before re-calibrating the transmitter, verify
the absence of gas.
 Loading...