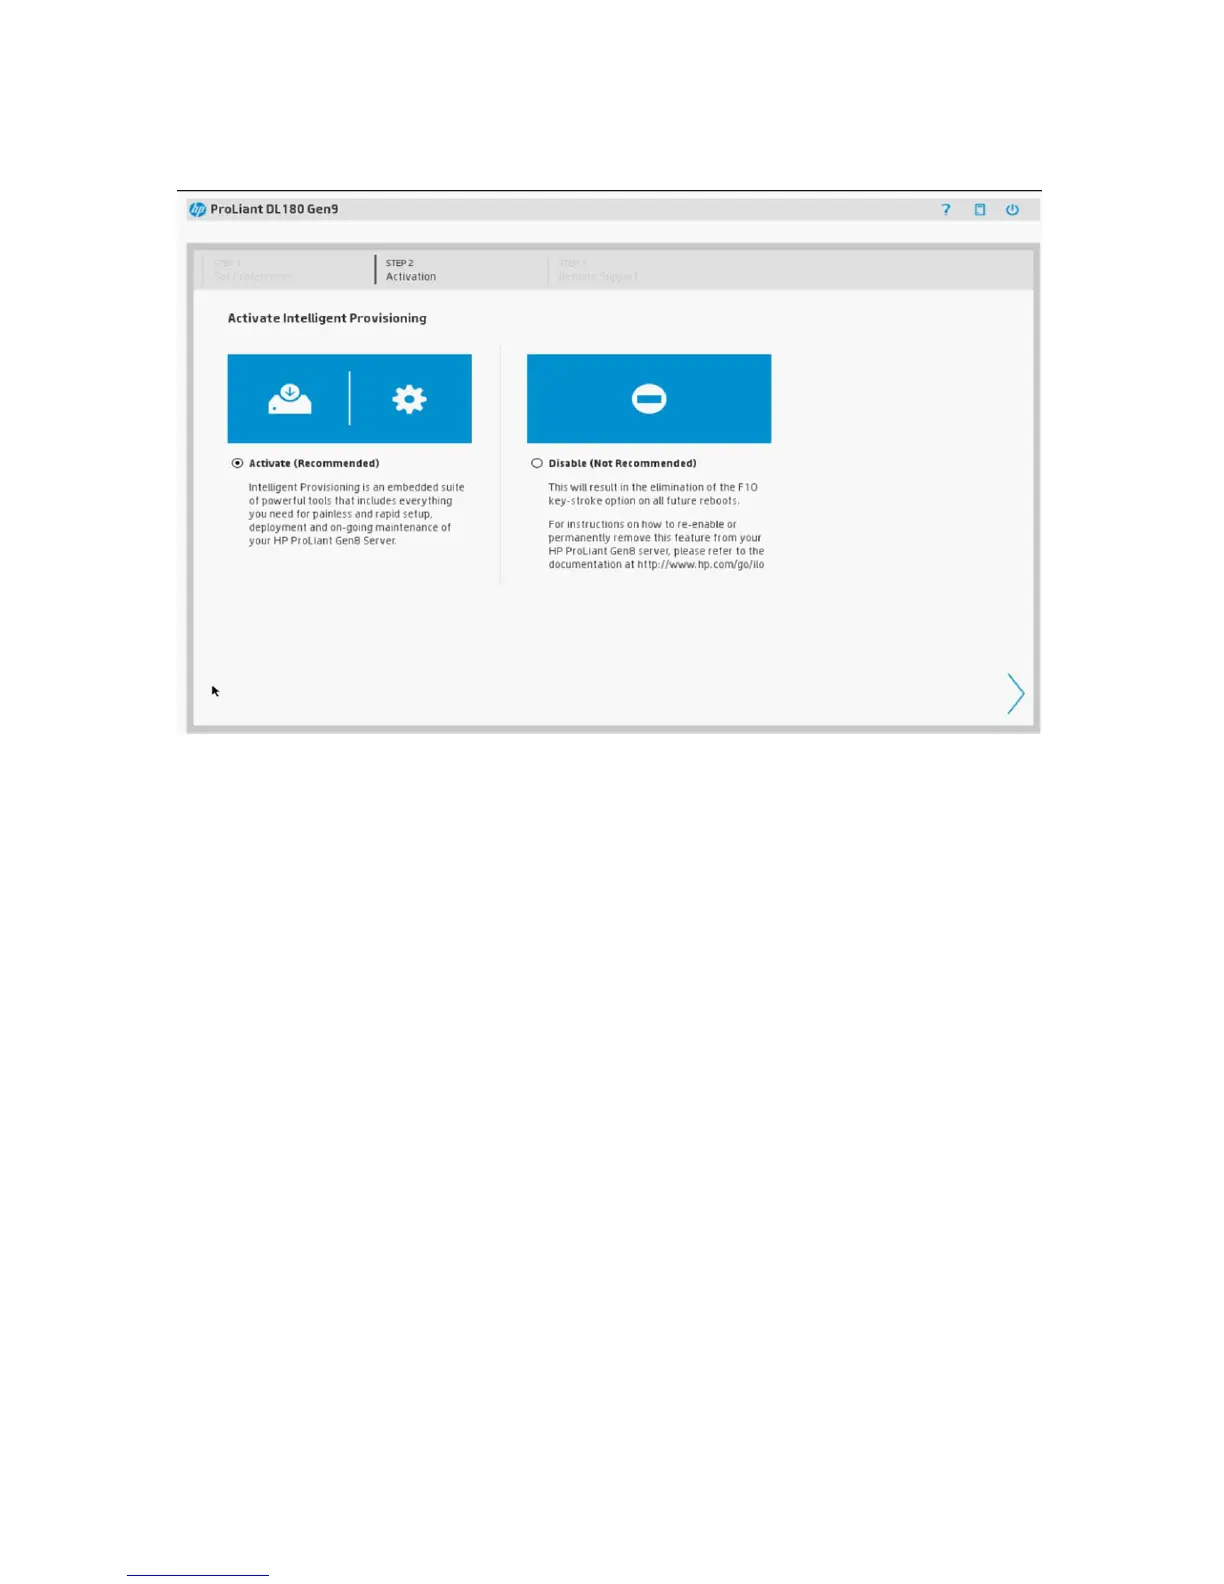
Step 2: Activating Intelligent Provisioning
When logging on to Intelligent Provisioning for the first time, the Activation screen is viewable after
the Setting Preferences screen.
To activate Intelligent Provisioning and make it available during server POST:
1. Select Activate (Recommended).
2. Click the Continue right arrow to proceed automatically to “Step 3: Registering for Insight
Remote Support” (page 10).
To disable Intelligent Provisioning:
1. Select Disable (Not Recommended).
2. Click the Continue right arrow. The server reboots. During POST, F10 is in red text on the
screen, indicating that the F10 key is disabled and Intelligent Provisioning is no longer
accessible.
To re-enable Intelligent Provisioning:
1. Reboot the server and, when prompted, press F9 to access the UEFI System Utilities.
2. From the System Utilities screen, select System Configuration→BIOS/Platform Configuration
(RBSU)→Server Security→Intelligent Provisioning (F10 Prompt) and press Enter.
3. Select Enabled.
For more information on UEFI System Utilities, see the HP UEFI System Utilities User Guide.
Step 3: Registering for Insight Remote Support
HP Insight Remote Support provides automatic submission of hardware events to HP to prevent
downtime and enable faster issue resolution. You can register directly to HP or through an Insight
RS Hosting Device.
10 Completing initial configuration and registration tasks
 Loading...