226 Powermax125 Service Manual 808070
9 – Power Supply Component Replacement
5. Push in the plastic ring on the long gas tube fitting while pulling the long gas tubing out of the right side of the
solenoid valve.
6. Remove the 2 mounting screws from the solenoid valve.
7. Push in the plastic ring on the short gas tube fitting while pulling the solenoid valve off the short gas tube.
8. Remove the solenoid valve.
Install the solenoid valve
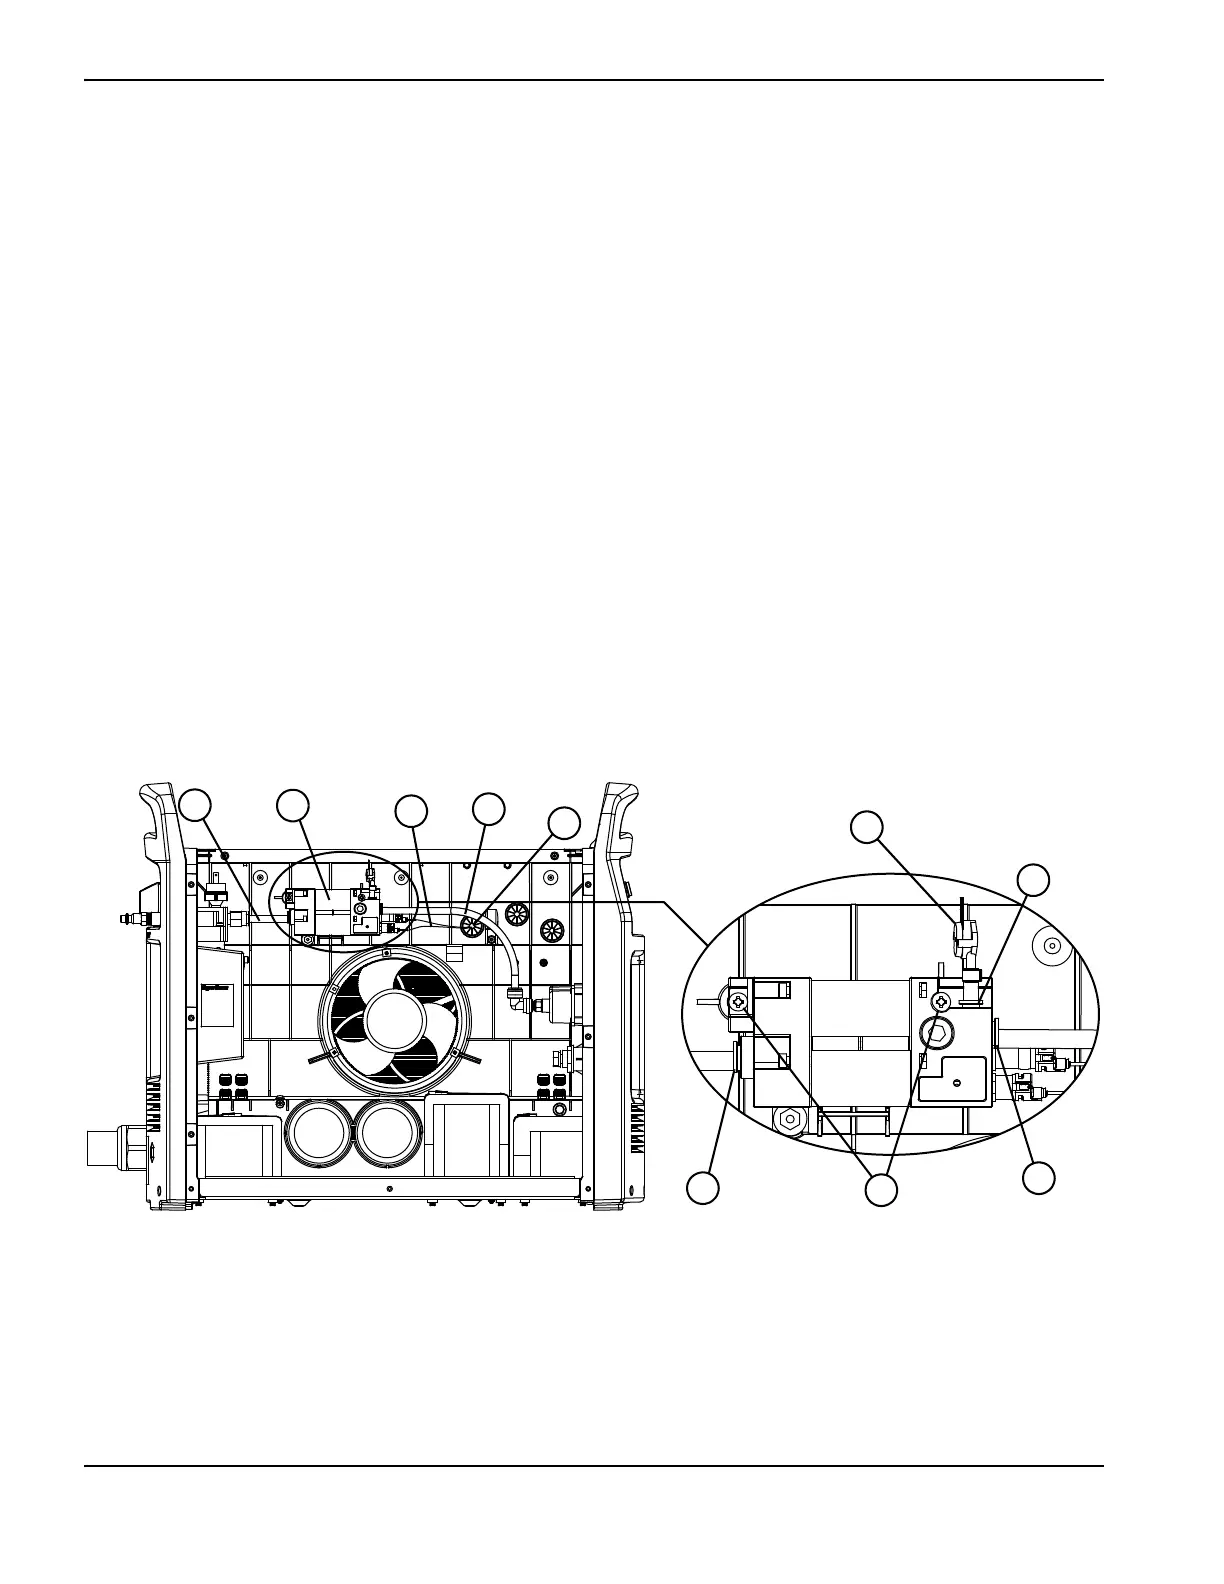
1. Align and push the solenoid valve onto the short gas tube until fully seated. See Figure 85.
2. Secure the solenoid valve to the center panel by tightening the 2 supplied mounting screws to 23 kg-cm
(20 inch-pounds).
3. Push the long gas tube into the solenoid valve until fully seated.
4. Push the pressure transducer into the solenoid valve until fully seated.
5. Route the solenoid valve power wires and connector through the left grommet.
6. Plug the solenoid valve connector into the J6 connector on the power board.
Figure 85
1 Short gas tube
2 Short gas tube fitting
3 Mounting screws
4 Long gas tube fitting
5 Pressure transducer fitting
6 Pressure transducer
7 Left grommet
8 Long gas tube
9 Solenoid valve power wires
10 Solenoid valve

 Loading...


