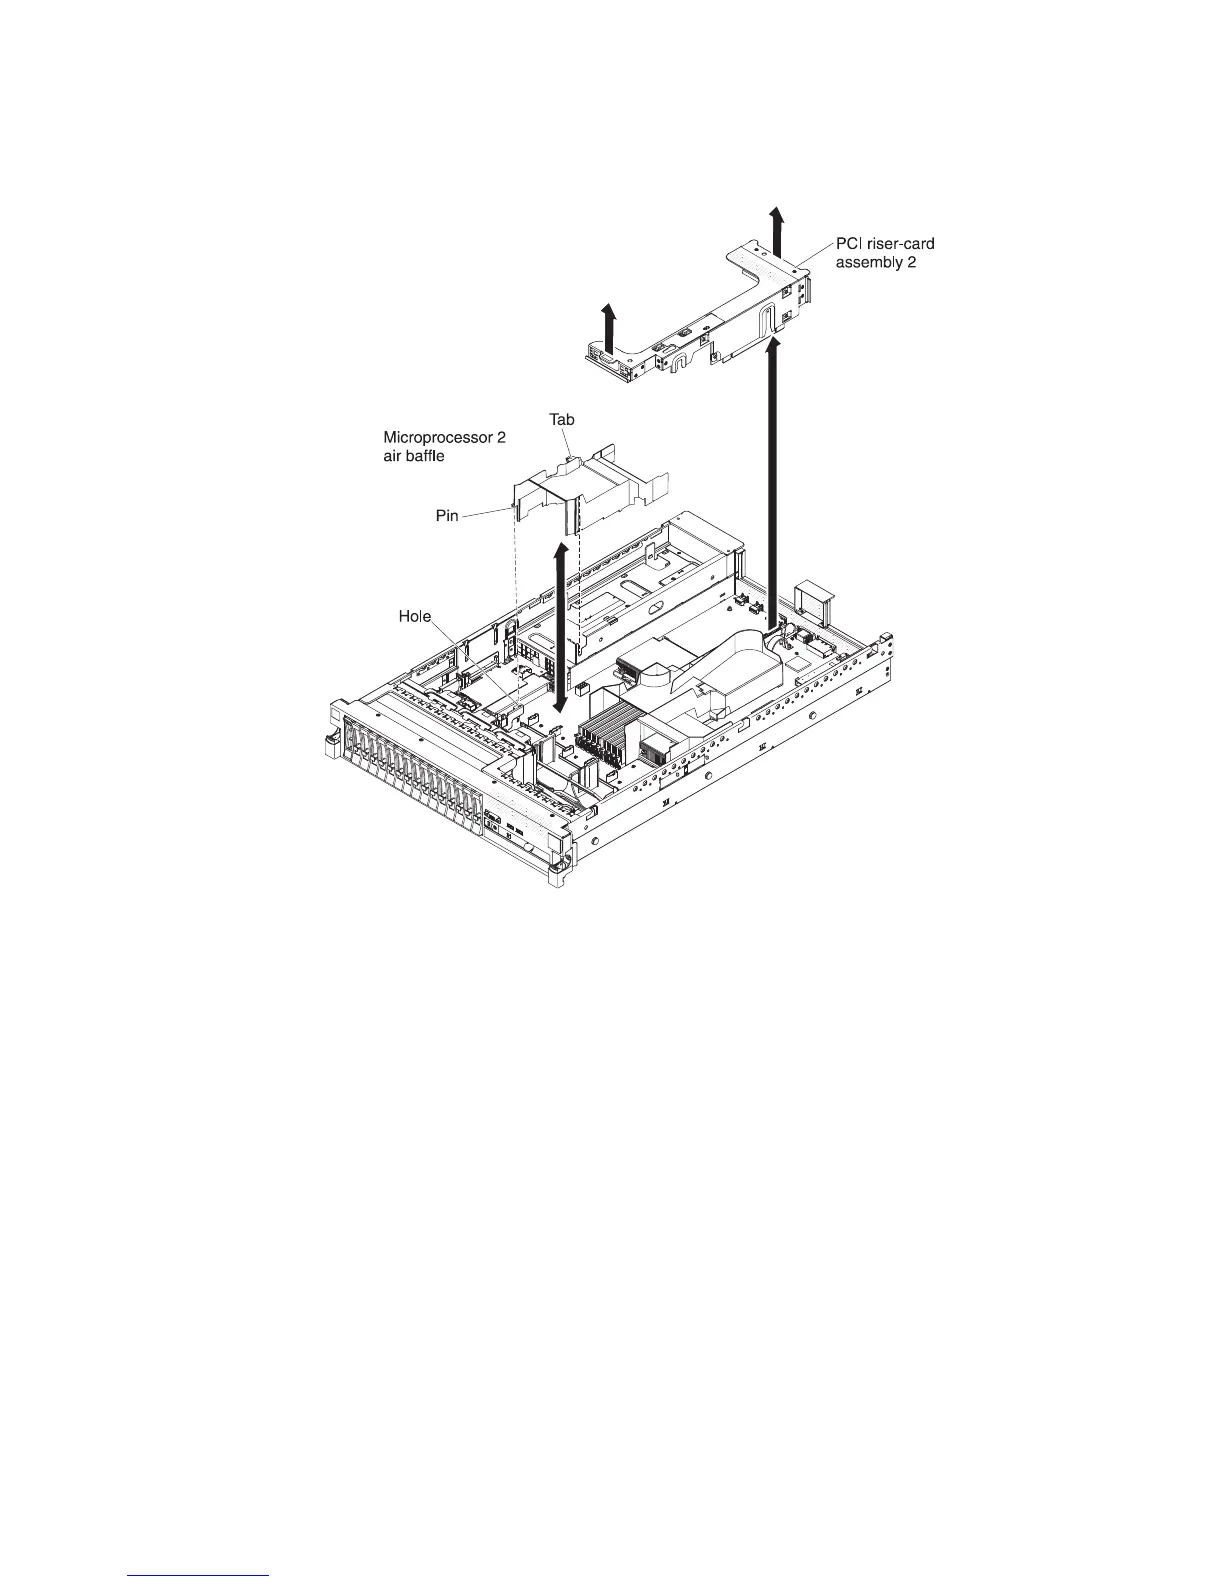
Installing the microprocessor 2 air baffle
To install the microprocessor air baffle, complete the following steps.
1. Align the tab on the left side of the microprocessor 2 air baffle with the slot in
the right side of the power-supply cage.
2. Align the pin on the bottom of the microprocessor air baffle with the hole on the
system board retention bracket.
3. Lower the microprocessor 2 air baffle into the server, making sure all cables are
out of the way.
Attention: For proper cooling and airflow, replace all air baffles before you
turn on the server. Operating the server with any air baffle removed might
damage server components.
4. Install PCI riser-card assembly 2.
5. Install the cover (see “Installing the cover” on page 178).
6. Slide the server into the rack.
7. Reconnect the external cables; then, reconnect the power cords and turn on the
peripheral devices and the server.
Removing the DIMM air baffle
When you work with some optional devices, you must first remove the DIMM air
baffle to access certain components or connectors on the system board.
To remove the DIMM air baffle, complete the following steps.
180 IBM System x3650 M3 Types 4255, 7945, and 7949: Problem Determination and Service Guide
 Loading...


