8. Replace the air baffle over the DIMMs (see “Installing the DIMM air baffle” on
page 182), making sure all cables are out of the way.
9. Replace the PCI riser-card assemblies (see “Installing a PCI riser-card
assembly” on page 189), if you removed them.
10. Install the cover (see “Installing the cover” on page 178).
11. Slide the server into the rack.
12. Reconnect the external cables; then, reconnect the power cords and turn on
the peripheral devices and the server.
13. Go to the Setup utility and make sure all the installed DIMMs are present and
enabled.
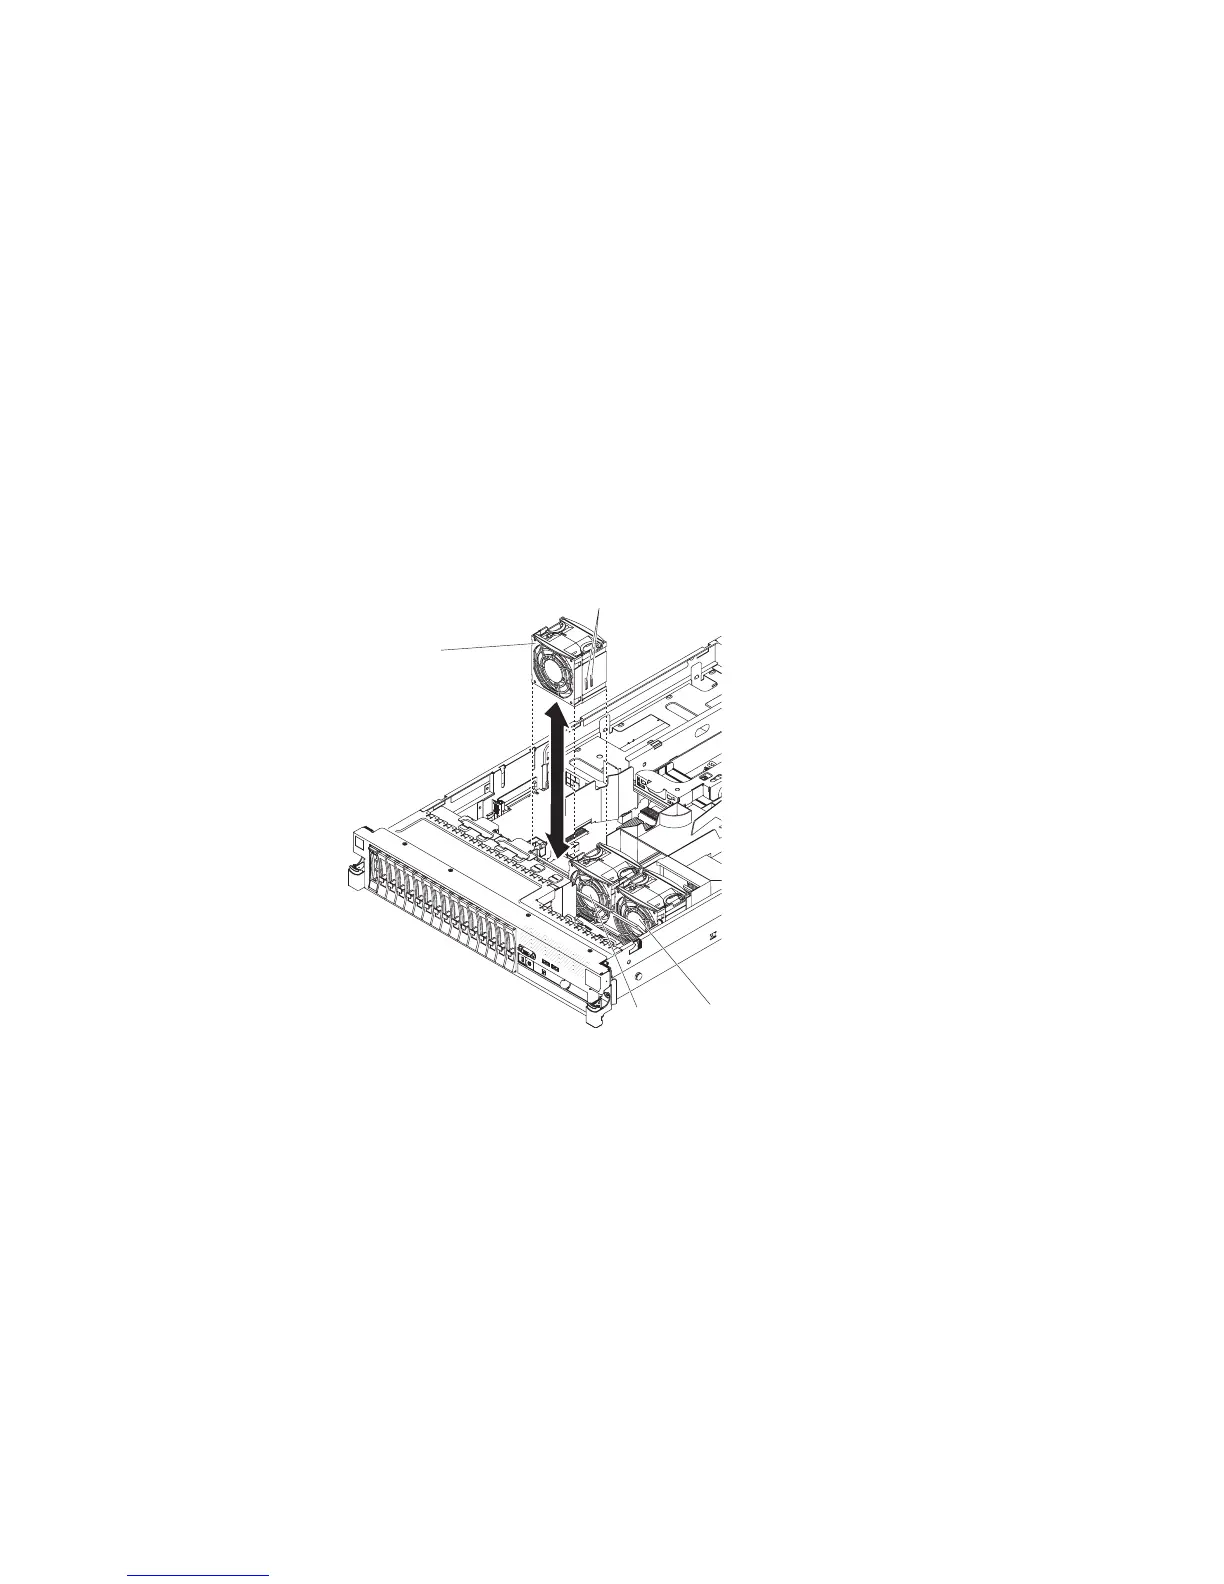
Removing a hot-swap fan
Attention: To ensure proper server operation and cooling, if you remove a fan
with the system running, you must install a replacement fan within 30 seconds or
the system will shut down.
To remove any of the three replaceable fans, complete the following steps.
Vertical tabs
Fan 3
Fan 2 Fan 1
1. Read the safety information that begins on page vii and “Installation guidelines”
on page 169.
2. Leave the server connected to power.
3. Slide the server out of the rack and remove the cover (see “Removing the
cover” on page 177). The LED on the system board near the connector for the
failing fan will be lit.
Attention: To ensure proper system cooling, do not remove the top cover for
more than 30 minutes during this procedure.
4. Grasp the fan by the finger grips on the sides of the fan.
5. Lift the fan out of the server.
6. Replace the fan within 30 seconds.
7. If you are instructed to return the fan, follow all packaging instructions, and use
any packaging materials for shipping that are supplied to you.
Chapter 5. Removing and replacing server components 223
 Loading...


