1. Read the safety information that begins on page vii and “Installation guidelines”
on page 169.
2. Turn off the server and peripheral devices, and disconnect the power cord and
all external cables.
3. Slide the server out of the rack.
4. Remove the cover (see “Removing the cover” on page 177).
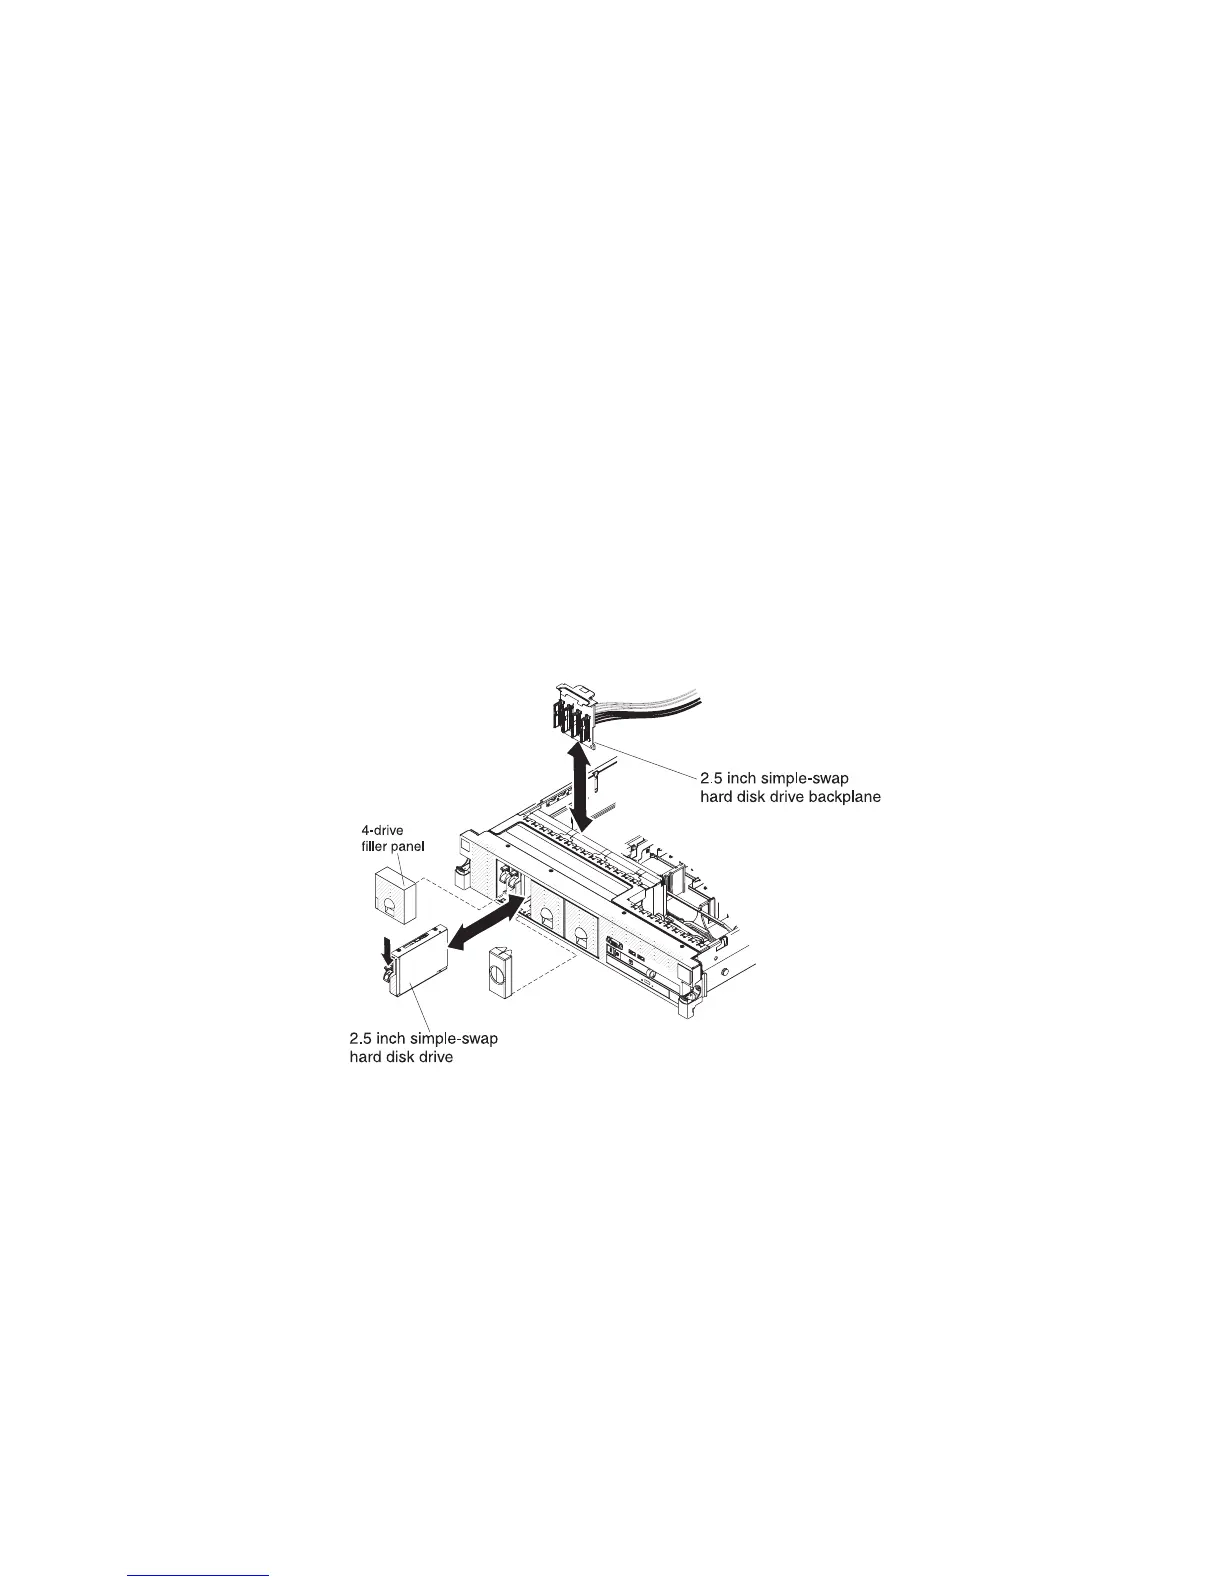
5. Pull the hard disk drives or fillers out of the server slightly to disengage them
from the backplate. See “Removing a simple-swap hard disk drive” on page 211
for details.
6. To obtain more working room, remove the fans (see “Removing a hot-swap fan”
on page 223).
7. Lift the backplate out of the server by pulling it and lifting it up.
8. Disconnect the backplate power, signal, and configuration cables (see “Internal
cable routing and connectors” on page 172).
9. If you are instructed to return the backplate, follow all packaging instructions,
and use any packaging materials for shipping that are supplied to you.
Installing the simple-swap hard disk drive backplate
To install the replacement simple-swap hard disk drive backplate, complete the
following steps.
1. Connect the power and signal cables to the replacement backplate (see
“Internal cable routing and connectors” on page 172).
2. Align the backplate with the backplate slot in the chassis and the small slots on
top of the hard disk drive cage.
3. Lower the backplate into the slots on the chassis.
4. Rotate the top of the backplate until the front tab clicks into place into the
latches on the chassis.
5. Insert the hard disk drives and the fillers the rest of the way into the bays.
6. Replace the fan bracket and fans if you removed them (see “Installing the fan
bracket” on page 184 and “Installing a hot-swap fan” on page 224).
7. Install the cover (see “Installing the cover” on page 178).
8. Slide the server into the rack.
9. Reconnect the external cables; then, reconnect the power cords and turn on the
peripheral devices and the server.
Chapter 5. Removing and replacing server components 237
 Loading...


