7. Reconnect the external cables; then, reconnect the power cords and turn on the
peripheral devices and the server.
Note: You will have to configure the server to boot from the hypervisor USB drive.
See “Configuring the server” on page 253 for information about enabling the
hypervisor memory key.
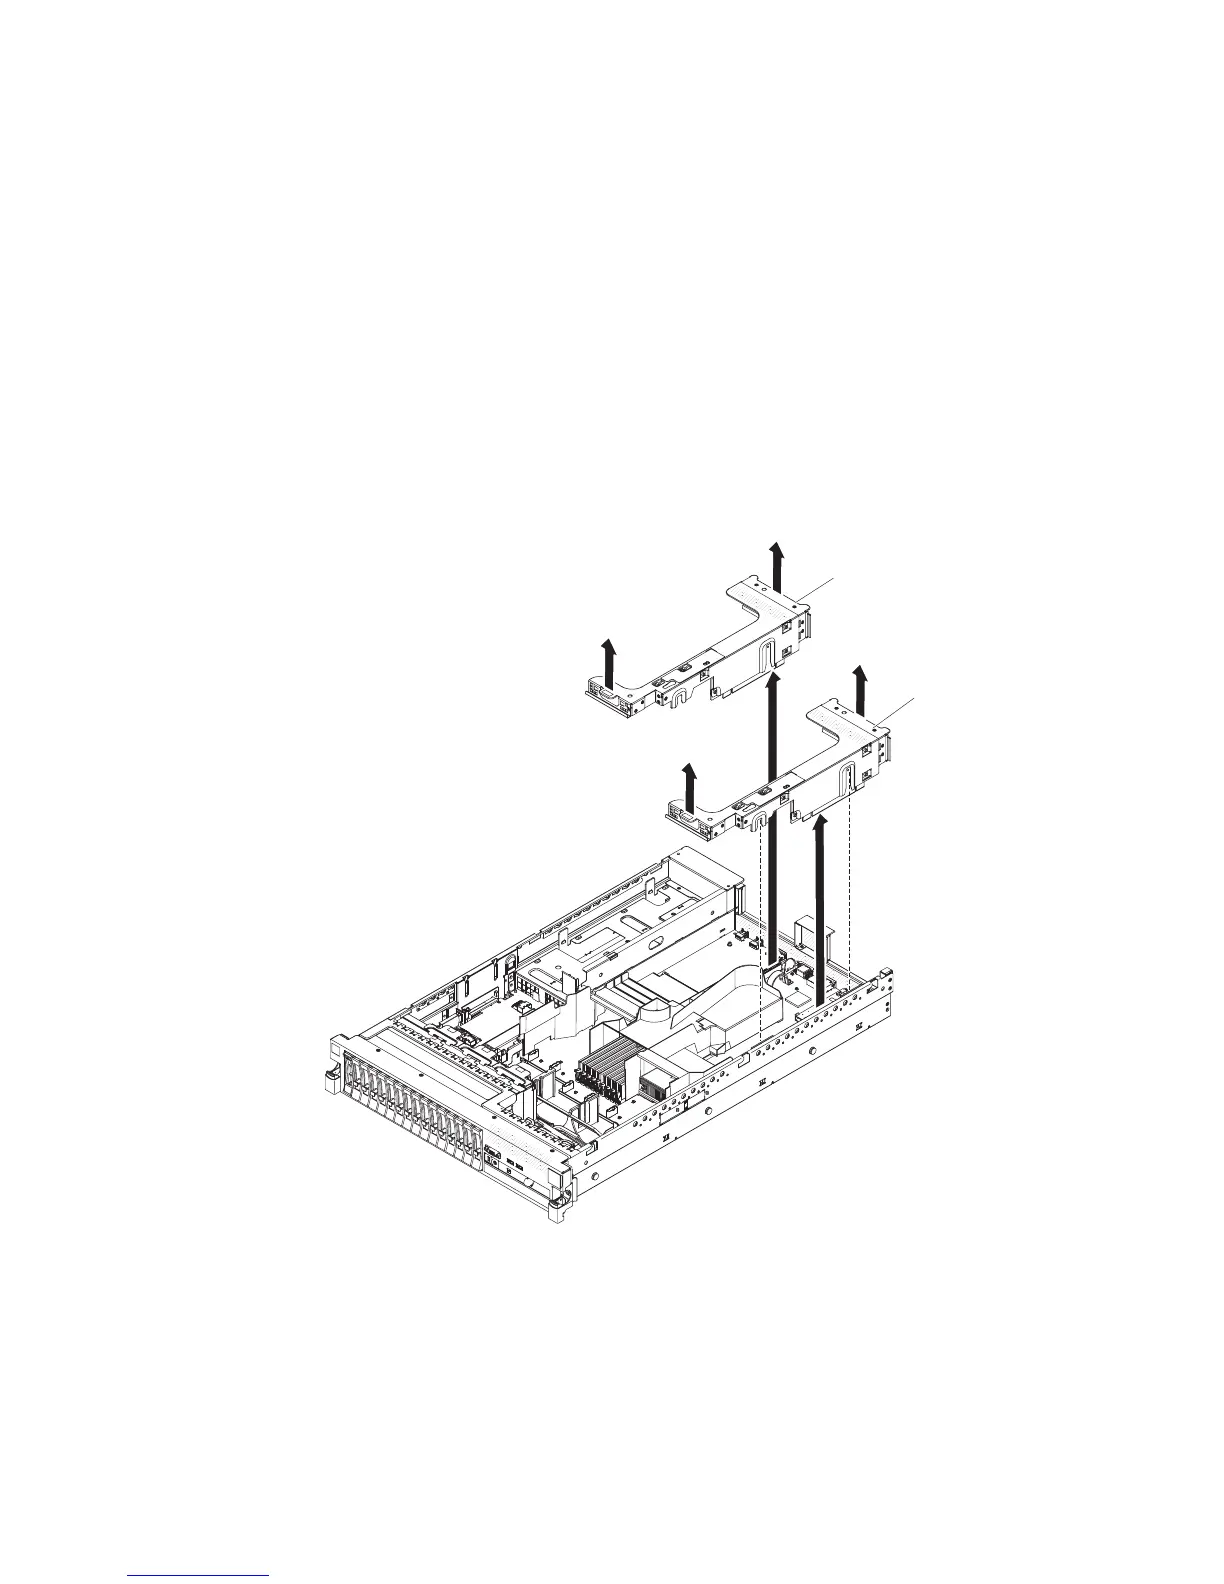
Removing a PCI riser-card assembly
The server comes with one riser-card assembly that contains two PCI Express x8
Gen 2 connectors. You can replace a PCI Express riser-card assembly with a
riser-card assembly that contains one PCI Express Gen 2 x16 connector or that
contains two PCI-X 64-bit 133 MHz connectors. See http://www.ibm.com/servers/
eserver/serverproven/compat/us/ for a list of riser-card assemblies that you can use
with the server.
To remove a riser-card assembly, complete the following steps.
PCI riser-card
assembly 2
PCI riser-card
assembly 1
1. Read the safety information that begins on page vii and “Installation guidelines”
on page 169.
2. Turn off the server and peripheral devices and disconnect all power cords and
external cables.
3. Slide the server out of the rack.
4. Remove the server cover (see “Removing the cover” on page 177).
188 IBM System x3650 M3 Types 4255, 7945, and 7949: Problem Determination and Service Guide
 Loading...


