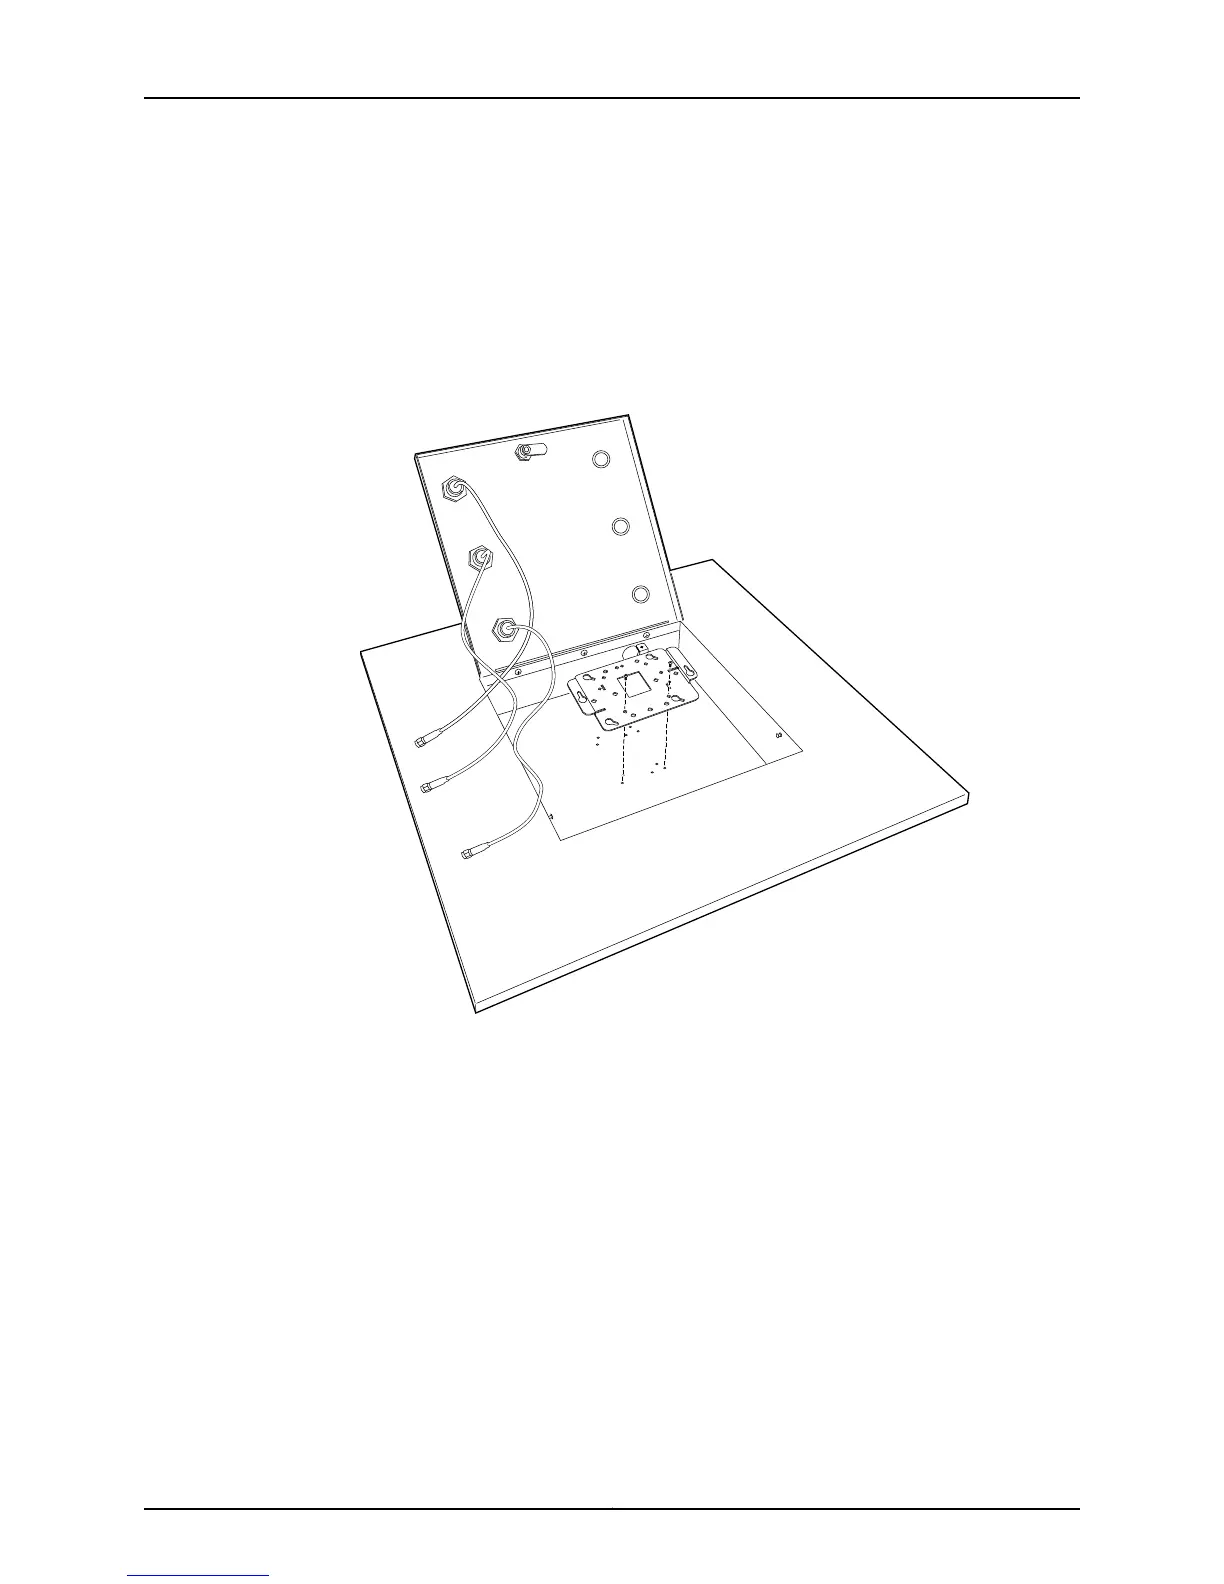
Installing the AX411 Access Point Mounting Bracket in an Overhead Enclosure
Use the hardware provided with the overhead enclosure to install the mounting bracket
inside the enclosure. Attach the bracket inside the enclosure with at least two screws of
size 8-32 or M4 or larger. For specific procedures, see the instructions provided with the
enclosure.
Figure 8: Installing the Mounting Bracket in an Overhead Enclosure
Attaching the AX411 Access Point to a Mounting Bracket in an Overhead Enclosure
To attach the AX411 Access Point to a mounting bracket installed inside an overhead
enclosure:
1. Locate the two pins protruding from the underside of the access point.
2. Orient the access point so that the captive screw on the rear panel matches the tab
on the mounting bracket.
3. Press the access point against the mounting bracket so that the two pins go through
the enlarged portions of the keyhole slots on the raised ears at each edge of the
mounting bracket.
Copyright © 2012, Juniper Networks, Inc.26
AX411 Access Point Hardware Guide
 Loading...