Chapter 5 Disassembly and Assembly
5-16
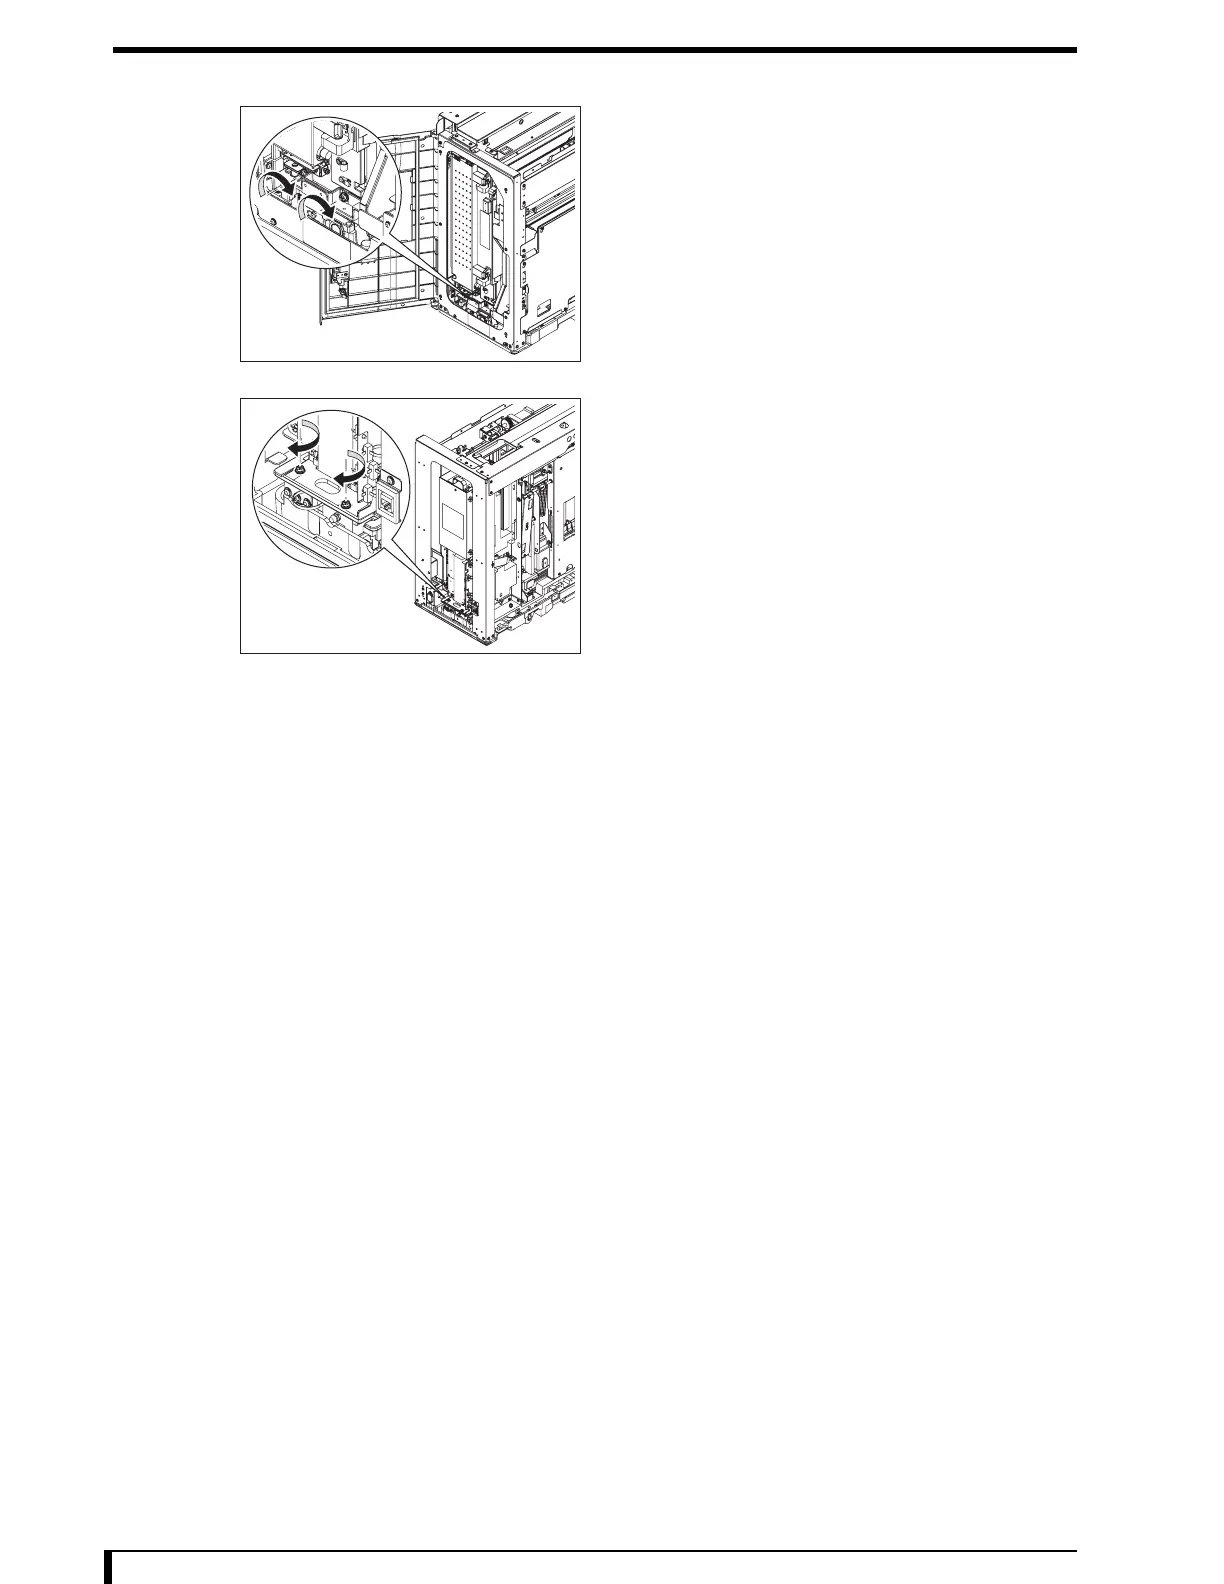
12 Release the simple fixing lock and move the
optical unit to the second front side.
13 In the second front side, fix the optical unit using
a simple fixing lock.
14 Fully tighten the setscrews on the second front
side.
•
2 hex/Phillips-head screws (M4 x 12)
15 Release the simple fixing lock and move the
optical unit to the second front back side.
16 In the second front back side, fix the optical unit
using a simple fixing lock.
17 Fully tighten the setscrews on the second front
back side.
•
2 hex/Phillips-head screws (M4 x 12)
18 Release the simple fixing lock.
19 See " Installation Procedures (Page 5-8)" in "5.2.3 Removing/Installing the Exterior Panel
and Insertion Unit" to install the exterior panel and insertion unit.
Now, you have finished with the procedures to install the optical unit.
Second Front Side
Second Front Back Side

 Loading...