Chapter 5 Disassembly and Assembly
5-21
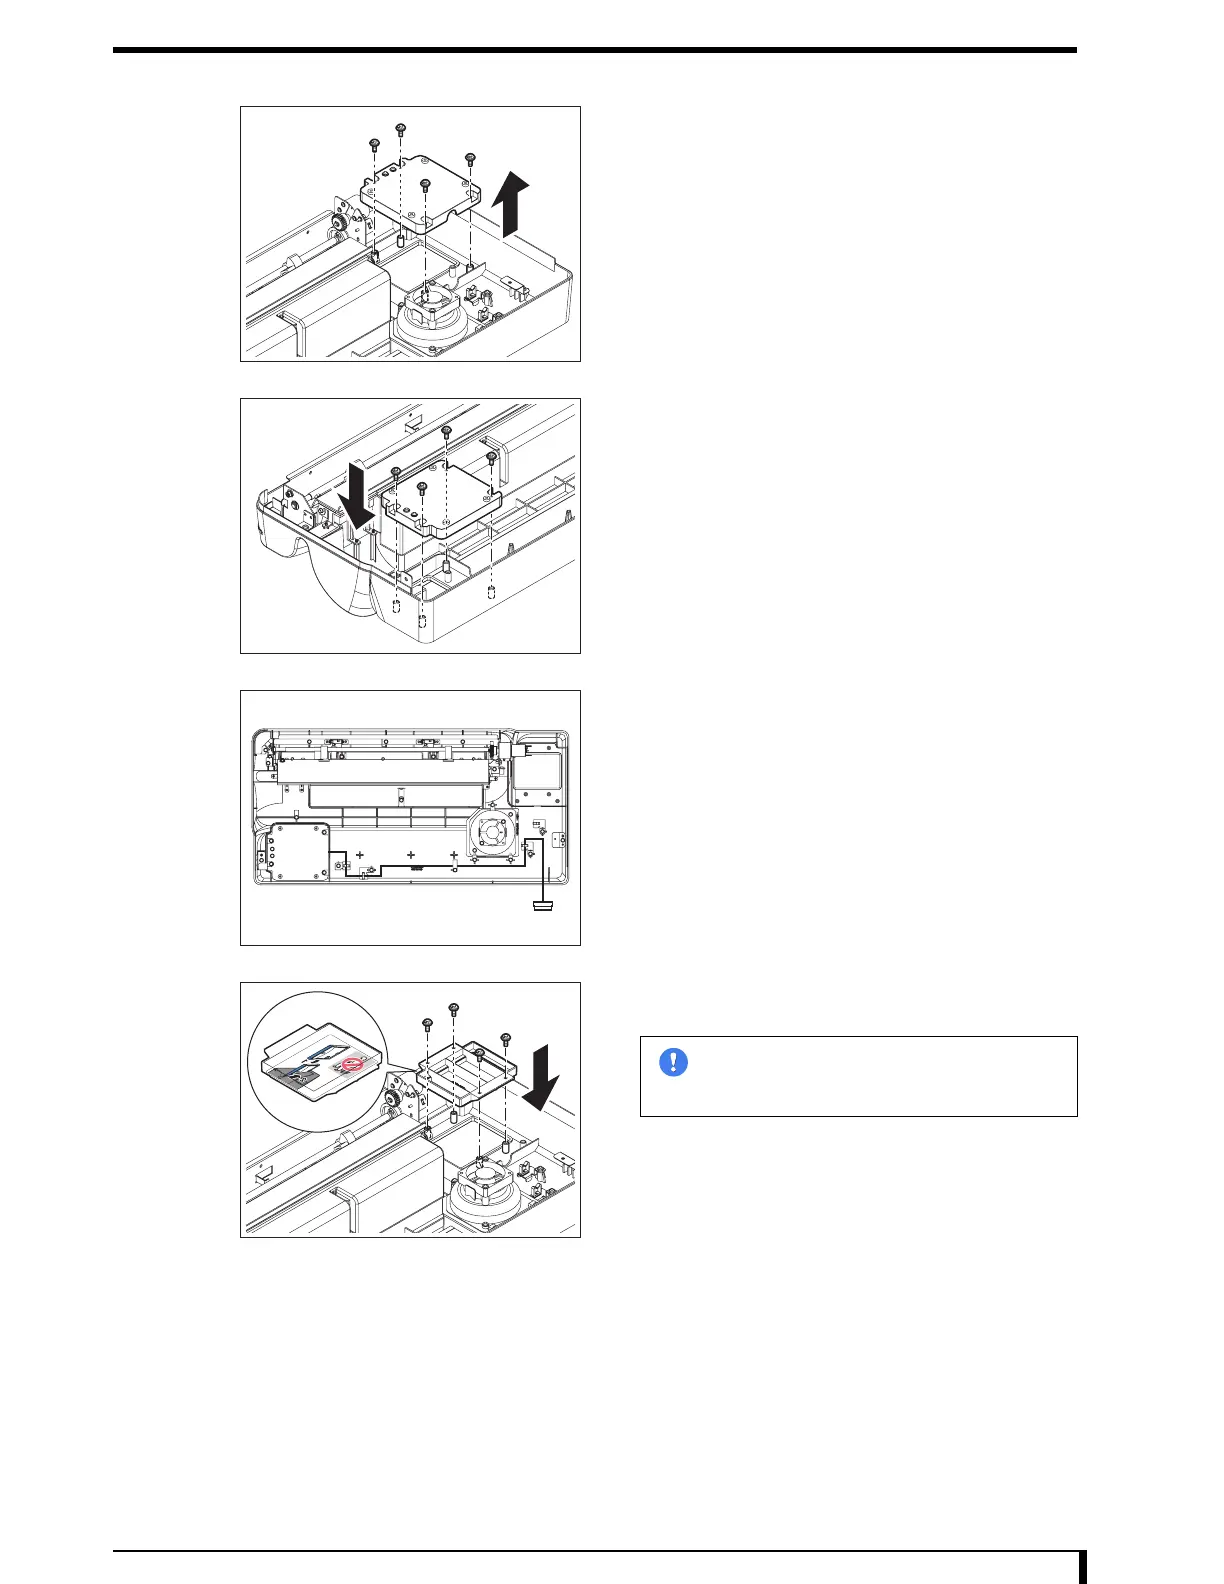
4 Remove the operation unit.
•
4 tapping screws (M4 x 10)
5 Place the operation unit at the position where the
dummy operation unit was placed.
•
4 tapping screws (M4 x 10)
6 Follow the figure to wire the cables to the
operation unit.
•
Clamps for 4 locations
7 Install the dummy operation unit.
•
4 tapping screws (M4 x 10)
8 See " Installation Procedures (Page 5-8)" in "5.2.3 Removing/Installing the Exterior Panel
and Insertion Unit" to install the insertion unit and exterior panel.
Now, you have finished with the procedures to change the mounting location of the operation unit.
Im
ortant
Install the unit in a direction so that the
bottom of the "Cassette loaded/Do not sit
on" label is the operation side.

 Loading...