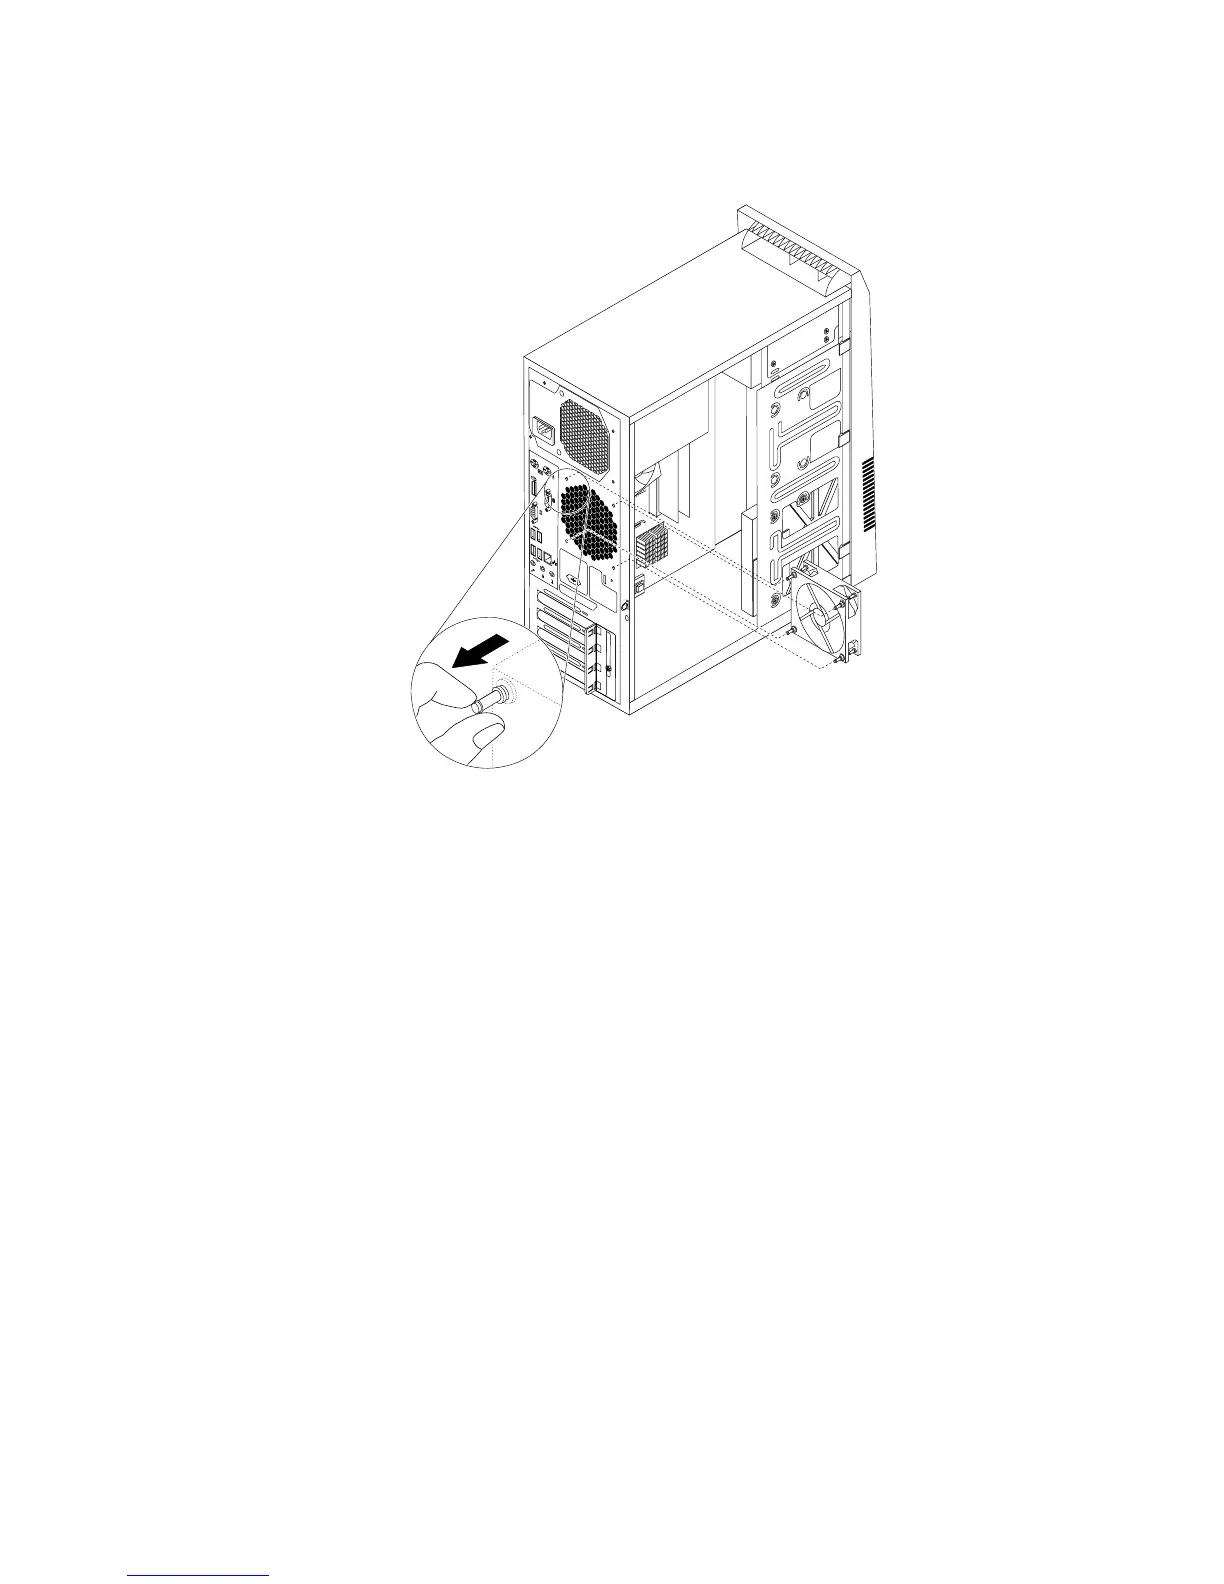
7.Pullonthetipsoftherubbermountsuntiltherearfanassemblyissecuredinplace.
Figure45.Installingtherearfanassembly
8.Connecttherearfanassemblycabletothesystemfanconnectoronthesystemboard.
Whattodonext:
•Toworkwithanotherpieceofhardware,gototheappropriatesection.
•Tocompletetheinstallationorreplacement,goto“Completingthepartsreplacement”onpage131.
ReplacingthefrontaudioandUSBassembly
Attention:Donotopenyourcomputerorattemptanyrepairbeforereadingandunderstandingthe
“Importantsafetyinformation”onpage1.
ThissectionprovidesinstructionsonhowtoreplacethefrontaudioandUSBassembly.
ToreplacethefrontaudioandUSBassembly,dothefollowing:
1.Removeallmediafromthedrivesandturnoffallattacheddevicesandthecomputer.Then,disconnect
allpowercordsfromelectricaloutletsanddisconnectallcablesthatareconnectedtothecomputer.
2.Removethecomputercover.See“Removingthecomputercover”onpage90.
3.Removethefrontbezel.See“Removingandreinstallingthefrontbezel”onpage90.
4.LocatethefrontaudioandUSBassembly.See“LocatingmajorFRUsandCRUs”onpage71.
5.Notethecableroutingandconnections.Then,disconnectthefrontaudioandUSBassemblycables
fromthesystemboard.See“Locatingpartsonthesystemboard”onpage73
.
Chapter9.ReplacingFRUs(machinetypes:10B0,10B1,10B2,10B3,10HJ,and10HK)115
 Loading...