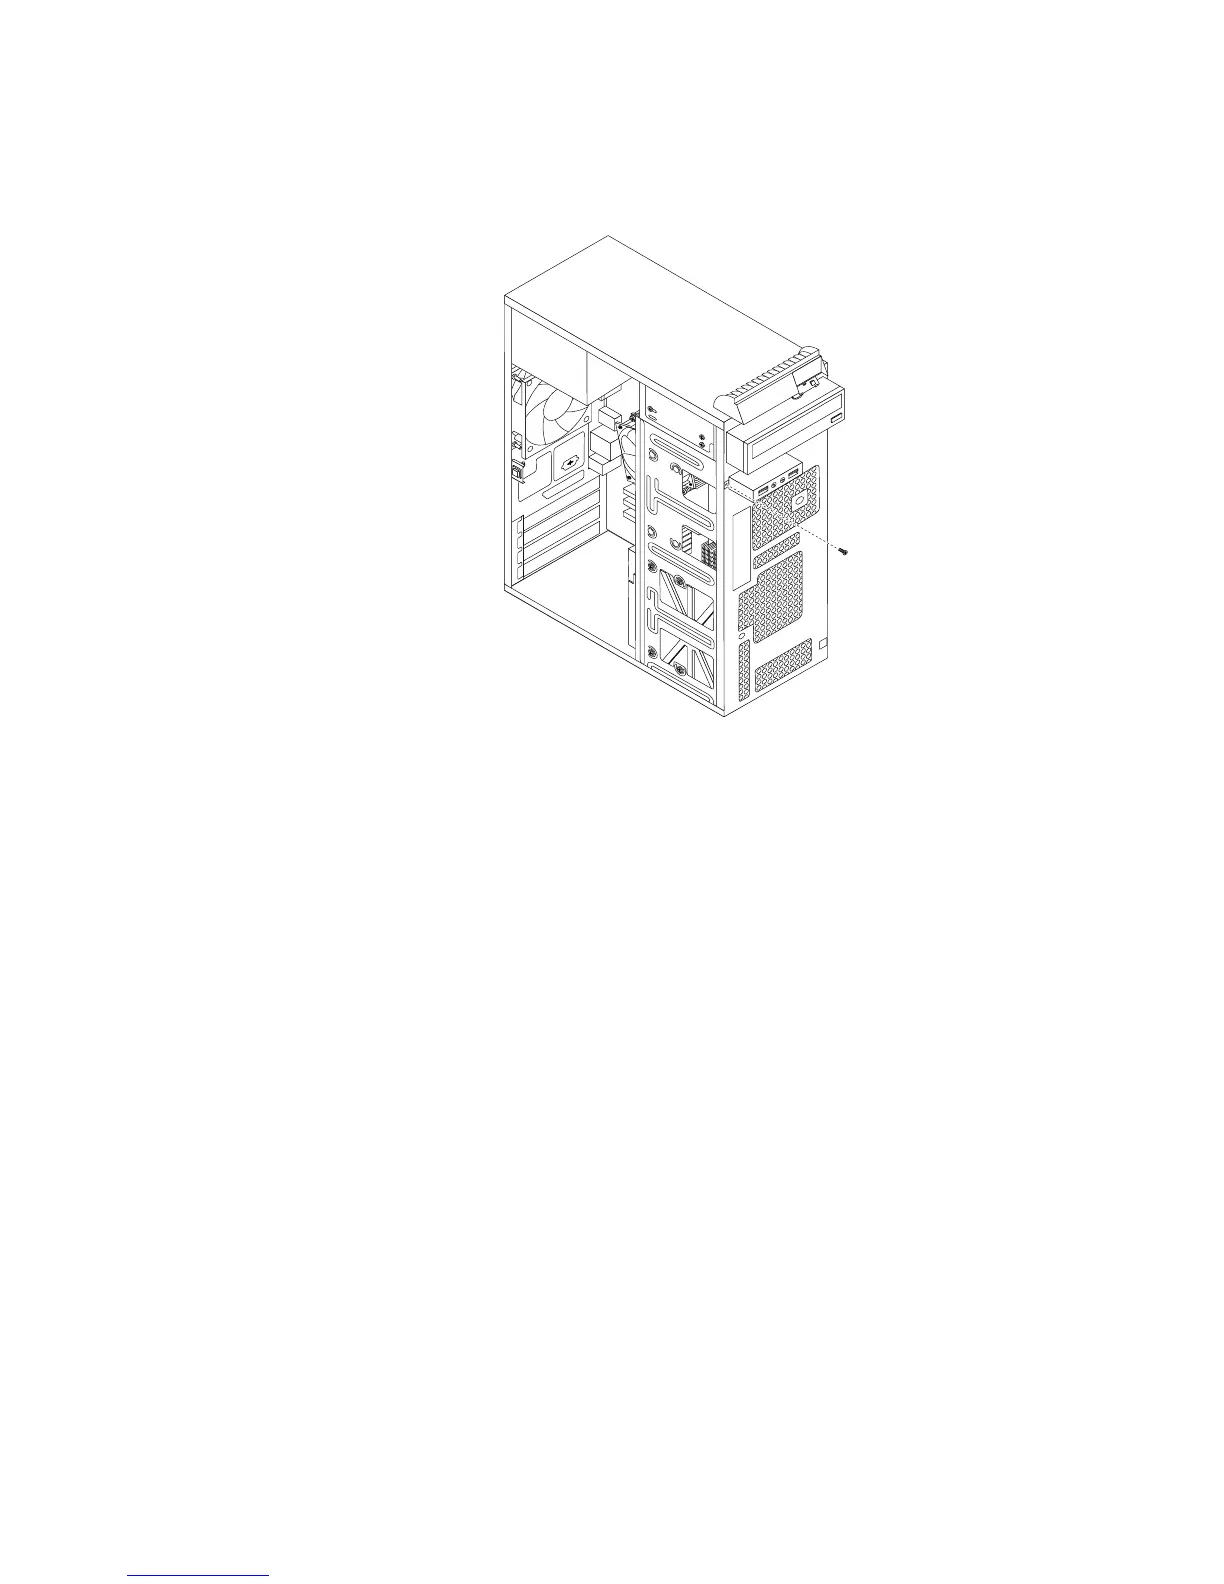
6.RemovethescrewthatsecuresthefrontaudioandUSBassemblybrackettothechassistoremove
thebracketfromthechassis.
Figure46.RemovingthescrewthatsecuresthefrontaudioandUSBassemblytothechassis
7.RemovethetwoscrewsthatsecurethefrontaudioandUSBassemblytoitsbracketandremovethe
failingfrontaudioandUSBassemblyfromthebracket.
8.InstallanewfrontaudioandUSBassemblyintothebracketandinstallthetwoscrewstosecurethe
frontaudioandUSBassemblytothebracket.
9.InstallthefrontaudioandUSBassemblybracketintothechassisandalignthescrewholeinthe
bracketwiththecorrespondingholeinthechassis.
10.Installthescrewtosecurethebrackettothechassis.
11.ReconnectthecablesofthenewfrontaudioandUSBassemblytothefrontaudioconnectorandthe
frontUSBconnector1onthesystemboard.See“Locatingpartsonthesystemboard”onpage73.
Whattodonext:
•Toworkwithanotherpieceofhardware,gototheappropriatesection.
•Tocompletetheinstallationorreplacement,goto“Completingthepartsreplacement”onpage131.
Replacingthethermalsensor
Attention:Donotopenyourcomputerorattemptanyrepairbeforereadingandunderstandingthe
“Importantsafetyinformation”onpage1
.
Thissectionprovidesinstructionsonhowtoreplacethethermalsensor.
Toreplacethethermalsensor,dothefollowing:
1.Removeallmediafromthedrivesandturnoffallattacheddevicesandthecomputer.Then,disconnect
allpowercordsfromelectricaloutletsanddisconnectallcablesthatareconnectedtothecomputer.
2.Removethecomputercover.See“Removingthecomputercover”onpage90.
3.Removethefrontbezel.See“Removingandreinstallingthefrontbezel”onpage90.
116ThinkCentreM73HardwareMaintenanceManual
 Loading...