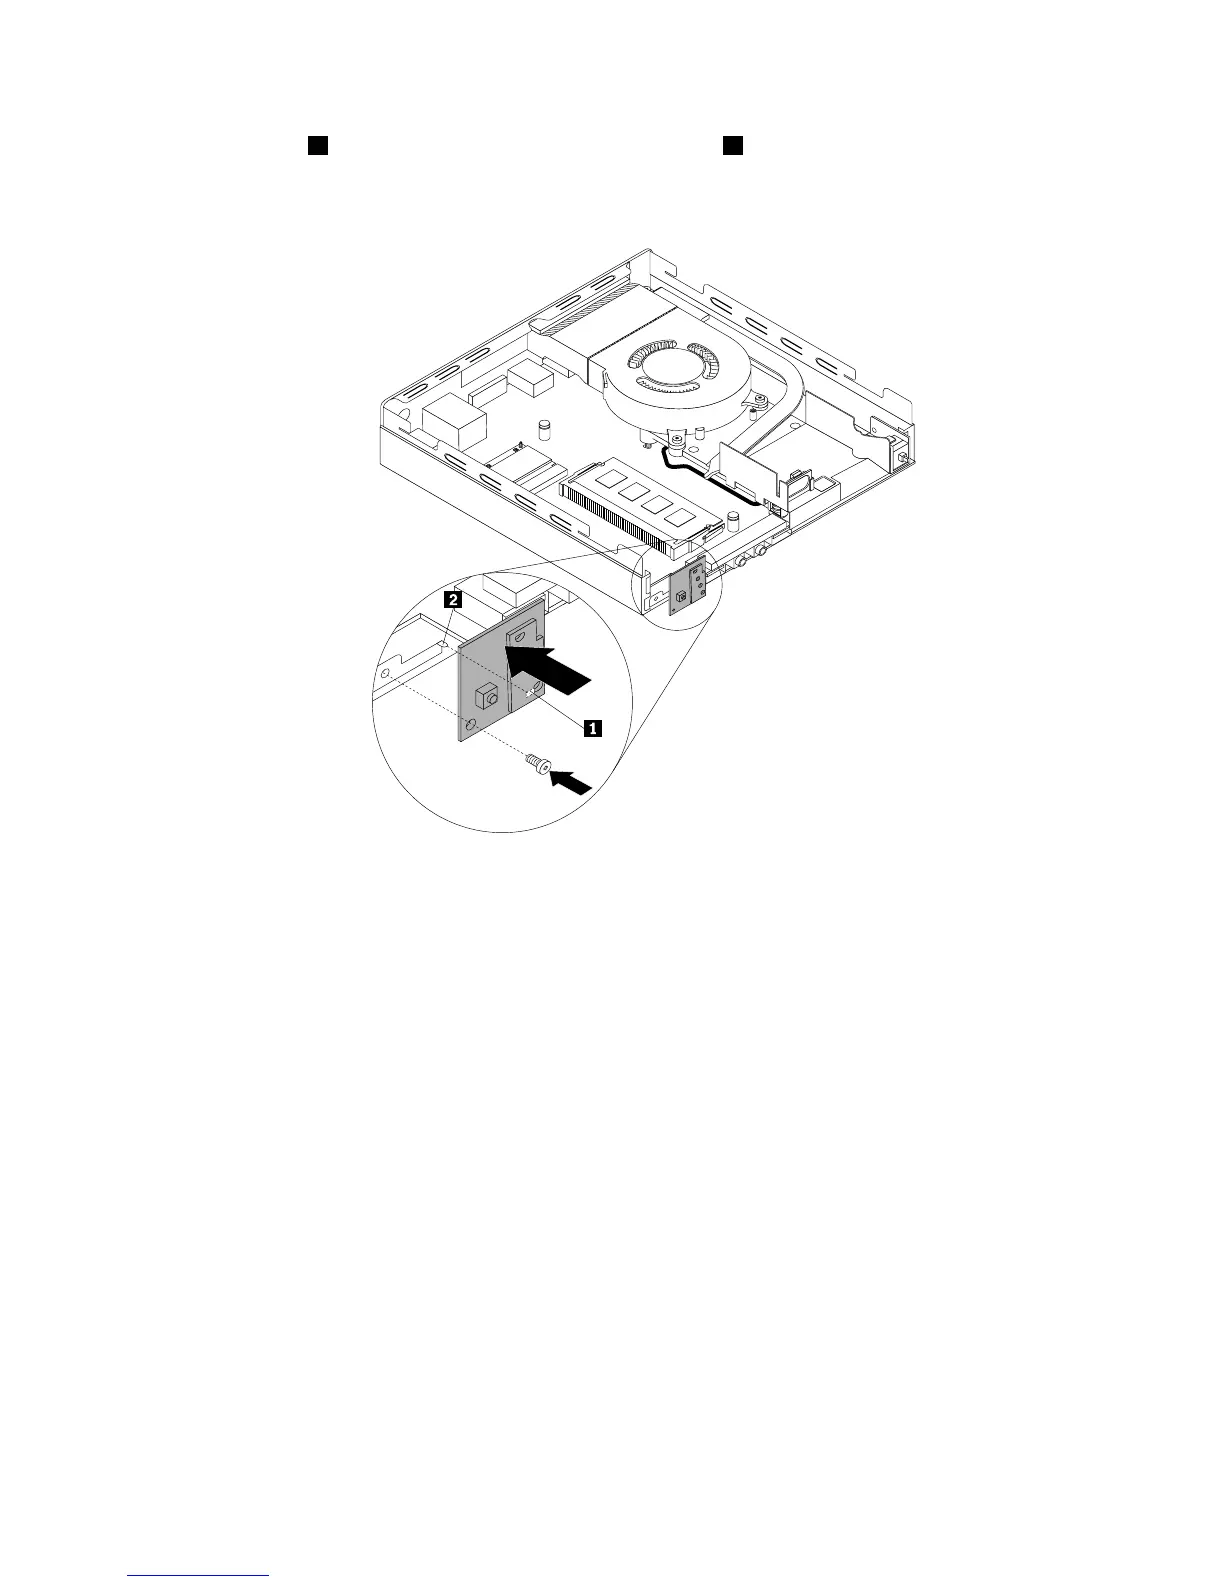
7.Alignthehole1inthenewpowerswitchboardwiththetab2onthecomputerandpositionthenew
powerswitchboardontothechassis.Then,installthescrewtosecurethenewpowerswitchboard
onthechassis.
Figure181.Installingthepowerswitchboard
8.Connectthepowerswitchboardcabletothepowerswitchboardcableconnectoronthesystemboard.
See“Locatingpartsonthesystemboard”onpage87.
9.Reinstalltheharddiskdriveassembly.See“Installingorremovingtheharddiskdriveassembly”on
page209.
Whattodonext:
•Toworkwithanotherpieceofhardware,gototheappropriatesection.
•Tocompletetheinstallationorreplacement,goto“Completingthepartsreplacement”onpage235.
ReplacingtheWi-Ficardmodule
Attention:Donotopenyourcomputerorattemptanyrepairbeforereadingandunderstandingthe
“Importantsafetyinformation”onpage1.
ThissectionprovidesinstructionsonhowtoreplacetheWi-Ficardmodule.
Note:TheWi-Ficardmoduleisonlyavailableinsomemodels.
ToreplacetheWi-Ficardmodule,dothefollowing:
1.Removeallmediafromthedrivesandturnoffallattacheddevicesandthecomputer.Then,disconnect
allpowercordsfromelectricaloutletsanddisconnectallcablesthatareconnectedtothecomputer.
2.Removethecomputercover.See“Removingthecomputercover”onpage207.
Chapter11.ReplacingFRUs(machinetypes:10AX,10AY,10DK,10DL,10DM,and10DN)215
 Loading...