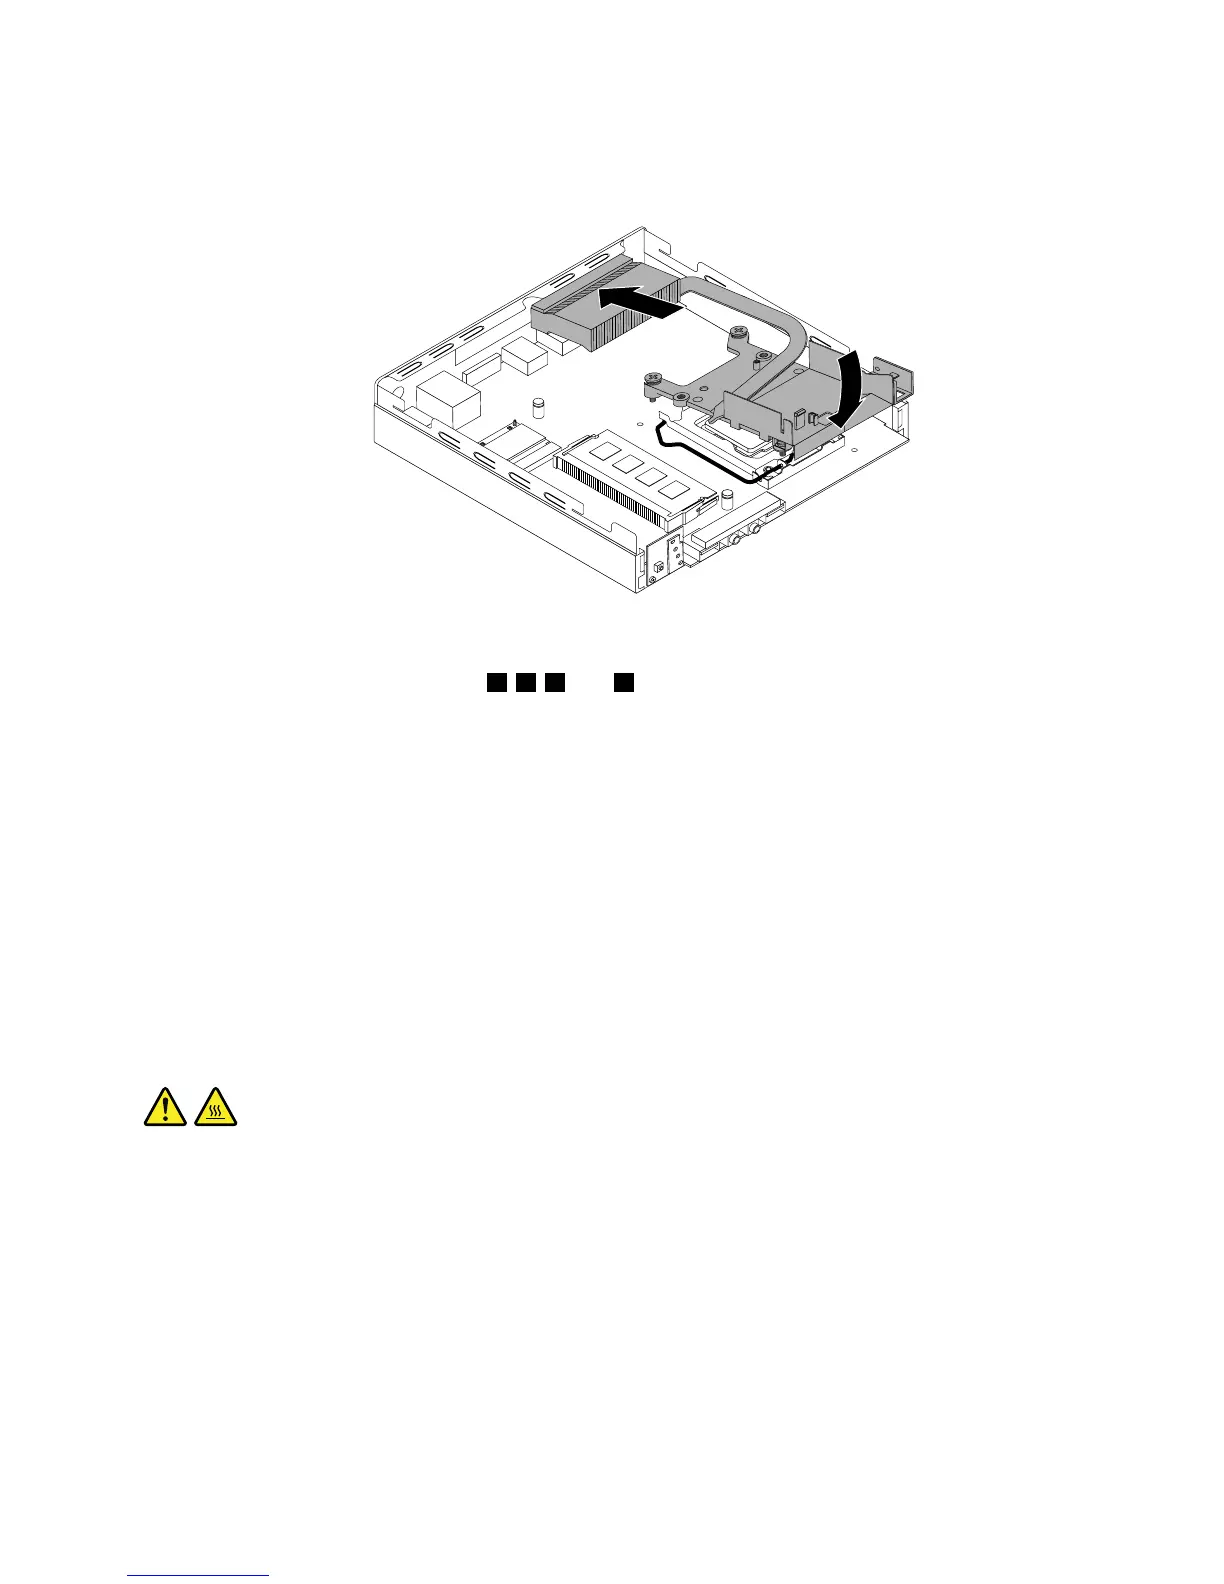
8.Installthenewthermalmoduleintothechassisasshown.Ensurethatthefourscrewsonthenew
thermalmodulearealignedwithcorrespondingholesinthesystemboard.
Figure202.Installingthethermalmodule
9.Followtheclockwisesequenceof2,4,1,and3toinstallthefourscrewstosecurethenewthermal
module.Donotover-tightenthescrews.
10.Reinstallthecoverpresenceswitch.See“Replacingthecoverpresenceswitch”onpage223.
11.Reinstalltheinternalspeaker.See“Replacingtheinternalspeaker”onpage221.
Whattodonext:
•Toworkwithanotherpieceofhardware,gototheappropriatesection.
•Tocompletetheinstallationorreplacement,goto“Completingthepartsreplacement”onpage235.
Replacingthemicroprocessor
Attention:Donotopenyourcomputerorattemptanyrepairbeforereadingandunderstandingthe
“Importantsafetyinformation”onpage1.
Thissectionprovidesinstructionsonhowtoreplacethemicroprocessor.
CAUTION:
Thethermalmoduleandmicroprocessormightbeveryhot.Beforeyouopenthecomputercover,turn
offthecomputerandwaitseveralminutesuntilthecomputeriscool.
Toreplacethemicroprocessor,dothefollowing:
1.Removeallmediafromthedrivesandturnoffallattacheddevicesandthecomputer.Then,disconnect
allpowercordsfromelectricaloutletsanddisconnectallcablesthatareconnectedtothecomputer.
2.Removethecomputercover.See“Removingthecomputercover”onpage207.
3.Removethethermalmodule.See“Removingthecomputercover”onpage207.
Note:Placethethermalmoduleonitsbacksothatthethermalgreaseonthebottomofitdoesnot
getincontactwithanything.
Chapter11.ReplacingFRUs(machinetypes:10AX,10AY,10DK,10DL,10DM,and10DN)229
 Loading...