113
5. 4K Photo and Drive Settings
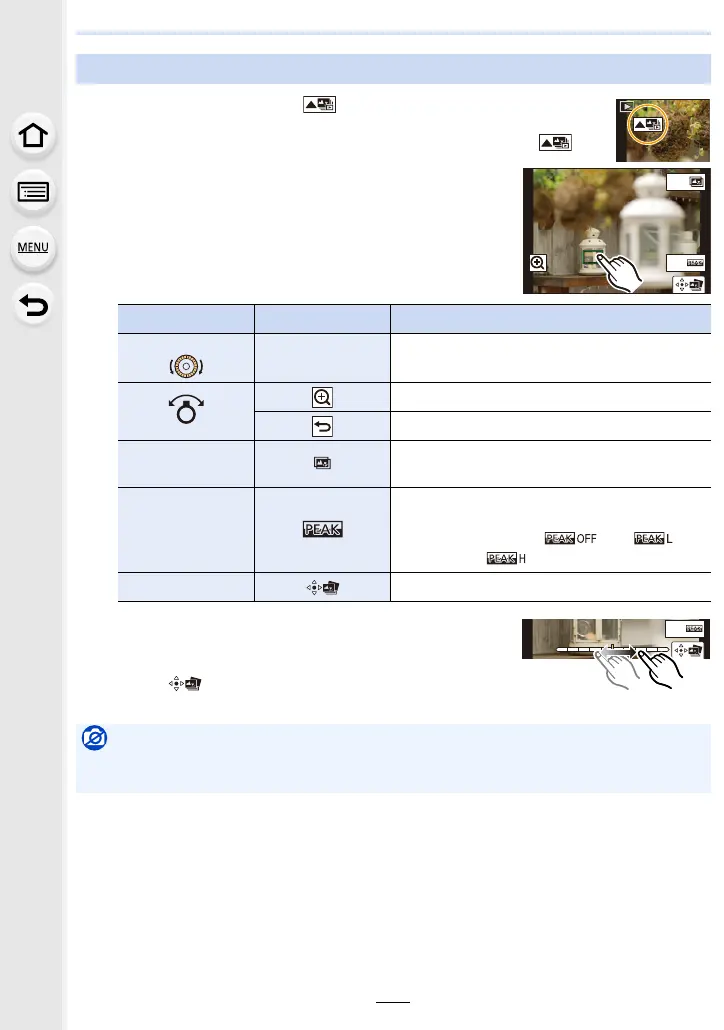
1 Select an image with the [ ] icon on the playback screen, and
press 3.
• You can also perform the same operation by touching the icon [ ].
2 Touch the desired focus area.
• If a picture that is in focus is not available for the selected
area, a red frame will be displayed. You cannot save a
picture in this case.
• You cannot select the edges of the screen.
• You can fine-adjust the focus by dragging the slide bar
during enlarged display. (You can also perform the same
operation by pressing 2/1.)
3 Touch [ ] to save the picture.
• The picture will be saved in JPEG format.
Selecting the desired focus area and saving a picture (Post Focus)
Button operation Touch operation Description of operation
3/4/2/1/
Touching
Selects a focus area.
• It cannot be selected during enlarged display.
Enlarges the display.
Reduces the display (during enlarged display).
[Fn1]
Switches to the Focus Stacking function.
(P114)
[Fn2]
In-focus portions are highlighted with colour.
([Peaking])
• Switches in order of [ ] > []
([LOW]) > [ ] ([HIGH]).
[MENU/SET] Saves the picture.
Not available in these cases:
• The Post Focus function cannot be set when the camera and a TV are connected with an
HDMI micro cable.
Fn1
Fn2
 Loading...