Home
Panasonic
Digital Camera
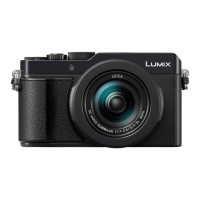
LUMIX DC-LX100M2
Panasonic LUMIX DC-LX100M2 User Manual
5
of 1
of 1 rating
309 pages
Give review
Manual
Specs
To Next Page
To Next Page
To Previous Page
To Previous Page
Loading...
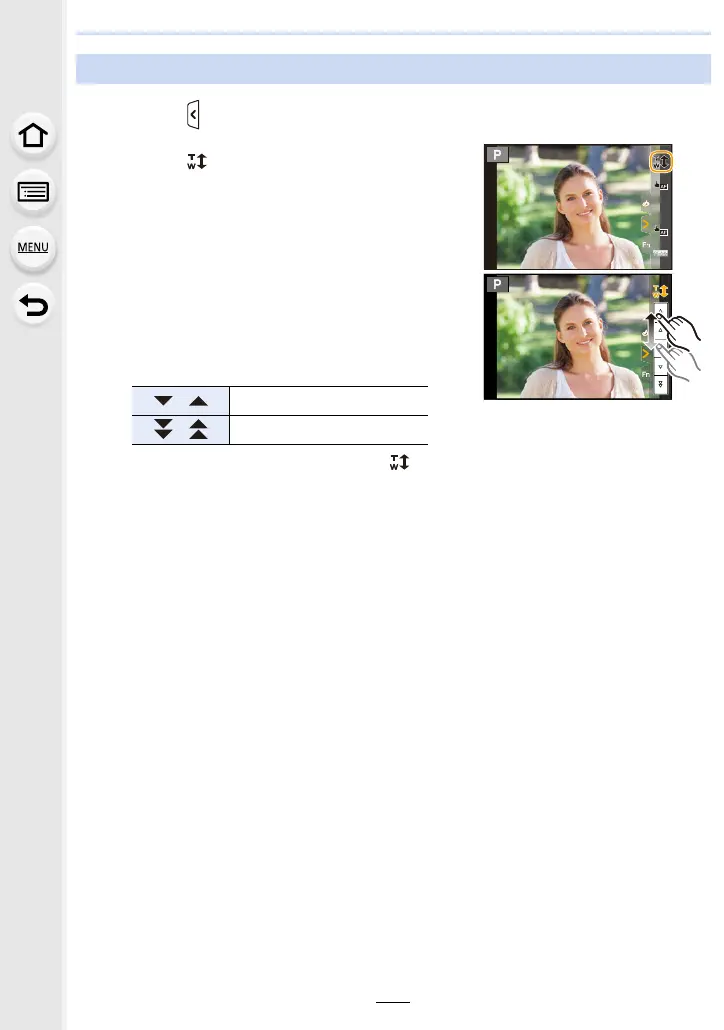
7. Stabiliser, Z
oom and Flash
146
1
To
u
c
h
[
]
.
2
To
u
c
h
[
]
.
•
The slid
e bar is d
isplayed.
3
Perform zoom
operations by dra
gging
the slide
bar
.
•
The zoo
m speed v
aries depend
ing on the
touched
positio
n.
•
T
o end touch z
oom opera
tions, t
ouch [
] aga
in.
Zooming u
sing touch ope
rations (T
ouch zoom
)
[
]
/[
]
Zooms slowly
[
]/[
]
Zooms
quickly
145
147
Table of Contents
Default Chapter
2
Finding the Information You Need
2
How to Use this Manual
3
Table of Contents
4
Contents by Function
9
1 Before Use
12
Care of the Camera
12
Standard Accessories
14
Names and Functions of Components
15
2 Getting Started/Basic Operations
17
Attaching the Lens Cap/Shoulder Strap
17
Charging the Battery
19
Inserting the Battery
20
Charging
21
Approximate Operating Time and Number of Recordable Pictures
24
Inserting and Removing the Card (Optional)
26
Card Information
27
Formatting the Card (Initialisation)
28
Approximate Number of Recordable Pictures and Available Recording Time
29
Setting Date/Time (Clock Set)
32
Basic Operations
34
Tips for Taking Good Pictures
34
Using the Viewfinder
35
Zoom Operations
36
Shutter Button (Taking Pictures)
37
Motion Picture Button (Recording Motion Pictures)
38
Select the Recording Mode
38
Control Dial
40
Cursor Button/[Menu/Set] Button
40
[DISP.] Button (Switching the Displayed Information)
40
Touch Screen (Touch Operations)
43
Taking Pictures Using the Touch Function
44
Touch AE]
45
Setting Menu Items
46
Calling Frequently-Used Menus Instantly (Quick Menu)
48
Customising the Quick Menu Settings
49
Assigning Frequently-Used Functions to Buttons (Function Buttons)
50
Changing Settings Using the Control Ring
54
Changing the Function Assigned to the Control Ring
55
Entering Text
56
3 Recording Modes
57
Taking Pictures Using the Automatic Function (Intelligent Auto Mode)
57
[Intelligent Auto] Menu
60
Taking Pictures with Customised Colour, Defocus Control, and Brightness Settings
61
Taking Pictures with Automatically Adjusted Aperture and Shutter Speed (Programme AE Mode)
62
Taking Pictures by Specifying the Aperture/Shutter Speed
64
Confirm the Effects of Aperture and Shutter Speed (Preview Mode)
70
Registering Your Preferred Settings (Custom Set)
71
Registering Personal Menu Settings (Registering Custom Settings)
71
Calling up a Registered Set of Custom Settings
71
4 Focus, Brightness (Exposure) and Colour Tone Settings
73
Adjusting Focus Automatically
73
Setting the Focus Mode (AFS/AFF/AFC)
75
Setting the Auto Focus Mode
76
Changing the Position and Size of the AF Area
82
Specifying the AF Area Position with the Touch Pad
85
Specifying the AF Area Position with the Touch Function
86
Taking Close-Up Pictures
87
Adjusting Focus Manually
88
Fixing the Focus and the Exposure (AF/AE Lock)
90
Compensating the Exposure
91
Setting the Light Sensitivity
93
Adjusting the White Balance
95
Finely Adjusting the White Balance
97
5 K Photo and Drive Settings
98
Select a Drive Mode
98
Taking Pictures Using Burst Mode
99
Recording 4K Photos
101
Notes on the 4K Photo Function
103
[Rec Format]/[Rec Quality]
104
Selecting Pictures from 4K Burst File and Saving
106
Operations During Selecting Pictures
107
Controlling Focus after Recording (Post Focus/Focus Stacking)
111
Manual Focus
112
Selecting the Desired Focus Area and Saving a Picture (Post Focus)
113
Merging Multiple Pictures to Widen the Focus Range (Focus Stacking)
114
Taking Pictures with the Self-Timer
116
Recording Panorama Pictures
118
6 Recording Images that Suit Your Subjects and Purposes
122
Changing the Aspect Ratio
122
Taking Pictures with Different Image Effects (Filter)
123
Types of Image Effects
125
Taking a Picture with and Without an Image Effect Simultaneously ([Simultaneous Record W/O Filter])
129
Taking Pictures While Adjusting a Setting Automatically (Bracket Recording)
130
Exposure Bracket
132
Aperture Bracket
132
Focus Bracket
133
White Balance Bracket
133
Taking Pictures Automatically at Set Intervals ([Time Lapse Shot])
134
Creating Stop Motion Pictures ([Stop Motion Animation])
137
7 Stabiliser, Zoom and Flash
140
Image Stabiliser
140
Taking Pictures with the Zoom
142
Zoom Types and Use
142
Zooming Using Touch Operations (Touch Zoom)
146
Taking Pictures Using the Flash (Supplied)
147
Attaching the Flash
147
Setting the Flash Functions
149
Changing the Firing Mode
149
Changing Flash Mode
150
Setting to the 2Nd Curtain Synchro
151
Adjust the Flash Output
152
Synchronising the Output of the Flash to the Exposure Compensation
152
Taking Pictures with Wireless Flashes
153
8 Recording Motion Pictures
156
Recording Motion Picture
156
Setting the Recording Format and Recording Quality
158
How to Set Focus When Recording a Motion Picture ([Continuous AF])
160
Recording Still Pictures While Recording Motion Pictures
161
Displaying/Setting the Sound Input Level
162
[Sound Rec Level Adj.]
162
9 Playing Back and Editing Images
163
Playing Back Pictures
163
Playing Back Motion Pictures
164
Creating Still Pictures from a Motion Picture
165
Switching the Playback Method
166
Using the Playback Zoom
166
Displaying Multiple Screens (Multi Playback)
167
Displaying Pictures by Recording Date (Calendar Playback)
167
Playing Back Group Pictures
168
Deleting Pictures
170
10 Using Menu Functions
171
Menu List
171
[Intelligent Auto] Menu
171
[Rec] Menu
171
Picture Size]
172
Quality]
173
Photo Style]
174
Color Space]
176
Highlight Shadow]
177
I.dynamic]
178
Long Shtr NR]
179
Silent Mode]
180
Hdr]
182
Multi Exp.]
183
[Motion Picture] Menu
184
[Wind Noise Canceller]
184
[Custom] Menu
185
[Auto Review]
191
[Monochrome Live View]
192
[Center Marker]
194
[Zebra Pattern]
195
[Setup] Menu
200
Custom Set
208
[Custom] Menu
208
[My Menu] Menu
209
[Playback] Menu
210
Post Focus
211
Processing]
215
[4K PHOTO Bulk Saving]
217
[Light Composition]
218
[Sequence Composition]
219
[Clear Retouch]
220
[Text Stamp]
221
11 Using the Wi-Fi/Bluetooth Function
227
What You Can Do with the Wi-Fi ® /Bluetooth ® Function
227
Wi-Fi Function/Bluetooth Function
228
Connecting to a Smartphone
230
Installing the Smartphone/Tablet App "Panasonic Image App
230
Connecting the Camera to a Smartphone Compatible with Bluetooth Low Energy
231
Connecting the Camera to a Smartphone that Does Not Support for Bluetooth Low Energy
233
Changing the Wi-Fi Connection Method
235
Terminating the Wi-Fi Connection
236
Controlling with a Smartphone
237
Turning On/Off the Camera with a Smartphone
237
Taking Images Via a Smartphone (Remote Recording)
238
Operating the Shutter Button with a Smartphone Via a Bluetooth Connection Alone
240
Playing Back/Saving Images Stored on the Camera, or Uploading Them on Social Media Sites
242
Transferring Recorded Images to a Smartphone Automatically
243
Writing Location Information of a Smartphone on a Recorded Image
245
Synchronising the Camera's Clock with a Smartphone
246
Displaying Pictures on a TV
247
Sending Images
248
Sending Images to a Smartphone
251
Printing Wirelessly
252
Sending Images to AV Device
253
Sending Images to PC
254
Using Web Services
256
When Sending Images to Web Service
256
When Sending Images to [Cloud Sync. Service]
259
About the [LUMIX CLUB]
260
About Wi-Fi Connections
263
Connecting Via a Wireless Access Point ([Via Network])
264
Connecting the Camera and Another Device Directly ([Direct])
266
Connecting Quickly with the same Settings as the Previous Ones ([Select a Destination from History]/[Select a Destination from Favorite])
267
[Wi-Fi Setup] Menu
269
12 Connecting to Other Equipment
271
Watching/Saving 4K Motion Pictures on an External Device
271
Watching Motion Pictures in 4K
271
Storing 4K Motion Pictures
271
Playing Back Pictures on a TV Screen
272
Using VIERA Link (HDMI)
273
Saving Still Pictures and Motion Pictures on Your PC
274
Downloading Software
275
SILKYPIX Developer Studio
276
Transferring Images to a PC
277
Saving Still Pictures and Motion Pictures on a Recorder
279
Printing the Pictures
280
Adding Date and Text to Pictures
282
13 Others
283
Optional Accessories
283
Monitor Display/Viewfinder Display
284
Message Display
290
Troubleshooting
292
Cautions for Use
301
Other manuals for Panasonic LUMIX DC-LX100M2
Basic Owner's Manual
88 pages
5
Based on 1 rating
Ask a question
Give review
Questions and Answers:
Need help?
Do you have a question about the Panasonic LUMIX DC-LX100M2 and is the answer not in the manual?
Ask a question
Panasonic LUMIX DC-LX100M2 Specifications
General
Brand
Panasonic
Model
LUMIX DC-LX100M2
Category
Digital Camera
Language
English
Related product manuals
Panasonic Lumix DC-LX100M2P
67 pages
Panasonic Lumix DC-S1
520 pages
Panasonic Lumix DC-G9
342 pages
Panasonic Lumix DC-G95
345 pages
Panasonic Lumix DC-TS7
199 pages
Panasonic Lumix DC-G9L
128 pages
Panasonic LUMIX DC-GF9
323 pages
Panasonic lumix DC-ZS70
302 pages
Panasonic lumix DC-TZ90
302 pages
Panasonic LUMIX DC-FZ80
311 pages
Panasonic Lumix DC-ZS80
311 pages
Panasonic Lumix DC-G100
512 pages
 Loading...