BRAKES
9.8
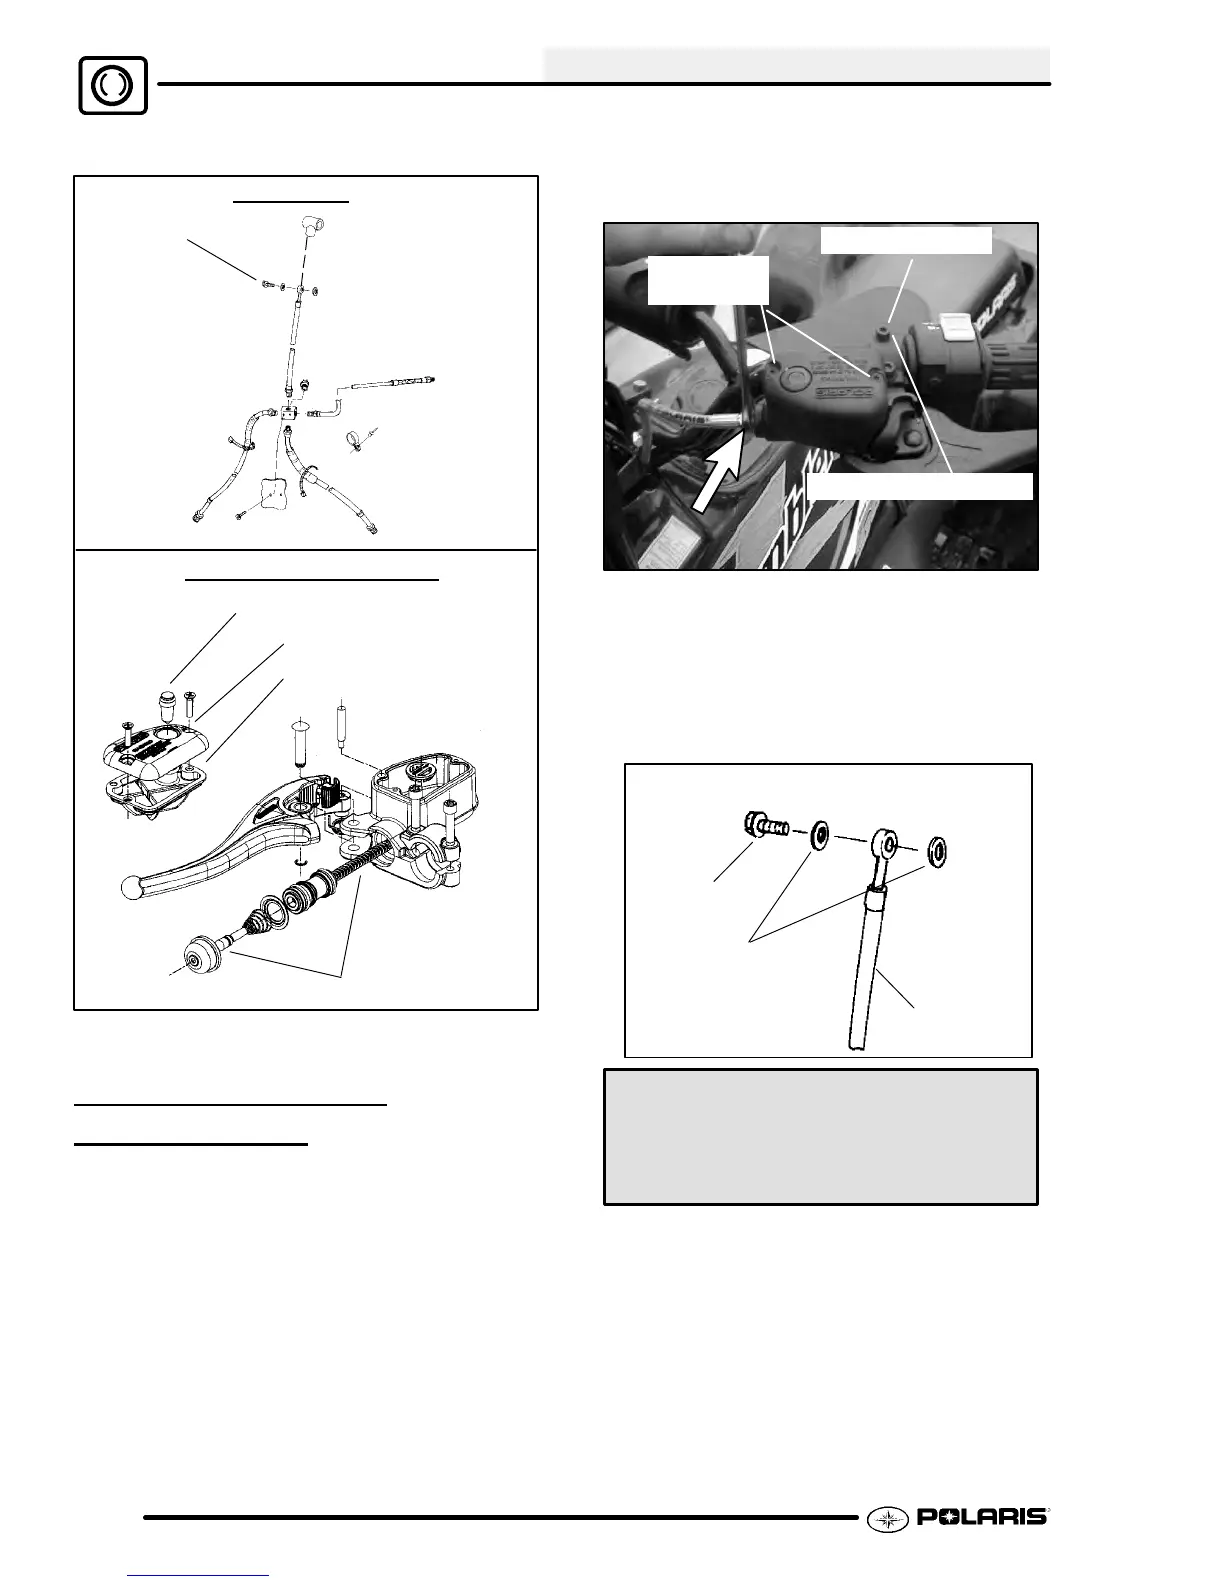
3. Remove master cylinder from handlebars.
Banjo Bolt
Master Cylinder
Piston Assy
Cover
Diaphragm
Sight Glass
Brake Lines
Master Cylinder Assembly
MASTER CYLINDER
INSTALLA
TION
Master cylinders are not rebuildable. The
complete master cylinder must be replaced.
When replacing the brake master cylinder assembly,
use the correct assembly. There are different brake
master cylinders for the different Polaris ATV models.
Refer to your parts manual or guide for the correct
parts.
1. Install master cylinder on handlebars. Torque
mounting bolts to 25 in. lbs. (3 Nm). Torque the
inside bolt first as indicated in the illustration.
25 in. lbs. (3 Nm)
Torque Outer Bolt First
5in.lbs.
(0.56 Nm)
NOTE: To speed up the brake bleeding procedure the
master cylinder can be purged of air before brake line
is attached. Fill with DOT3 Brake Fluid (PN 2870990)
and pump lever slowly two to three times with finger
over the outlet end to purge master cylinder of air.
2. Place new sealing washers on each side of banjo
line.
Brake Line
Banjo Bolt
Sealing Washers
Torque to 15 ft.lbs.
(21 Nm)
Master Cylinder Mounting Bolt
Torque 25 in. lbs. (3 Nm)
Brake Line Banjo Bolt Torque
15 ft. lbs. (21 Nm)
3. Install brake line on master cylinder hand tight.
4. Fill reservoir with DOT3 Brake Fluid (PN
2870990).
 Loading...