ELECTRICAL
10.18
Headlamp Replacement
1. With the headlight assembly in place, unsnap the
electrical harness from the back the headlight
assembly.
2. Turn and pull out the connector on the back of the
headlight assembly. Gently pull the bulb out and
replace with the new bulb. Snap the harness back
into place.
TAILLIGHT/BRAKELIGHT
LAMP
REPLACEMENT
If the taillight/brakelight does not work the lamp may
need to be replaced.
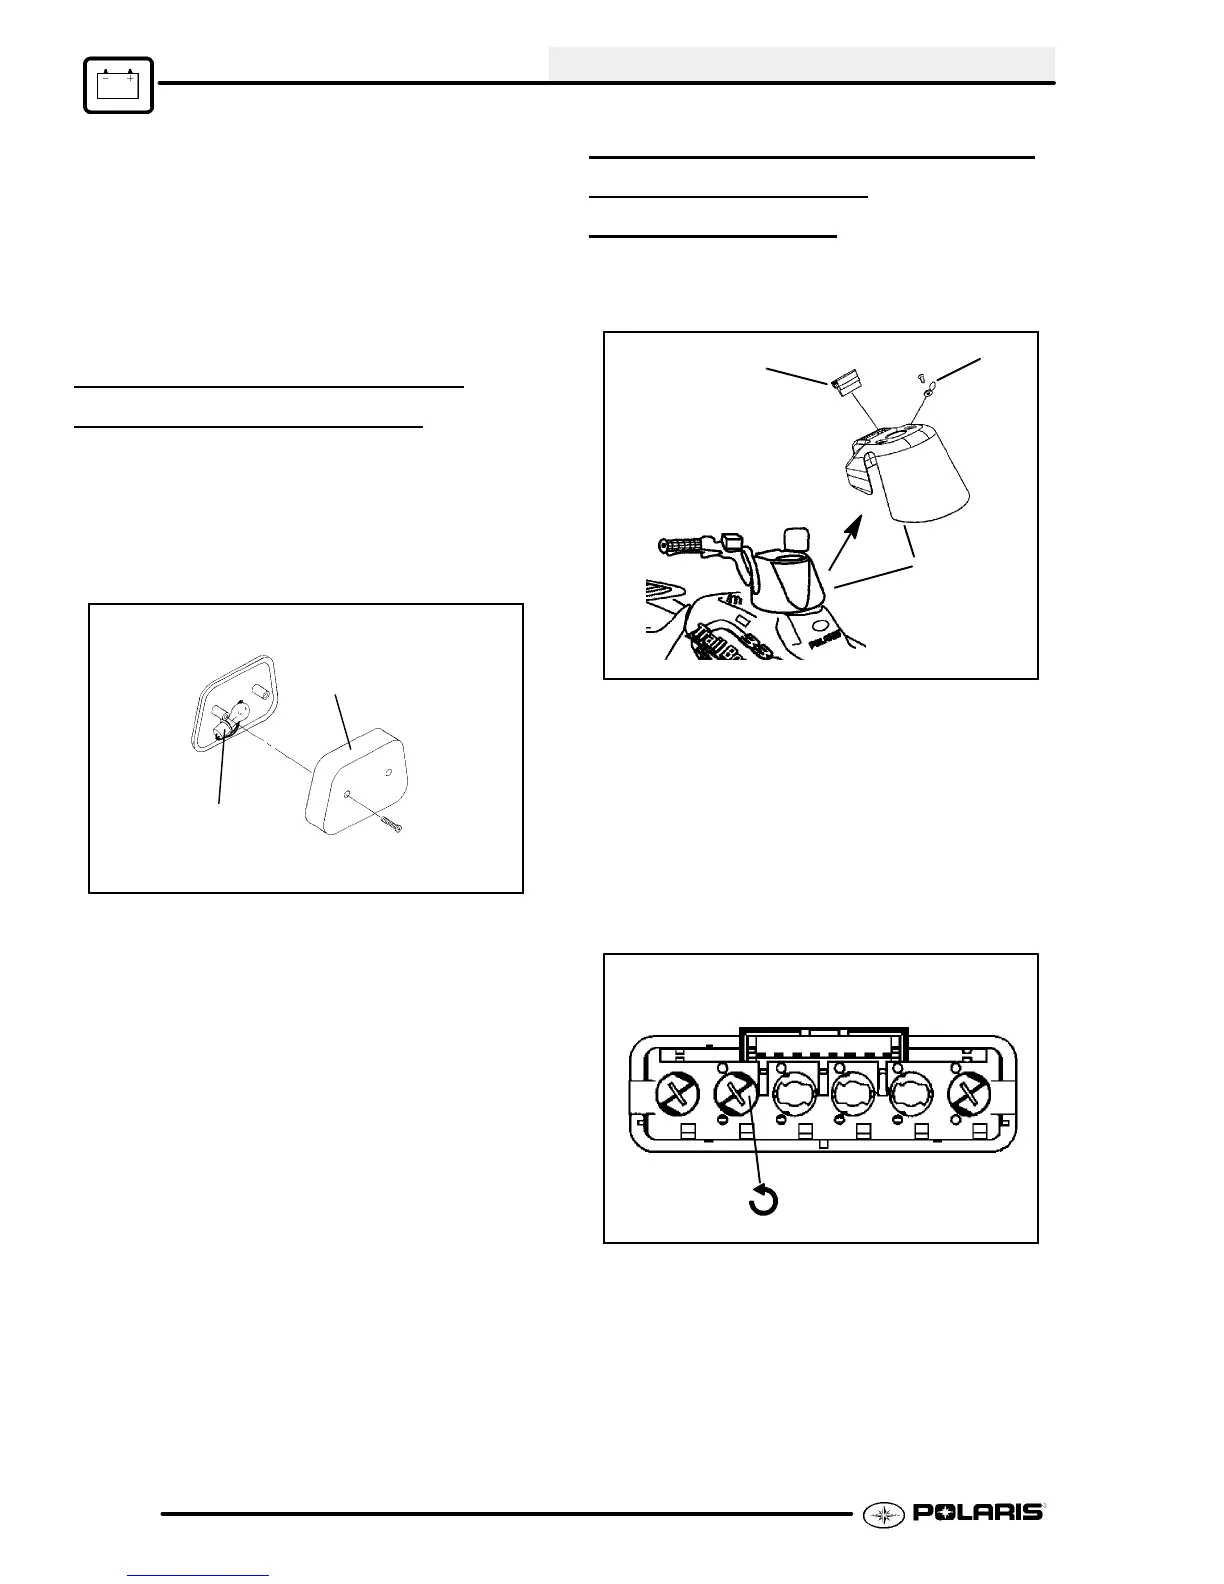
1. From the rear of the taillight remove two screws
holding lens cover in place and remove lens
cover.
Lens Cover
Bulb
2. Remove lamp and replace it with recommended
lamp. Apply Dielectric Grease (PN 2871329).
3. Reinstall the lens cover removed in Step 1.
4. Test the taillight/brakelight to see that it’s working.
POD ASSEMBLY REMOVAL /
INDICATOR
LAMP
REPLACEMENT
1. Remove the two screw covers (A) and screws
from the pod assembly (B).
A
B
C
2. Disconnect indicator light panel from harness, by
lifting the retaining latch from the wire connector.
NOTE: The indicator panel (C) does not have to be
remove from the pod to replace an indicator light.
3. To remove defective light: Use a small
screwdriver and turn light holder a quarter turn,
pull light holder out with a needle nose pliers or
equivalent. Replace with new holder and bulb
assembly and reassemble pod.
Rear view of indicator lamp panel
1/4 Turn
4. Reverse the above steps for installation.
 Loading...