BRAKES
9.11
5. Install the adjuster screw and turn clockwise until
stationary pad contacts disc, then back off 1/2
turn (counterclockwise).
6. Verify fluid level in reservoir is up to MAX line
inside reservoir and install reservoir cap.
Master Cylinder Fluid
Up to MAX line inside reservoir
7. Install wheels and torque wheel nuts.
Front Wheel Nut Torque
20 ft. lbs. (27 Nm)
BRAKE BURNISHING
PROCEDURE
It is required that a burnishing procedure be
performed after installation of new brake pads to
extend service life and reduce noise.
Start machine and slowly increase speed to 30 mph.
Gradually apply brakes to stop machine. Allow pads
and disc to cool sufficiently during the procedure. Do
not allow pads or disc to become hot or warpage may
result. Repeat this procedure 10 times.
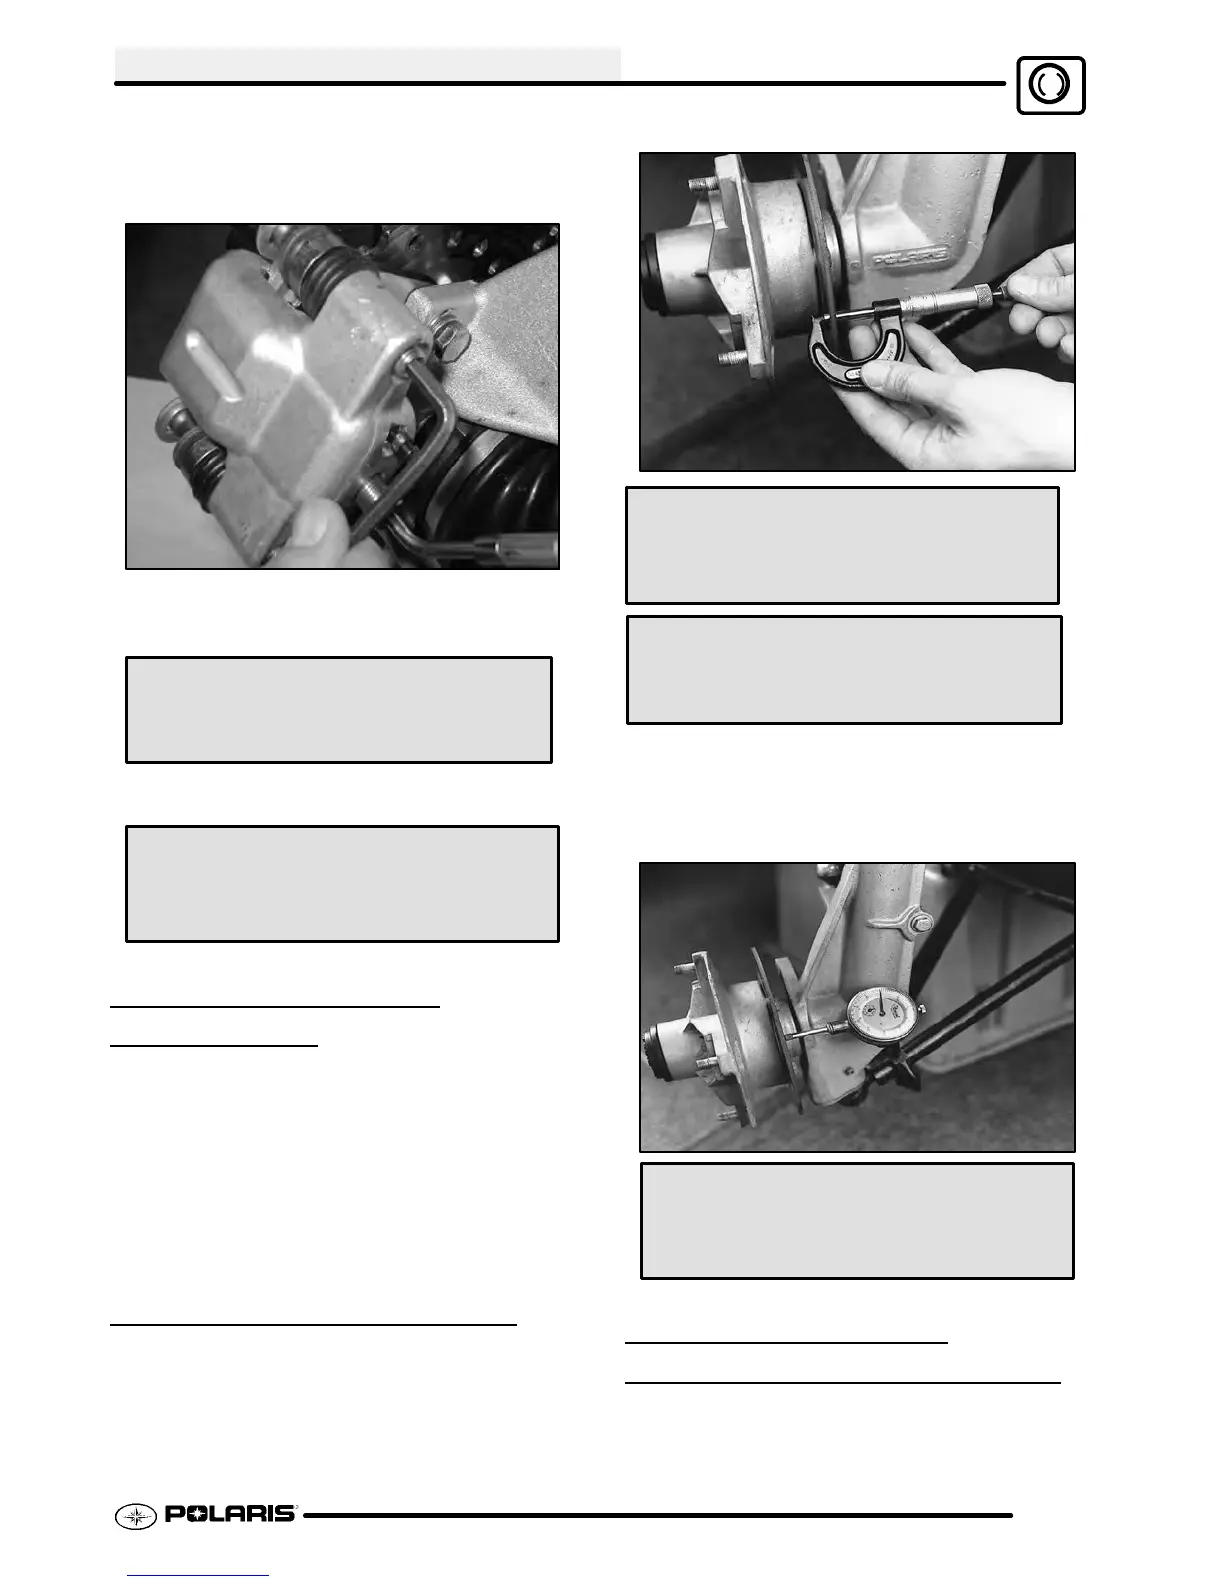
FRONT DISC INSPECTION
1. Visually inspect the brake disc for nicks,
scratches, or damage.
2. Measure the disc thickness at eight different
points around the pad contact surface using a
0-1² micrometer. Replace disc if worn beyond
service limit.
Brake Disc Thickness
Service Limit .140² / 3.556 mm
New .150--.165² (3.81 --4.19 mm)
Brake Disc Thickness Variance
Service Limit: .002² (.051 mm)
difference between measurements.
3. Mount dial indicator as shown to measure disc
runout. Slowly rotate the disc and read total
runout on the dial indicator. Replace the disc if
runout exceeds specifications.
Brake Disc Runout
Service Limit .010² (.50 mm)
FRONT BRAKE DISC
REMOVAL /
REPLACEMENT
NOTE: To reduce the possibility of warpage, try
removing the brake disc mounting bolts before
applying heat to the bolts.
 Loading...