ELECTRICAL
10.17
NOTE: Stored batteries lose their charge at the rate
of 1% per day. They should be recharged to a full
charge every 30 to 60 days during a non-use period.
If the battery is stored during the winter months the
electrolyte will freeze at a higher temperature as the
battery discharges. The chart at below indicates
freezing points by specific gravity.
Electrolyte Freezing Points
Specific Gravity
of Electrolyte
Freezing
Point
1.265 -75° F
1.225 -35° F
1.200 -17° F
1.150 +5° F
1.100 +18° F
1.050 +27° F
1. Install battery in vehicle with positive terminal
toward the front. Coat threads of battery bolt with
a corrosion resistant dielectric grease.
Dielectric Grease
(PN 2871329)
WARNING: To avoid the possibility of explosion,
connect positive (red) cable first and negative (black)
cable last.
2. Connect battery cables.
3. After connecting the battery cables, install the cover
on the battery and attach the hold down strap.
4. (Conventional Lead--acid batteries only) Install
clear battery vent tube from vehicle to battery vent.
W ARNING: V ent tube must be free from
obstructions and kinks and securely installed. If not,
battery gases could accumulate and cause an
explosion. Vent should be routed away from frame
and body to prevent contact with electrolyte. Avoid
skin contact with battery electrolyte, severe burns
could result. If electrolyte contacts the vehicle
frame, corrosion will occur .
5. Route cables so they are tucked away in front and
behind battery.
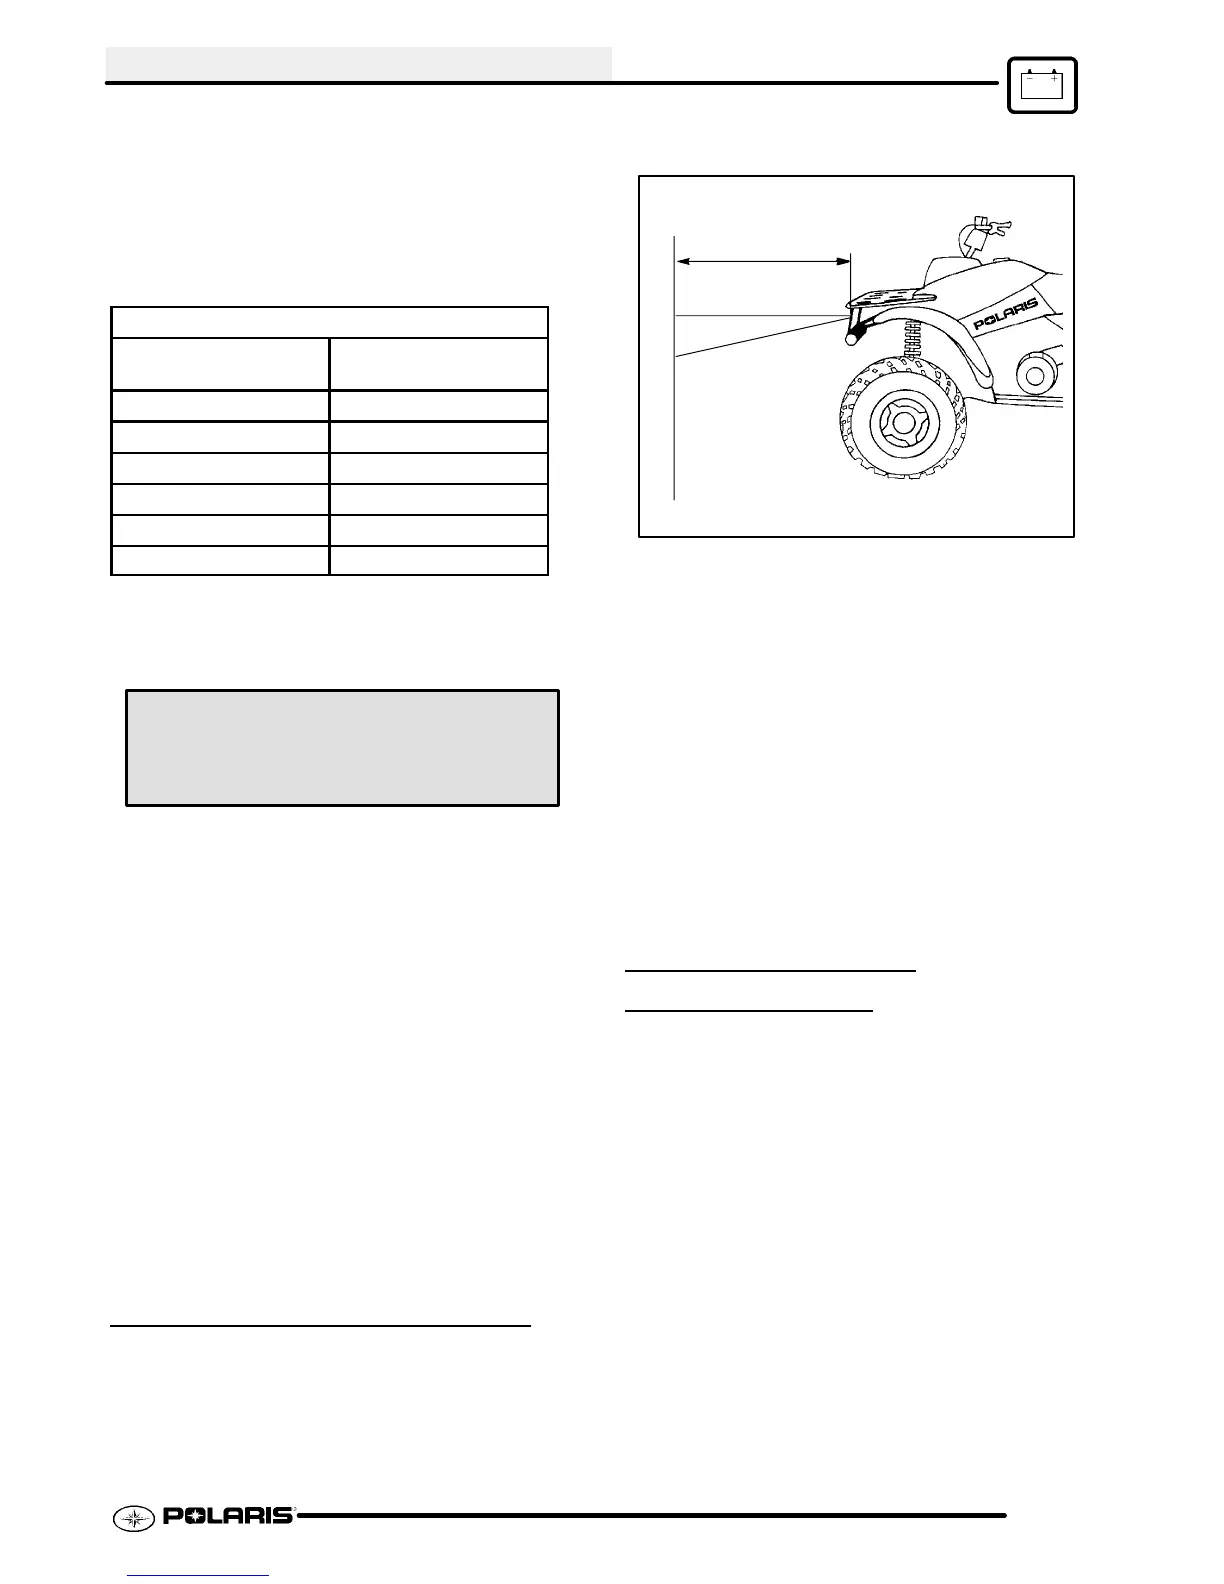
HEADLIGHT ADJUSTMENT
The headlight beam can be adjusted up and down and
side to side.
1. Place the vehicle on a level surface with the
headlight approximately 25’ (7.6 m) from a wall.
25’ (7.6 m)
Lamp Center Height
2² (5.1 cm)
2. Measure the distance from the floor to the center
of the headlight and make a mark on the wall at
the same height.
3. Shift transmission to neutral, start the engine and
turn the headlight switch to high beam.
4. Observe headlight aim. The most intense part of
the headlight beam should be aimed 2² (5.1 cm)
below the mark placed on the wall in Step 2.
NOTE: Rider weight must be included on the
seat. For machines with separate low beam
lights, the drop should be 8² (20.3 cm) in 25’.
5. Adjust beam to desired position by moving
headlight.
HEADLIGHT LAMP
REPLACEMENT
NOTE: Allow lamp to cool before proceeding. Do not
touch a halogen lamp with bare fingers. Oil from your
skin leaves a residue, causing a hot spot which will
shorten the life of the lamp. Hold the bulb by the base
only.
Headlight Assembly Removal
1. Carefully unsnap the electrical harness from the
back of the headlight assembly and remove the
harness.
2. Remove the screws and nuts from the sides of the
headlight assembly.
3. Remove the headlight assembly.
 Loading...